
Hi Everyone! It’s Megan from The Homes I Have Made, popping in today to share a quick and easy project for decorating your Thanksgiving tablescape!
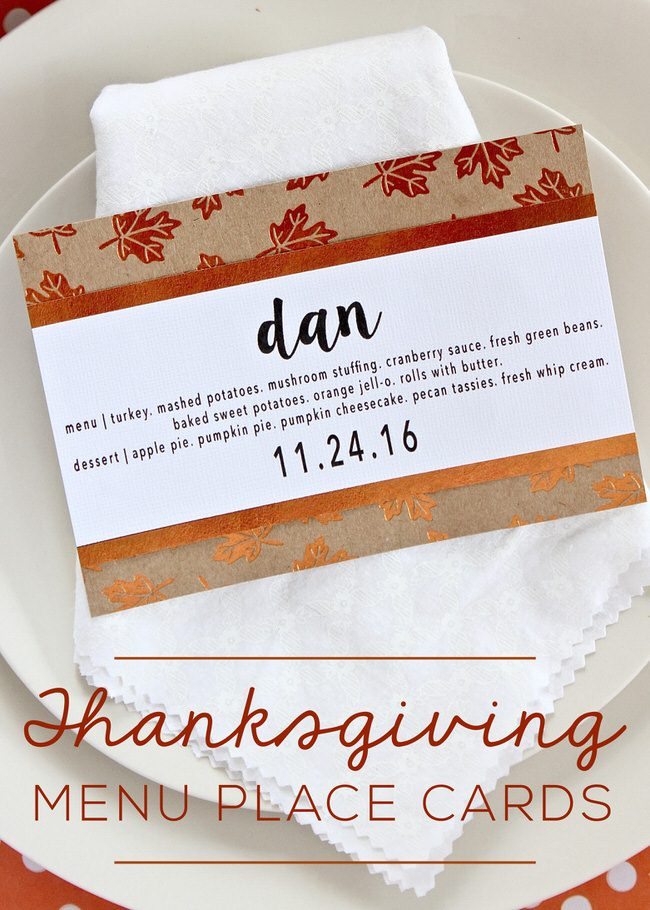
With Halloween over, it’s time to (quickly!) shift gears to Thanksgiving! And if you’re anything like me, my To-Do List is quickly filling up with recipes to finalize, guests to invite, and table decor to make! Between table linens and centerpieces, place settings and more, it can be a bit overwhelming (not to mention, expensive!) to outfit a Thanksgiving table to the hilt…but it doesn’t have to! With just a handful of pretty papers, you can quickly and easily make some show-stopping menu cards that double as place cards.
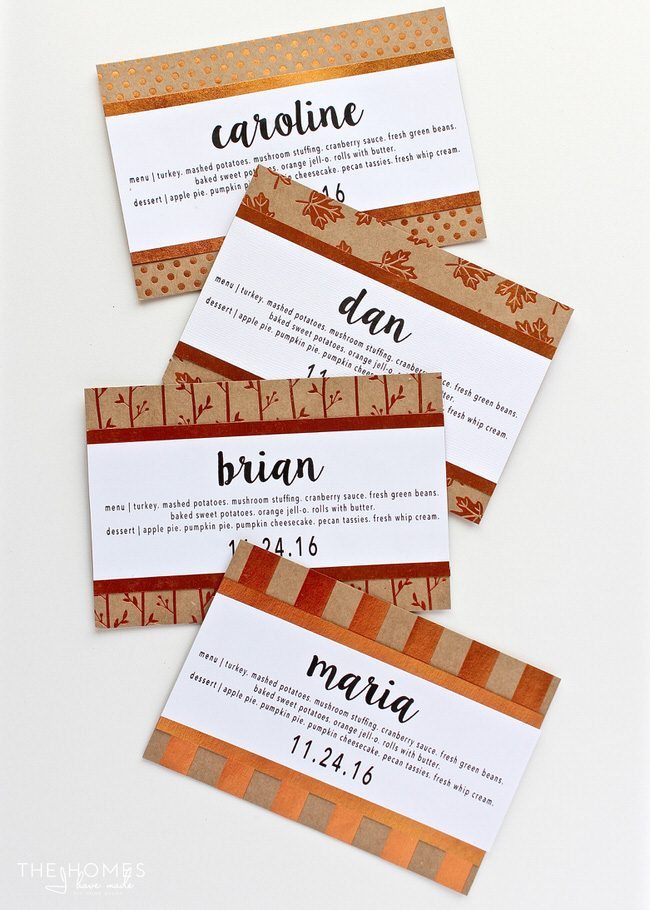
These Thanksgiving Menu Place Cards come together so easily, you can even leave them until the very last minute. However, easy doesn’t have to mean sloppy! Make these out of some metallic Fall-inspired paper, and you’ll have the perfect accessory to dress up any tablescape!
Here’s what you need for this project:
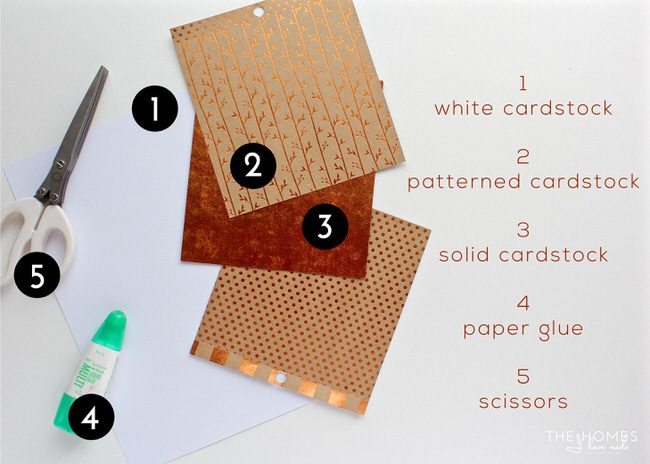
- White 8.5×11” cardstock
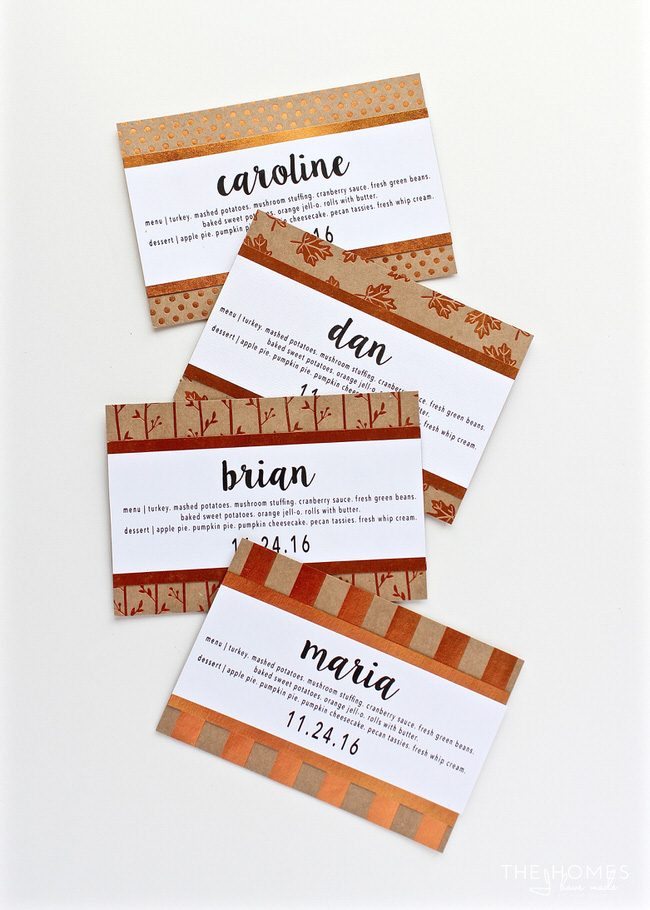
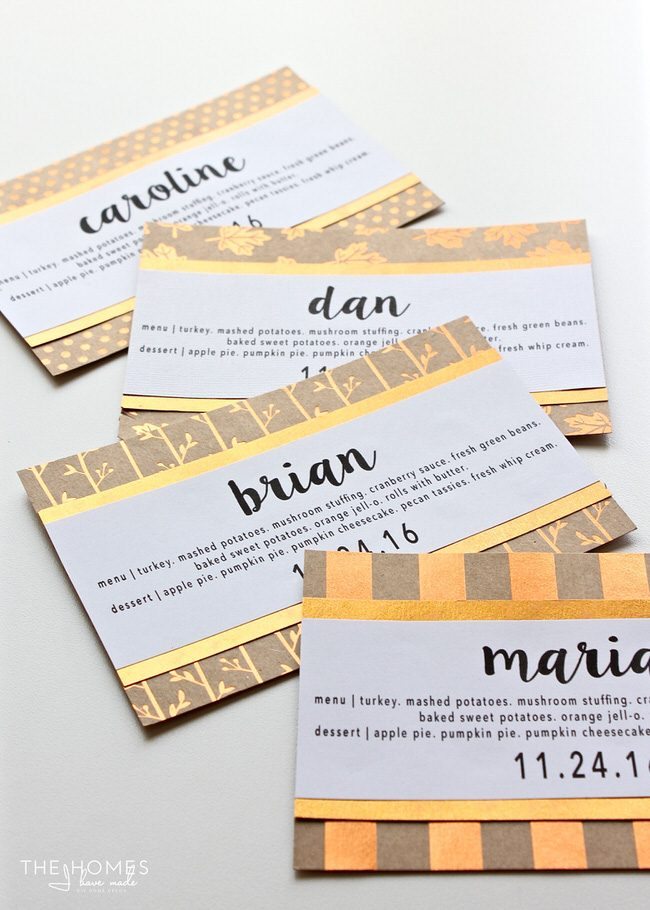
- Sheets of assorted Fall-themed cardstock, at least 6” wide, mix and match to add variety and whimsy to your table! (Note – these papers are from the Target Dollar Spot)
- Solid coordinating cardstock, at least 6” wide
- Paper adhesive or glue
- Scissors or paper trimmer
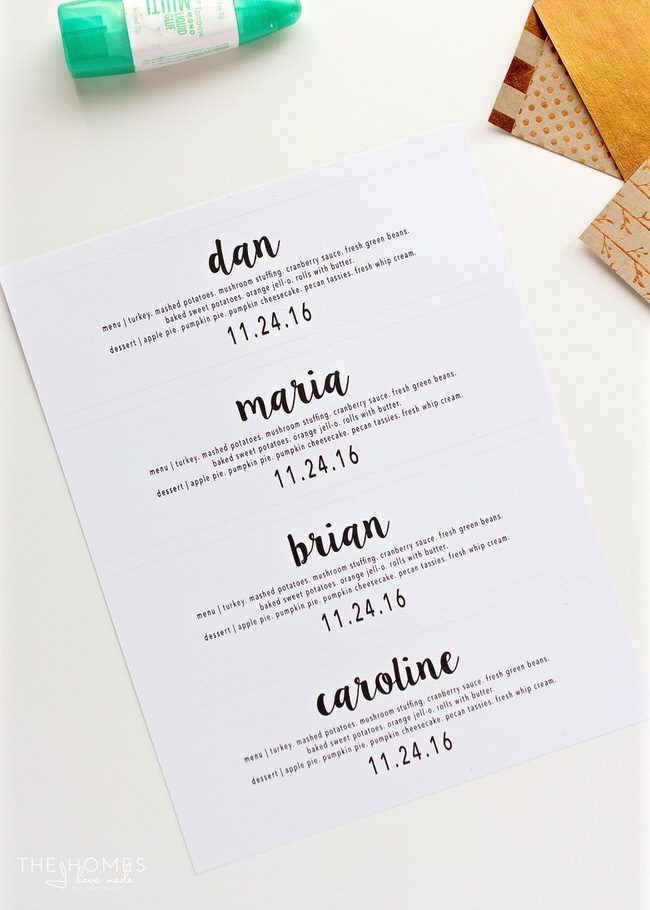
Start by typing up your menu and guests in whatever word processing program you prefer. Make a table of boxes that are at least 6” wide and 2.25” tall, and then use a variety of fonts to create a menu design that matches your table aesthetic. The fonts used here are LilyBelle and Avenir Next.
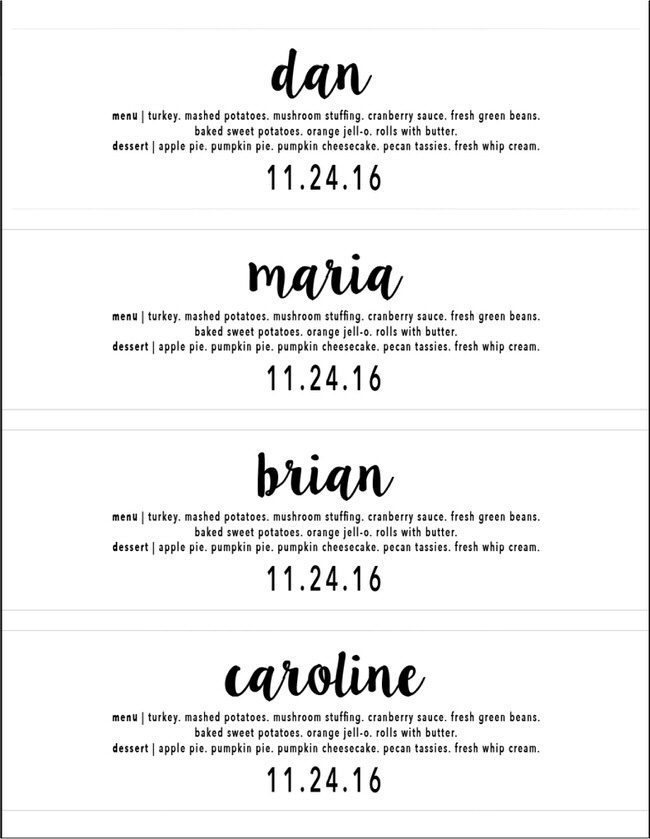
Once your menu and names are finalized, print out as many as you need onto the white cardstock. (TIP! To really get a nice, clean, professional quality print, consider printing onto photo paper!)
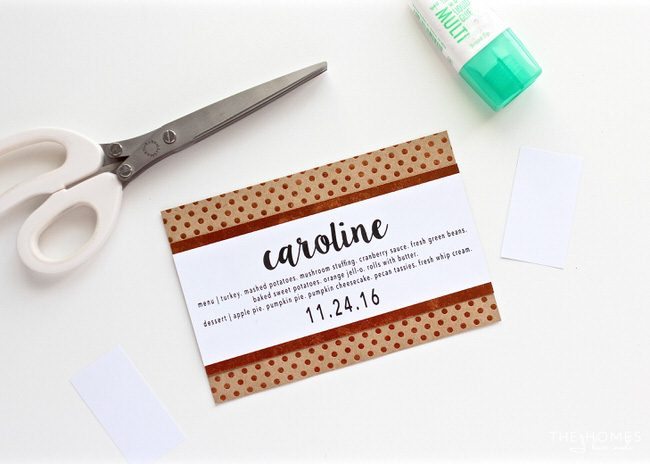
Next, use a scissors or paper trimmer to cut down the various papers into the following sizes:
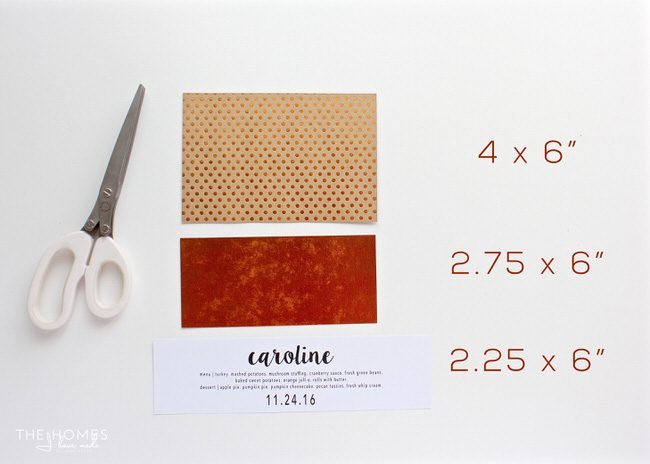
Cut the background paper down to 4 x 6”; trim the solid color band down to 2.75 x 6”; and trim the printed menu text into 2.25” strips. You can certainly adjust these measurements to match your style and preference!
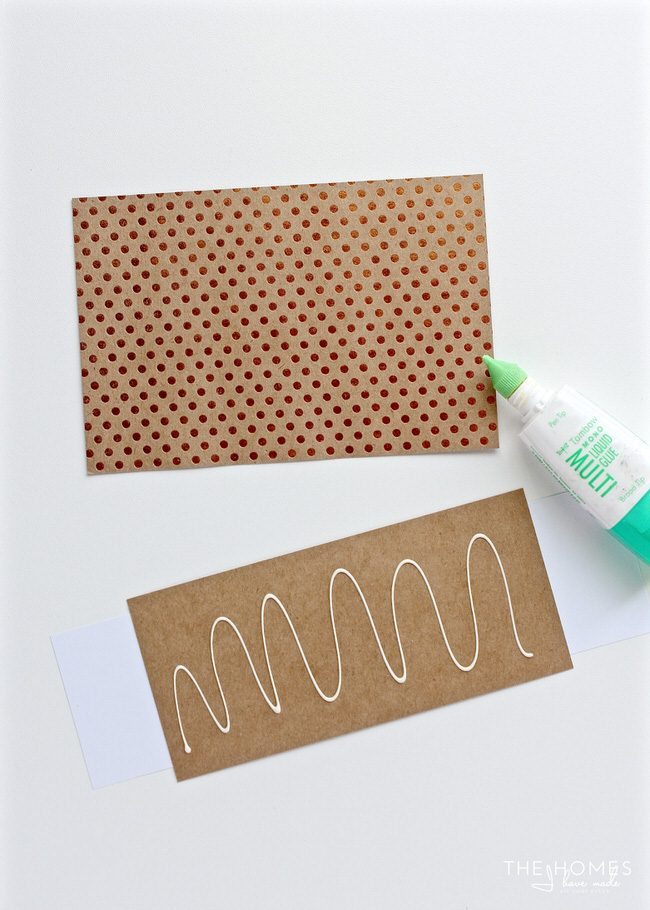
The last step is to use paper adhesive/glue to secure all the pieces together. Center the white wording strip onto the solid color band; then center the solid color band onto the background paper.
If necessary, use a scissors/paper cutter to trim down the sides to make them perfectly even and square.
Repeat the process for all your guests!
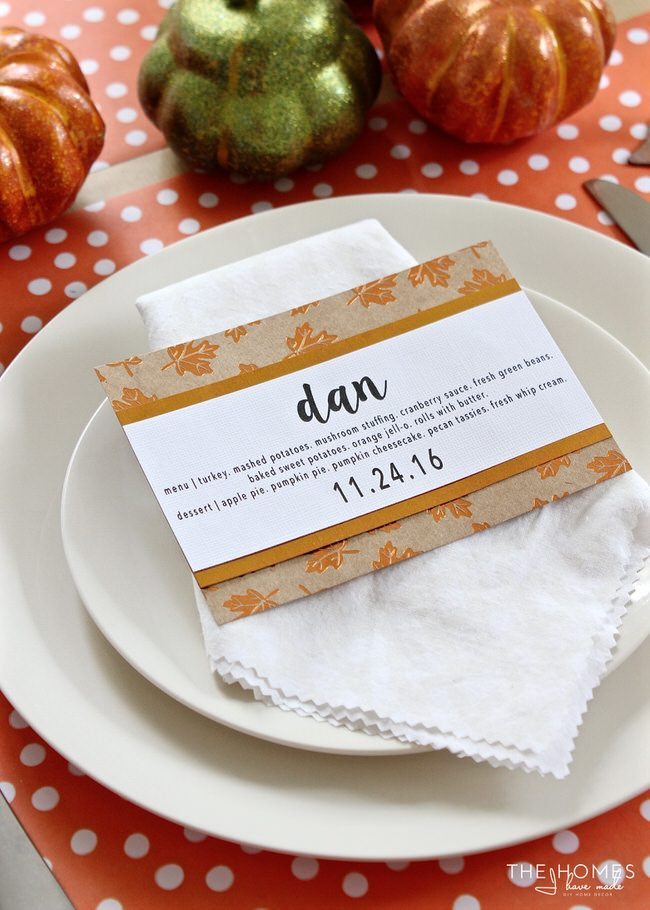
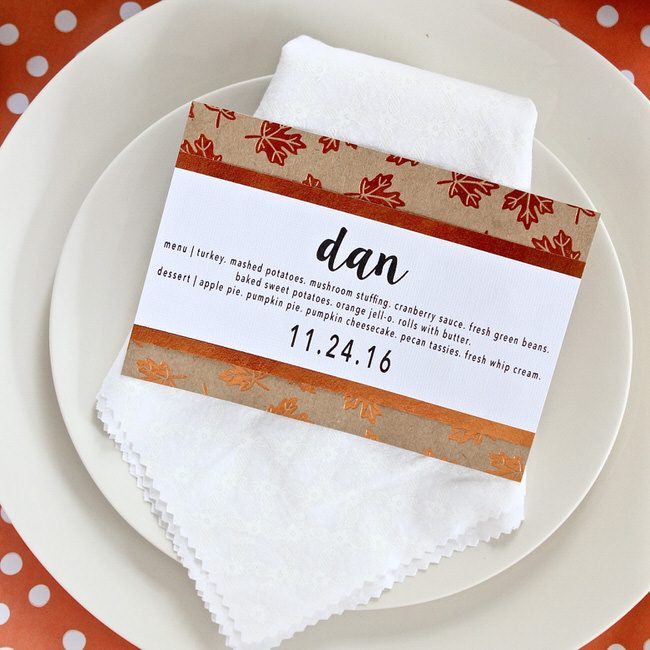
When you set your Thanksgiving table, simply place each menu card on top of a folded napkin. If you used a variety of papers, try to display them evenly around the table(s).
These Thanksgiving Menu Place Cards are a simple and inexpensive little project that can go a long way in making your table a little more special and festive! If displaying a menu isn’t your preference, you can also use this same technique to make thankful cards, table trivia, or conversation starters! Your imagination combined with some pretty papers will certainly make a Thanksgiving table to remember!
I hope you all have a fantastic November and Thanksgiving! Be sure to come on over to The Homes I Have Made and say hi! And if you’re looking for even more Thanksgiving table inspiration, check out my ideas here!

