
October is officially here, which means if you haven’t begun to decorate your house for Halloween, it’s time to jump on it! Between a cross-country move this summer, moving into a new home, and planning to welcome a baby into our family at the end of the year, October really snuck up on me, and I’m feeling a bit behind on my black-and-orange decorating game. If you’re in the same boat, read on to see how quickly and easily you can bring some spooky cheer to your home. All three of these Halloween wreaths can be made in just 15 minutes or less and come together using easy-to-find, off-the-shelf supplies! Let me show you how!
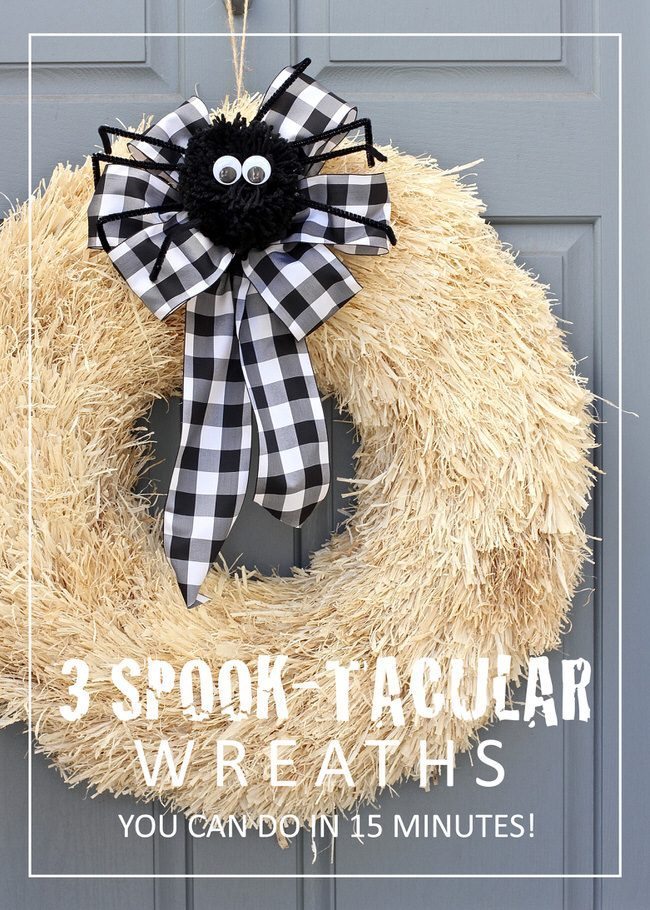
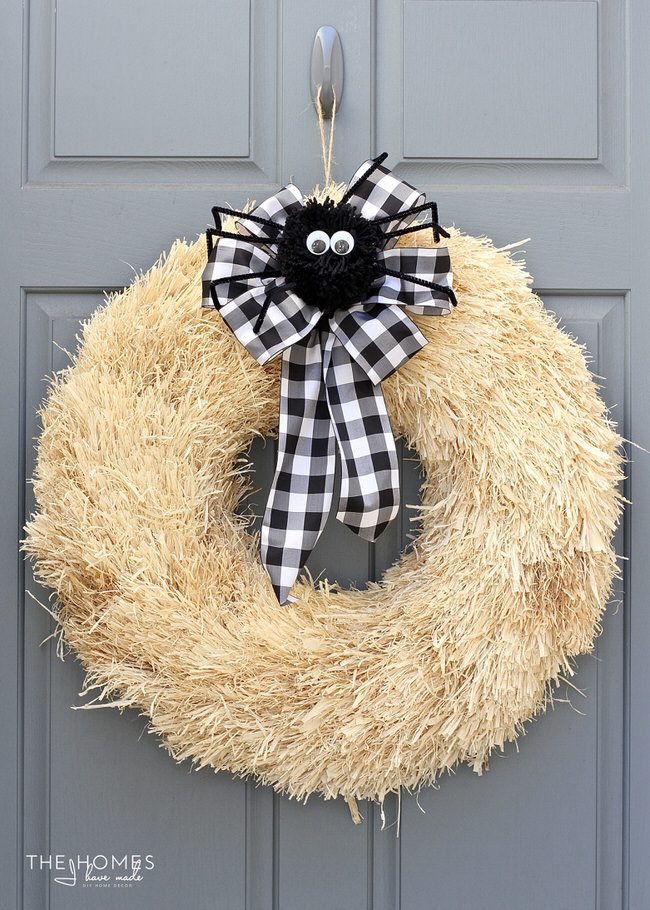
All three of these wreath projects come together in a jiffy thanks to a pre-made wreath and off-the-shelf Halloween decorations and supplies from my local craft store. I suggest starting with a basic, neutral Fall-themed wreath as your base. It doesn’t have to be anything fancy…just think straw, pinecones, branches, etc without any other decorations. This basic straw wreath is from HomeGoods and is a great staple in our decor stash since it can be on our door from September through Thanksgiving. By simply adding a few seasonal items to the wreath, it transitions easily from one holiday to the next (reducing the amount of decor items I need to keep on hand!)
Simple Spider Wreath
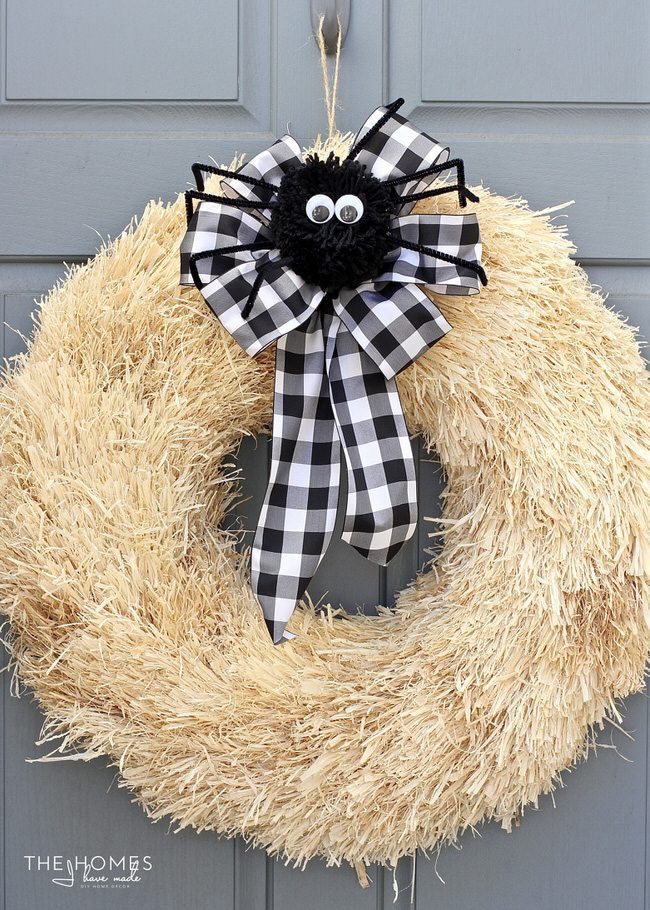
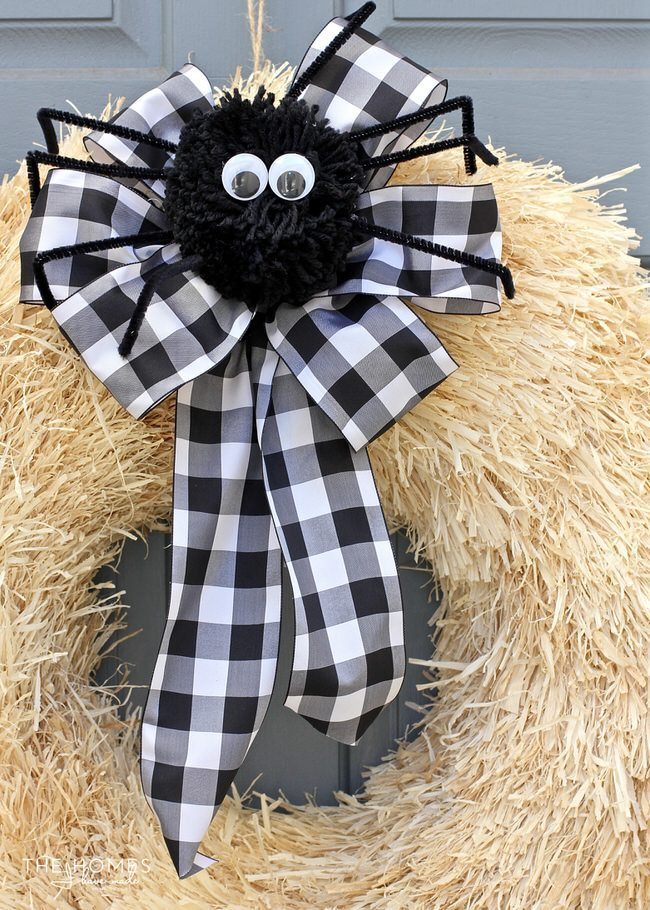
This adorable spider wreath it perfect when you want just a little bit of Halloween decor on your door. It’s neutral and festive, yet more cute than scary, making it perfect for little ones. The only addition to the basic wreath is a spider bow, which is quick and super easy to make!
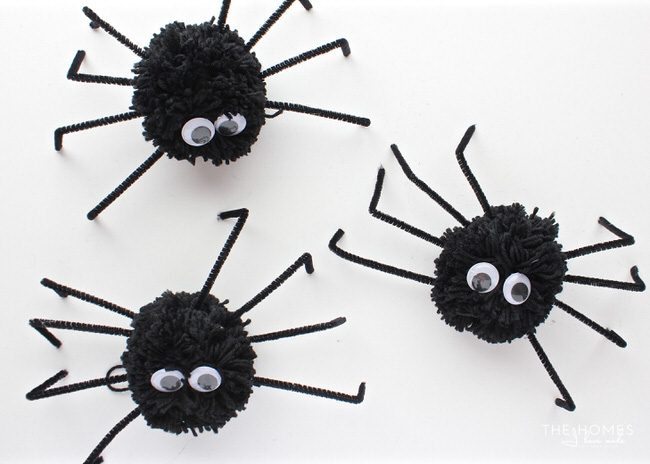
Start by making the pom-pom spider. Here is what you need for one spider:
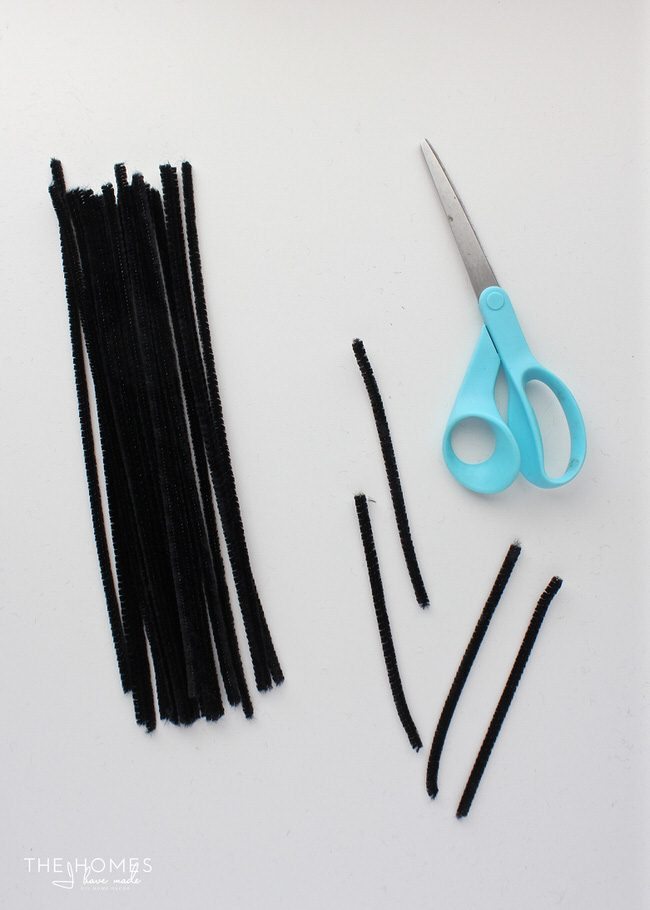
- Four (4) black pipe cleaners
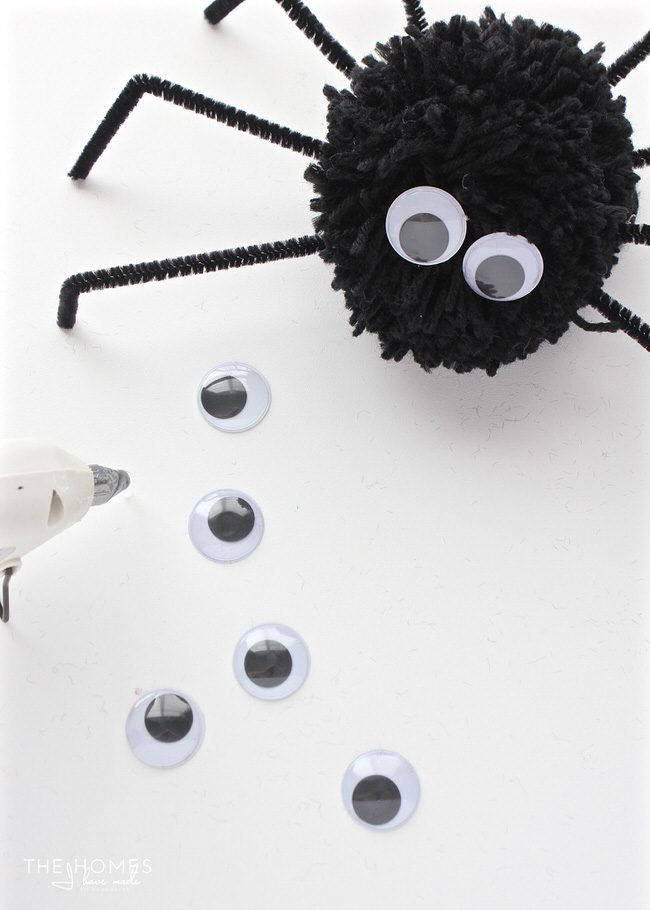
- Two (2) large goggly eyes
- Hot glue gun and glue stick
- One (1) large black pom-pom
Tools – scissors
You can certainly make a yarn pom-pom yourself (with just a scissors and some yarn); but thanks to these large pre-made ones from Michaels (look in the dollar section), these spiders come together even easier!
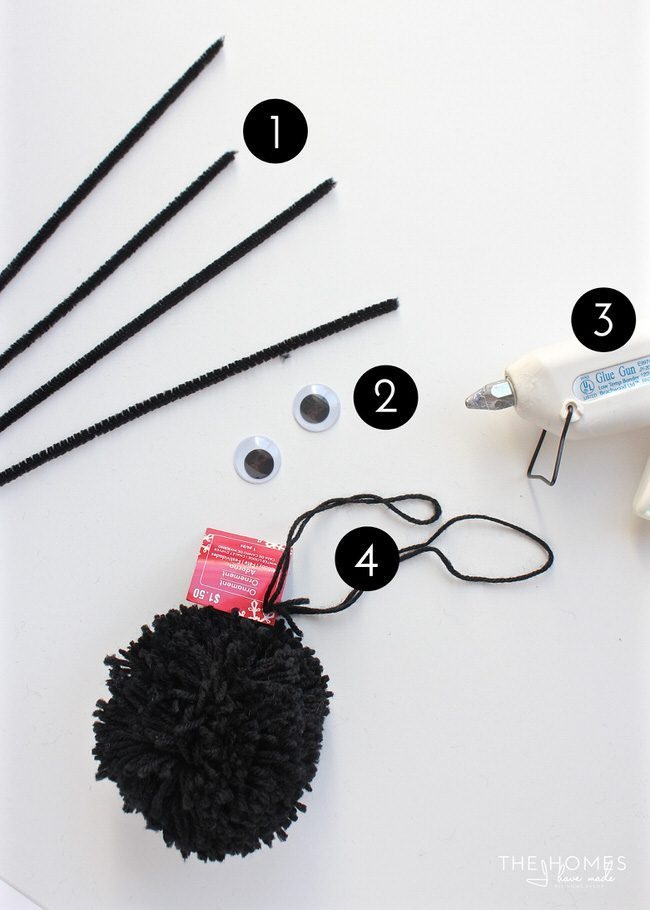
Start by trimming the four black pipe cleaners in half with a scissors to make eight legs.
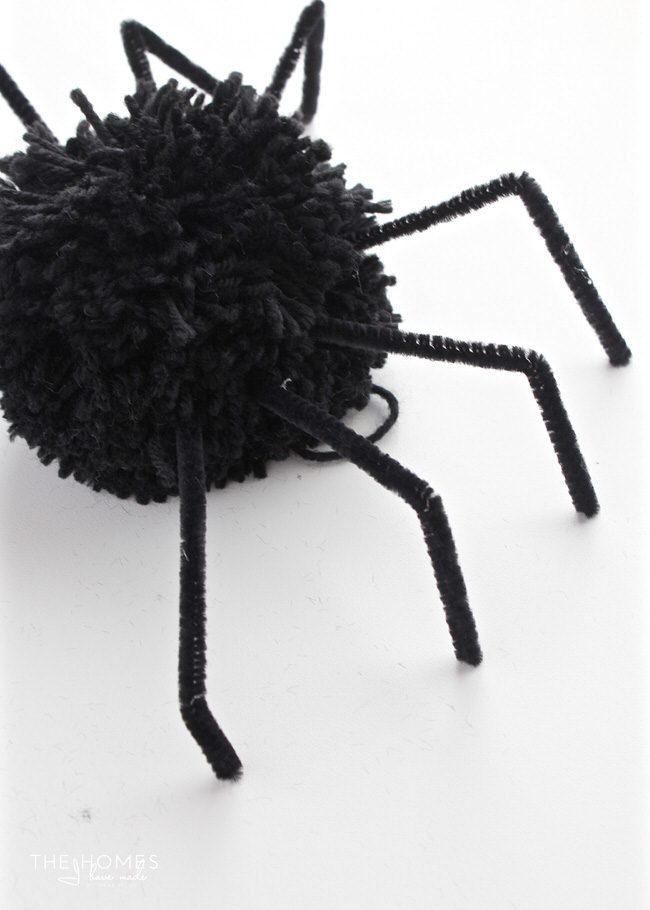
Place a dollop of hot glue on one end of each pipe cleaner and stick it right into the center of the pom-pom. Be sure to space them so that four are on one side, and four are on the other.
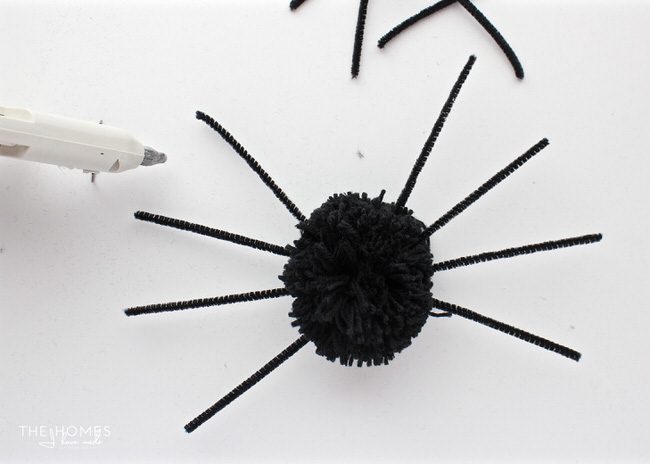
Then bend each leg at a 90 degree angle, making the legs shorter in the front and taller in the back.
Lastly, use some more hot glue to attach the eyes to the front/top of the pom-pom.
Although this specific wreath only requires one cute spider, I recommend making a few while you are at it. Our family is having quite a bit of fun leaving the others around the house as spooky surprises! Each day, they are somewhere new!
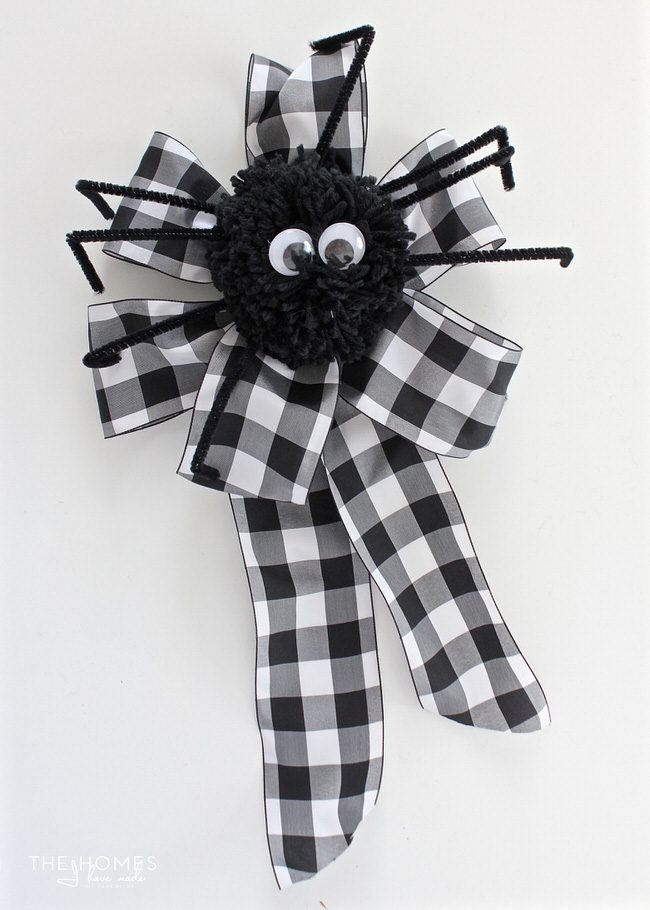
With the spider made, you will need some wide ribbon (preferably the wired kind) and some more pipe cleaners to make the bow.
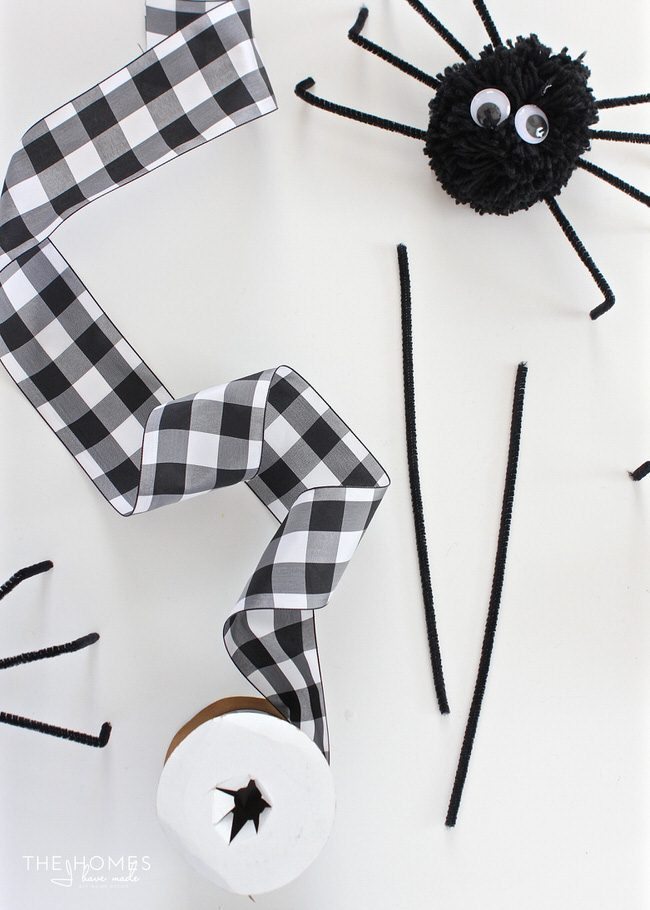
Start by folding and twisting the ribbon into a large bow and secure the middle with a pipe cleaner. If you need help making a bow, here is a great tutorial!
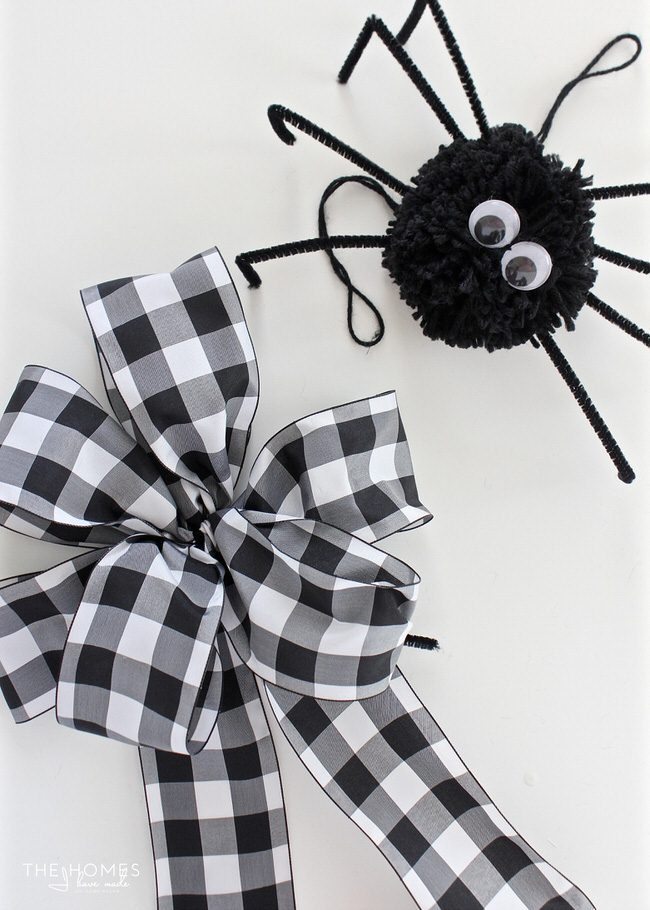
These pom-poms came with two extra-long loops. If yours’ didn’t or you made your own, you can use the other pipe cleaner for this step by inserting it through the center of the pom-pom and keep the ends free. Simply wrap the strings/pipe cleaner from the spider around the center of the bow, and twist the ends together in the back of the bow to secure the two together.
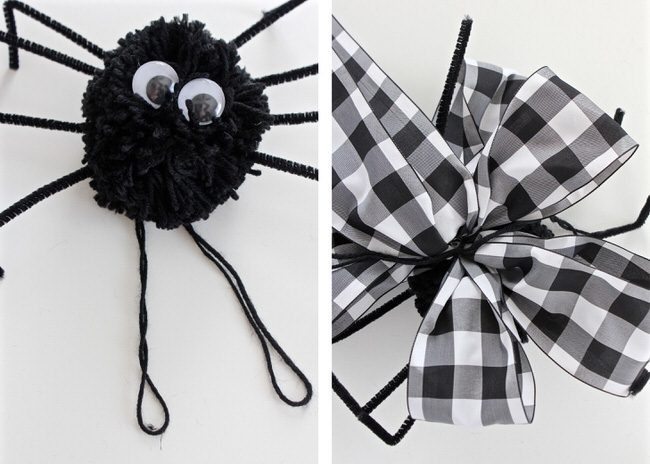
With the bow made, use some basic straight pins, floral pins, or floral wire to secure the bow to the wreath!
And just like that, our basic straw wreath is updated for Halloween!
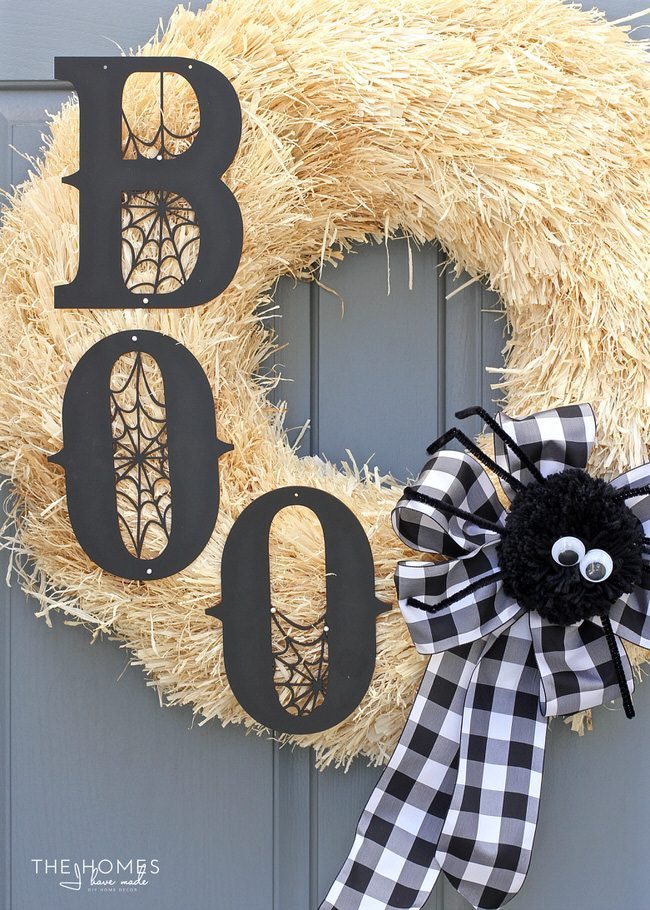
“Boo” Wreath
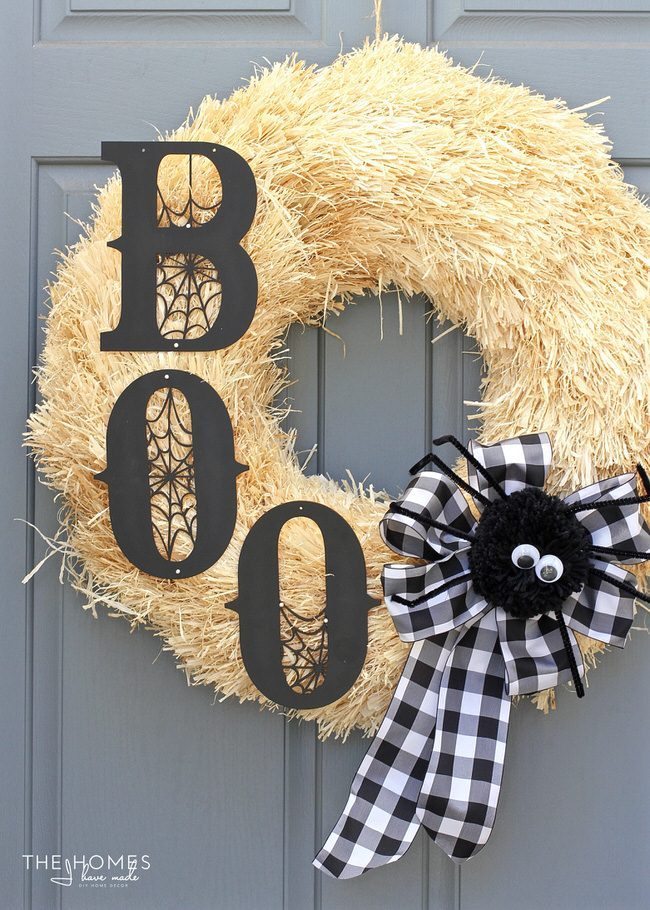
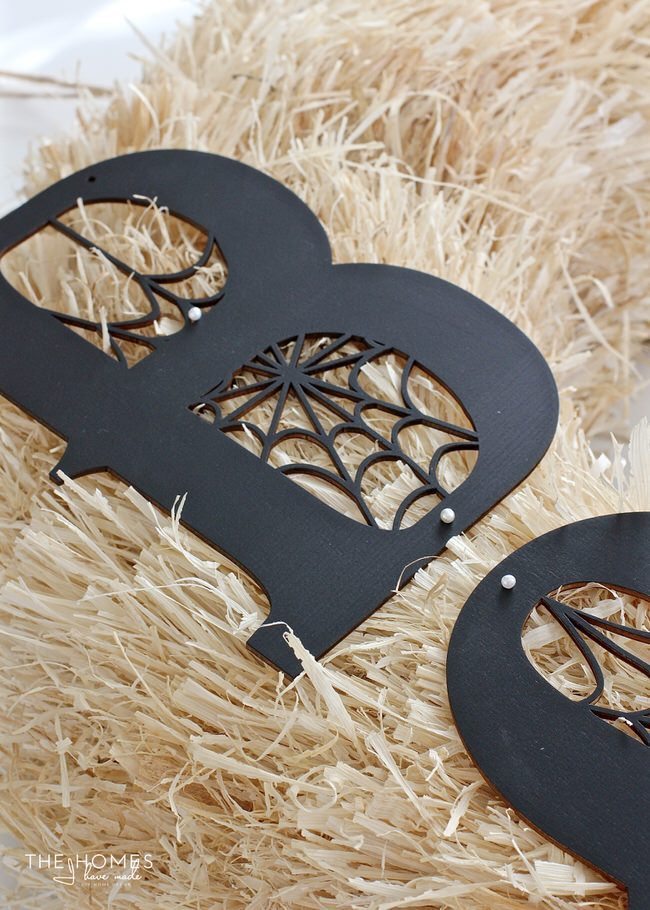
The “boo” wreath comes together almost as fast, but makes a bit more of a dramatic statement thanks to some big letters spelling out a frightful phrase. This time around, you will combine the spider bow that you learned to make above with some off-the-shelf letters. Just a quick crafting tip: when you’re out looking for supplies, don’t hesitate to get creative with what you find. These letters were part of a larger, vertical banner. I loved how the spider webs on the letters would look with my spiders, but the vertical arrangement was giving me trouble.
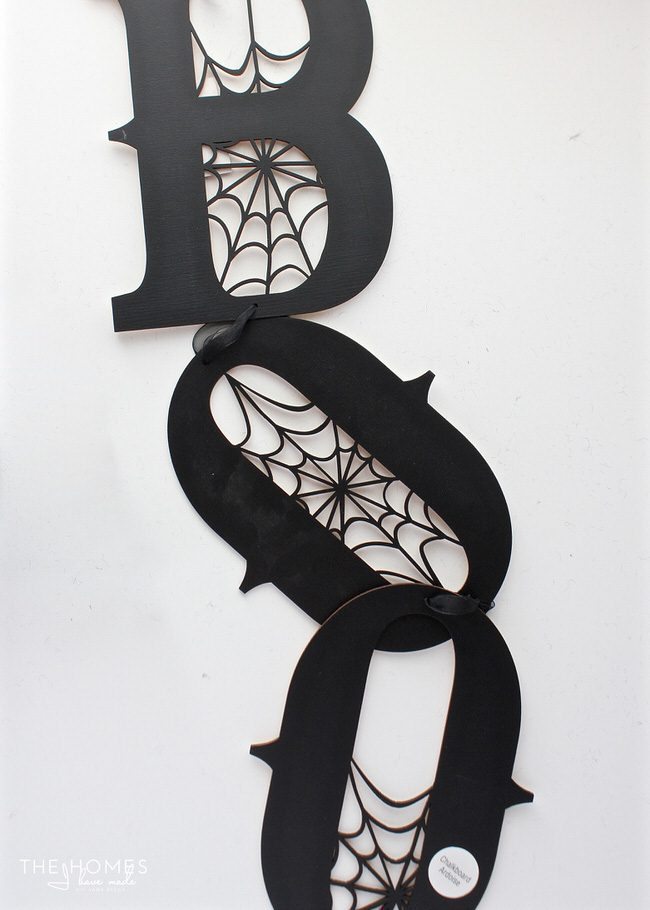
So…I just snipped off the ribbon and used the holes to attach the letters to my wreath instead!
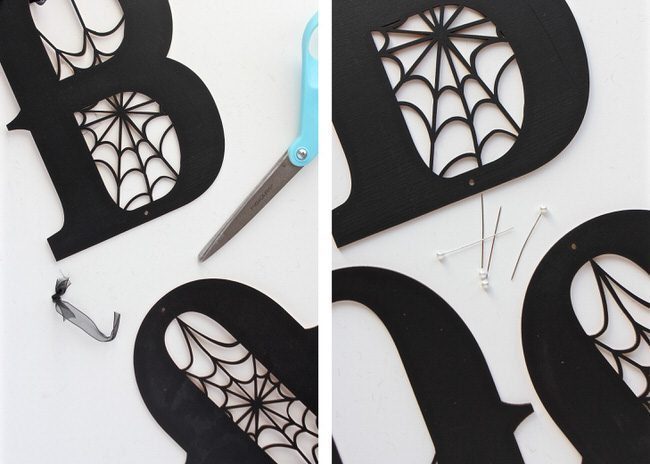
If you can’t find these exact letters (these are from Michaels), any can work. Simply play with the placement of the letters until you find an arrangement you like. Then use straight pins, floral pins, or floral wire to secure them right into the wreath.
Add the spider bow back on, and your wreath is ready for hanging!
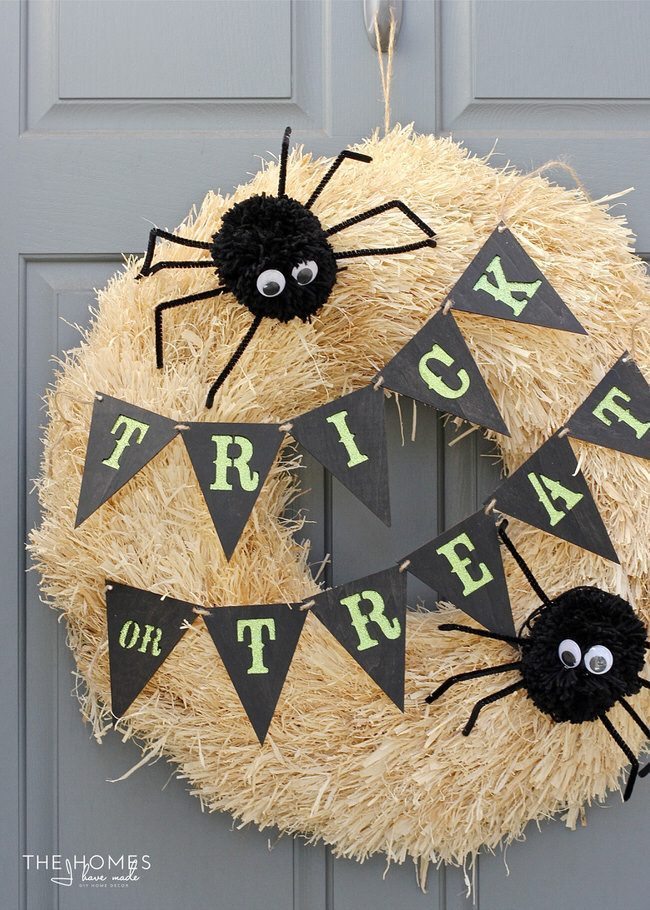
Trick-or-Treat Wreath
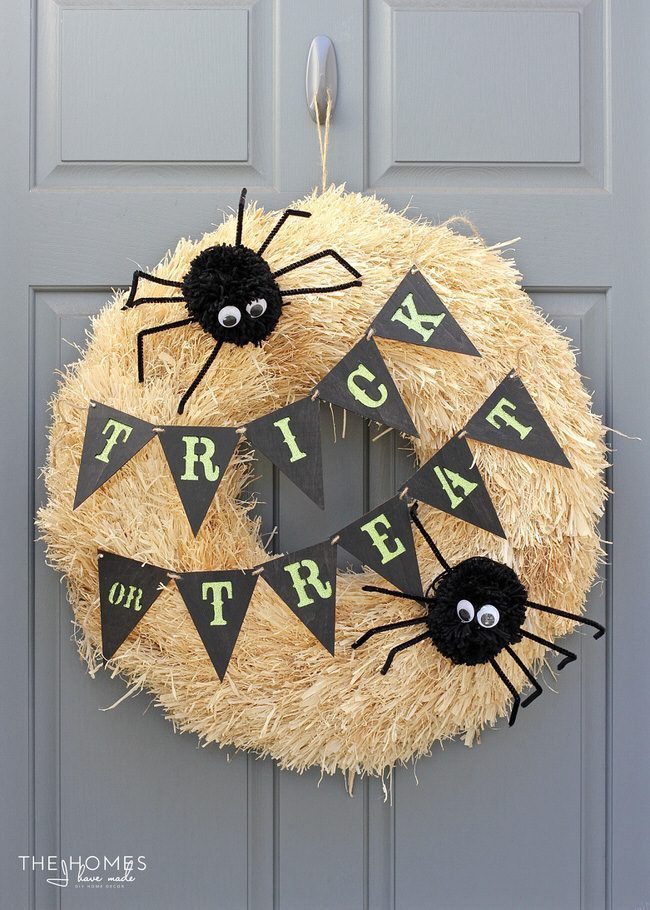
This Trick-or-Treat Wreath may look like it requires a little more work, but thanks to some more off-the-shelf supplies, it too can come together in a snap! For this wreath, you will need:
- Glittered cardstock in the color of your choice
- Wooden trick-or-treat banner (this one is from Michaels for just a few dollars)
- Foam paint brush
- Acrylic paint in the color of your choice
Tools: scissors, craft glue

Start by painting the die-cut banner with the acrylic paint and foam brush.

While the banner is drying, make two of the pom-pom spiders using the directions above. Next, trim down the glittered cardstock into small scraps that will cover the size of each letter on the banner.
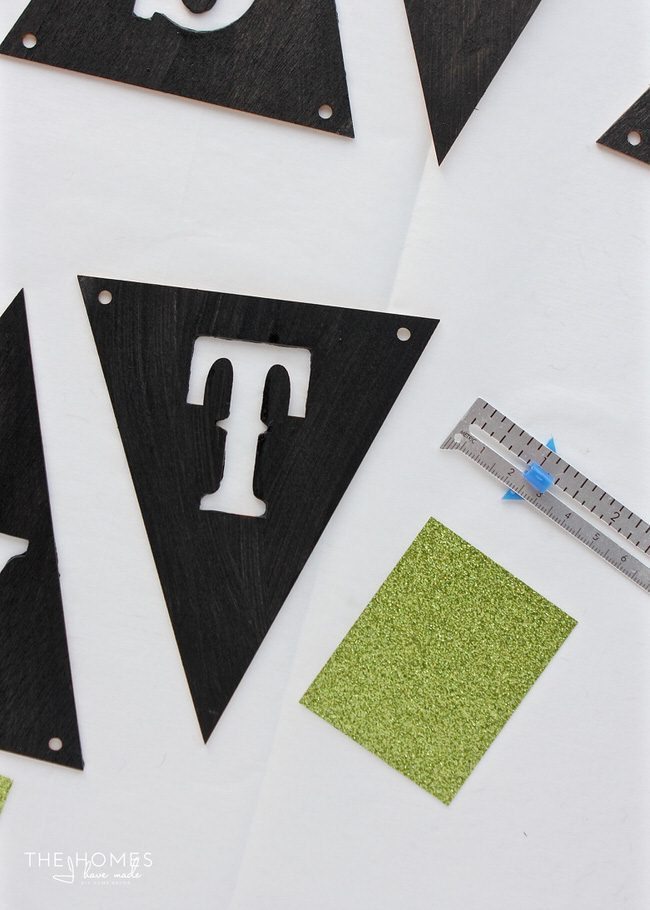
Once the banner is dry, use some craft glue to secure the glittered cardstock to the back of the banner. If your pennants are triangles like mine, you may need to trim down the edges so they don’t show from the front.
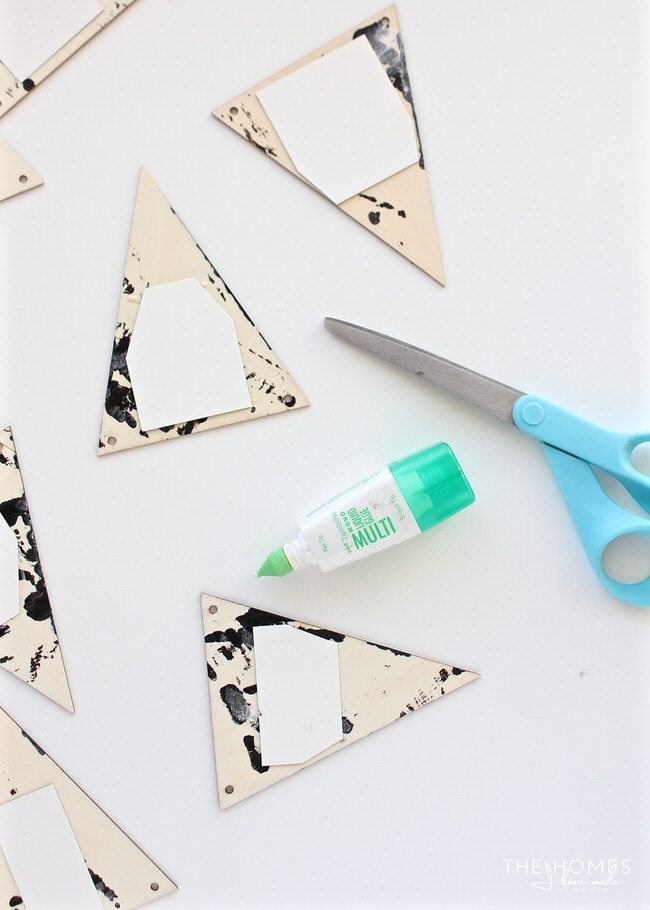
Next, use the included twine (or any ribbon or string you have on hand) to string the pennants together. For spacing purposes, I found it most helpful to string T-R-I-C-K together, and then -OR-T-R-E-A-T together onto a second string.
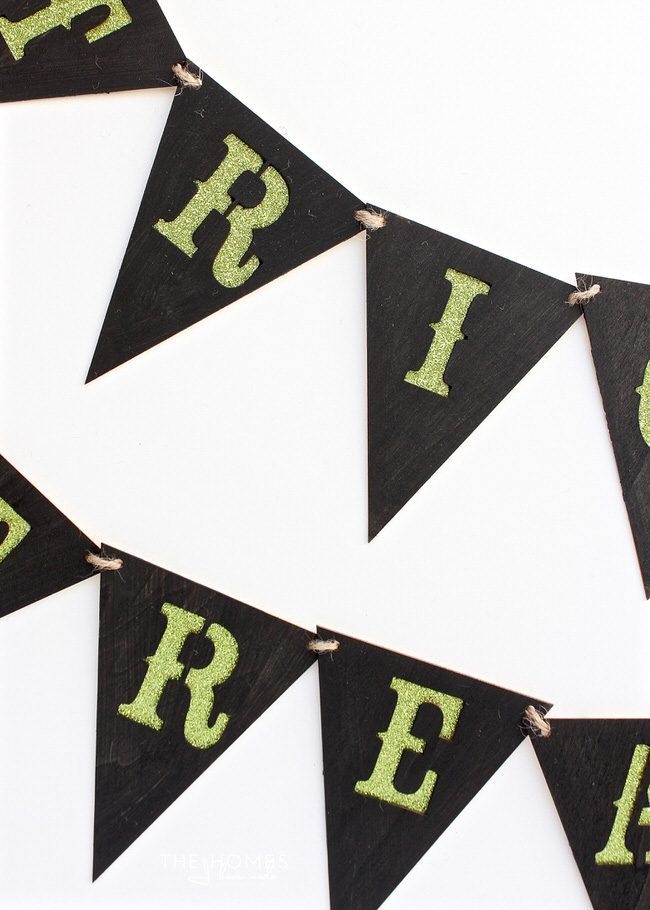
You may have to play around with the banners a bit to find a spacing solution that works for you. But once you do, use more straight pins, floral pins, or wire to attach the banners to the wreath.

Finally, use more straight pins or wire to attach some fuzzy spiders…
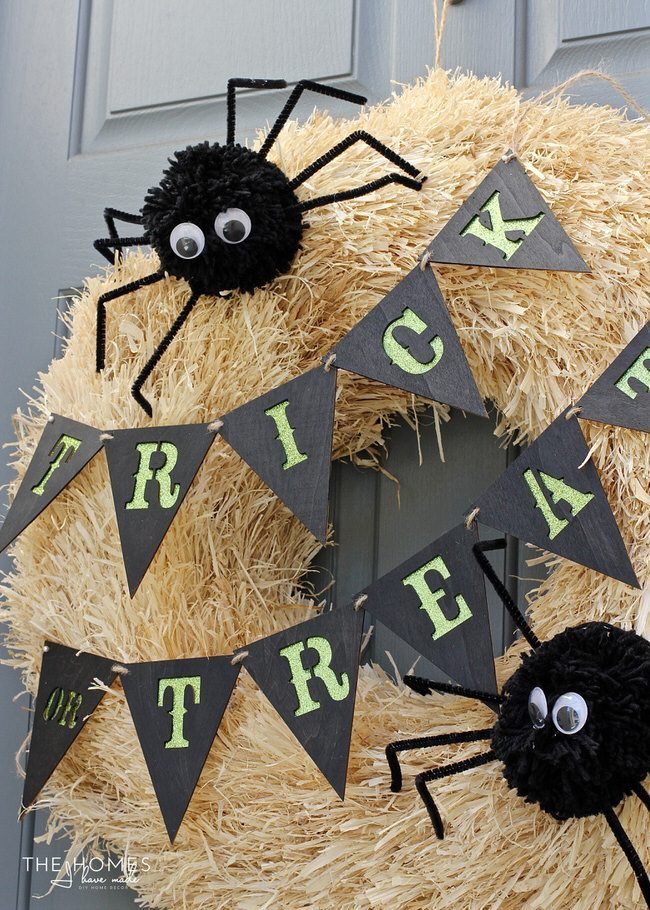
…and you’ll have a friendly wreath that sings the most common sentiment of the Halloween season!
Right now, stores are filled with fun and inexpensive decorations that can be used in a variety of ways to dress up a basic wreath for the upcoming Halloween holiday! From ribbons and banners to signs and other die-cut shapes…use the concepts I showed here to make an entirely different and unique wreath that matches your home and style. Using a basic wreath and these easy ideas, you’ll be decorated and ready for trick-or-treaters in no time! Happy Halloween!


Love these wreaths! I would pick a straw wreath for my home too, so we are definitely on the same page. I hope you will share your inspiration with us at The Crafty Corner link party this week. :)