
Here’s a quilt that is as simple as sewing a straight line. That’s right … no intricate piecing or quilting, just lots and lots of straight lines. This is a wonderful beginner project and a great way to get practice while actually sewing something wonderful!
I didn’t invent this style of quilting and the idea of sewing a bunch of strips together is nothing new either. It just happens to be one of my favorite ways to quilt! In fact, I love it so much {and want others to love it too} this isn’t the first time I’ve written a tutorial on the process. It seems however that each time I sit down to make one of these quilts, it comes out just a bit different than those in the past.
This should give you the basic idea of how to sew a basic baby quilt using all straight lines.

Finished size: 40″x 54″
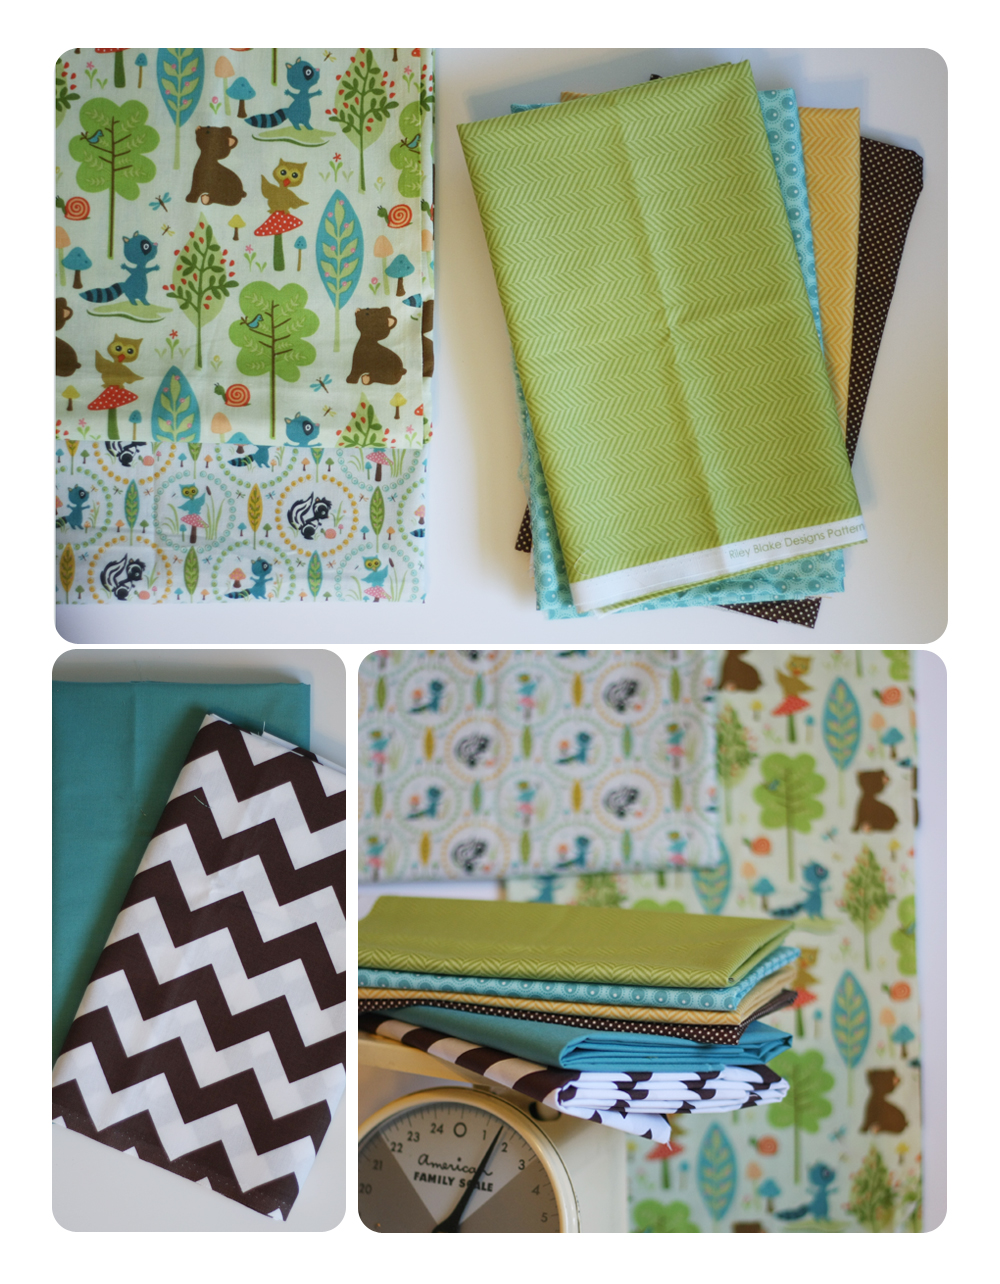
Materials Needed::
- {1} 1/3 YD cut of “main print” fabrics (Quilt Front)
- {1} 1/2 YD cut of “main print” fabrics (Quilt Front)
- {4} 1/3 YD cuts of coordinating “accent” fabrics (Quilt Front)
- 1 YD print fabric & 5/8 YD solid fabric (Quilt Back)
- 45″x 60″ Piece of batting {Warm & Natural}
- Coordinating thread
Helpful Equipment::
- Rotary Cutter
- Cutting Mat
- Walking Foot {for your sewing machine}
Step 1.
Cut strips of fabric for your quilt top. You will need to cut as follows::
Front Fabrics –
- Main Fabric {A} – Cut {2} strips 5″
- Main Fabric {B} – Cut {2} strips 8″
- Accent Fabrics {C-F} – Cut {1} strip each 2.25″ / 3″ / 3.75″
Back Fabrics –
- Print Fabric – Cut {2} strips 18″
- Solid Fabric – Cut {1} strip 20″
All cuts are the full width of the fabric {selvage to selvage} by the above measurement.
Step 2.
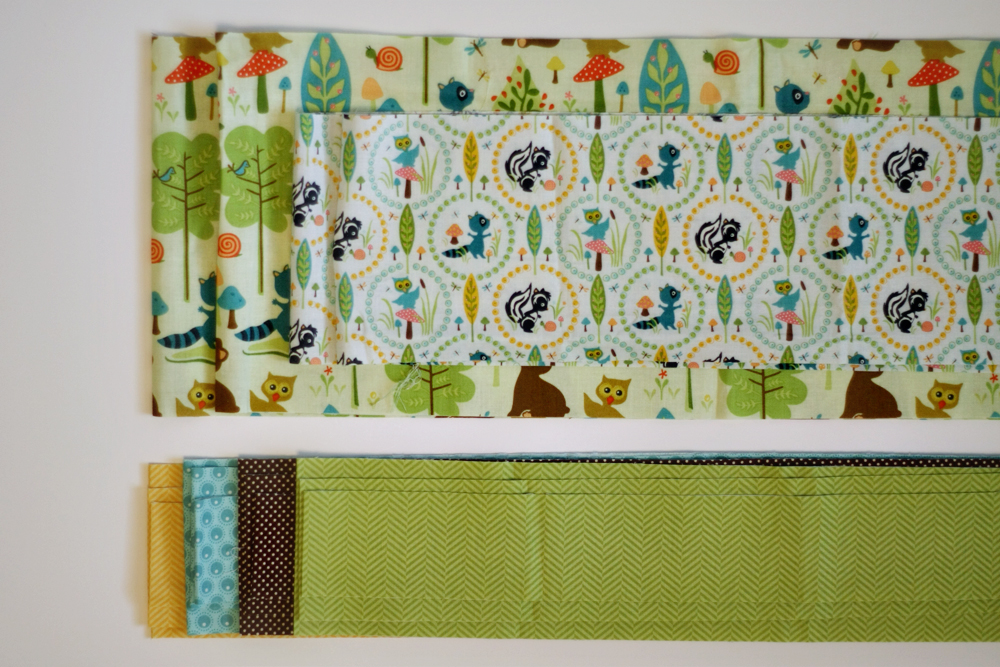
Determine the layout you’d like for your strips. {For mine, I started with three different accent strips in varying widths, then one of my main fabric strips. I repeated this pattern (4) times.} Then, stack the strips in order with the top/beginning strip on the top of the pile.
Step 3.
Sew the strips together. Take the first strip and place it right side up. {You’ll notice one selvage edge usually has the pattern on it and the other edge has fabric/printing information. I like to keep the ends with the pattern all lined up on the left side.} Take the next strip and place it right side down, matching up the selvage edge on the left and the raw edge on the bottom. Pin the two fabrics together {I like to pin about 1″ from the edge so that I don’t have to remove my pins while I sew.} and sew using a 1/4 seam allowance (SA) with a small stitch length of 2.2-2.5. Back stitch at the beginning and ending of each seam. Press seam OPEN using steam to get a nice flat seam.
Step 3b.
Similar to step 3a, lay out your now pieced together strip right side up. Take the next strip and lay it right side down, again matching up the selvage edge on the left and the raw edges along the bottom. Pin the fabric together. This time you will sew from the bottom to the top. {The reason for this is that by switching directions, you’re less likely to get a ‘curve’ to your strips and will end up with a more square quilt top.} Press seams open.
Repeat Steps 3a & 3b for remaining strips, remembering to alternate the direction of your sewing.
Nice job, you’ve just made you’re self a quilt top! Pat yourself on the back, stretch, go grab a fresh iced tea and come back refreshed and ready to finish your quilt.
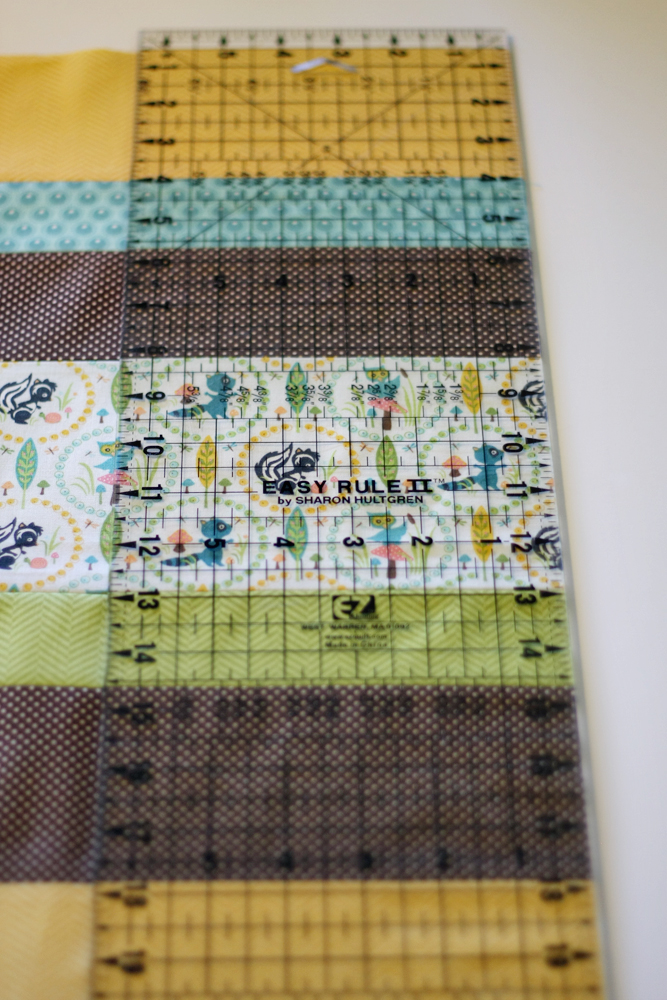
Step 4.
Time to trim up your quilt top. Lay one of your selvage edges on your cutting mat and line your ruler up with the most inset selvage edge {they may be varying lengths so you have to go with the shortest to get a straight edge}. Trim excess. You’ll have to adjust your quilt top several times on your cutting mat to trim the full length. Repeat on opposite edge. Your quilt top should be about 40″ wide by 54″ in length.
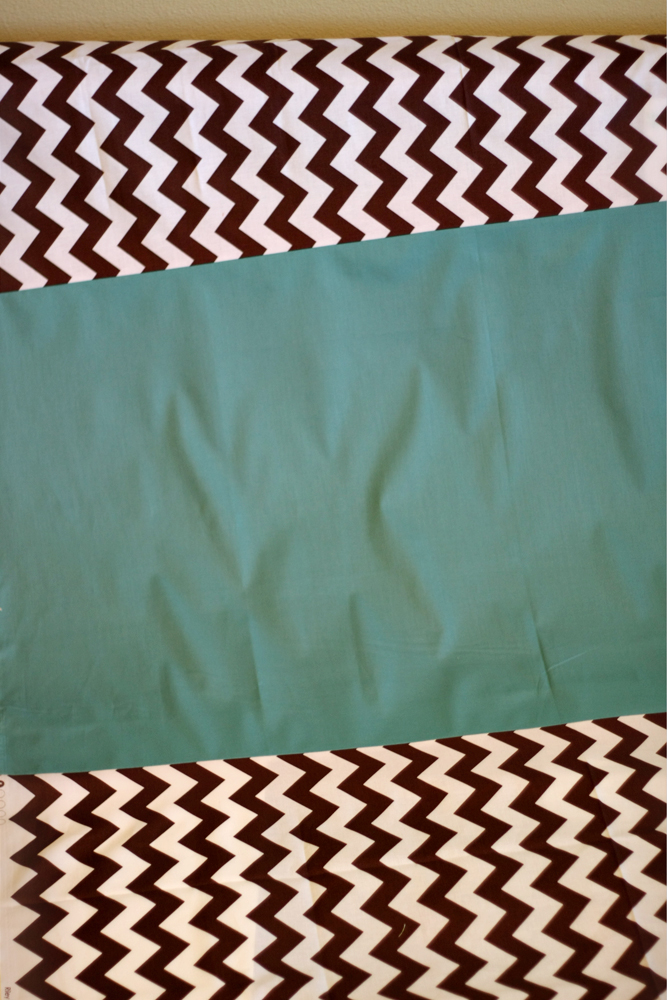
Step 5.
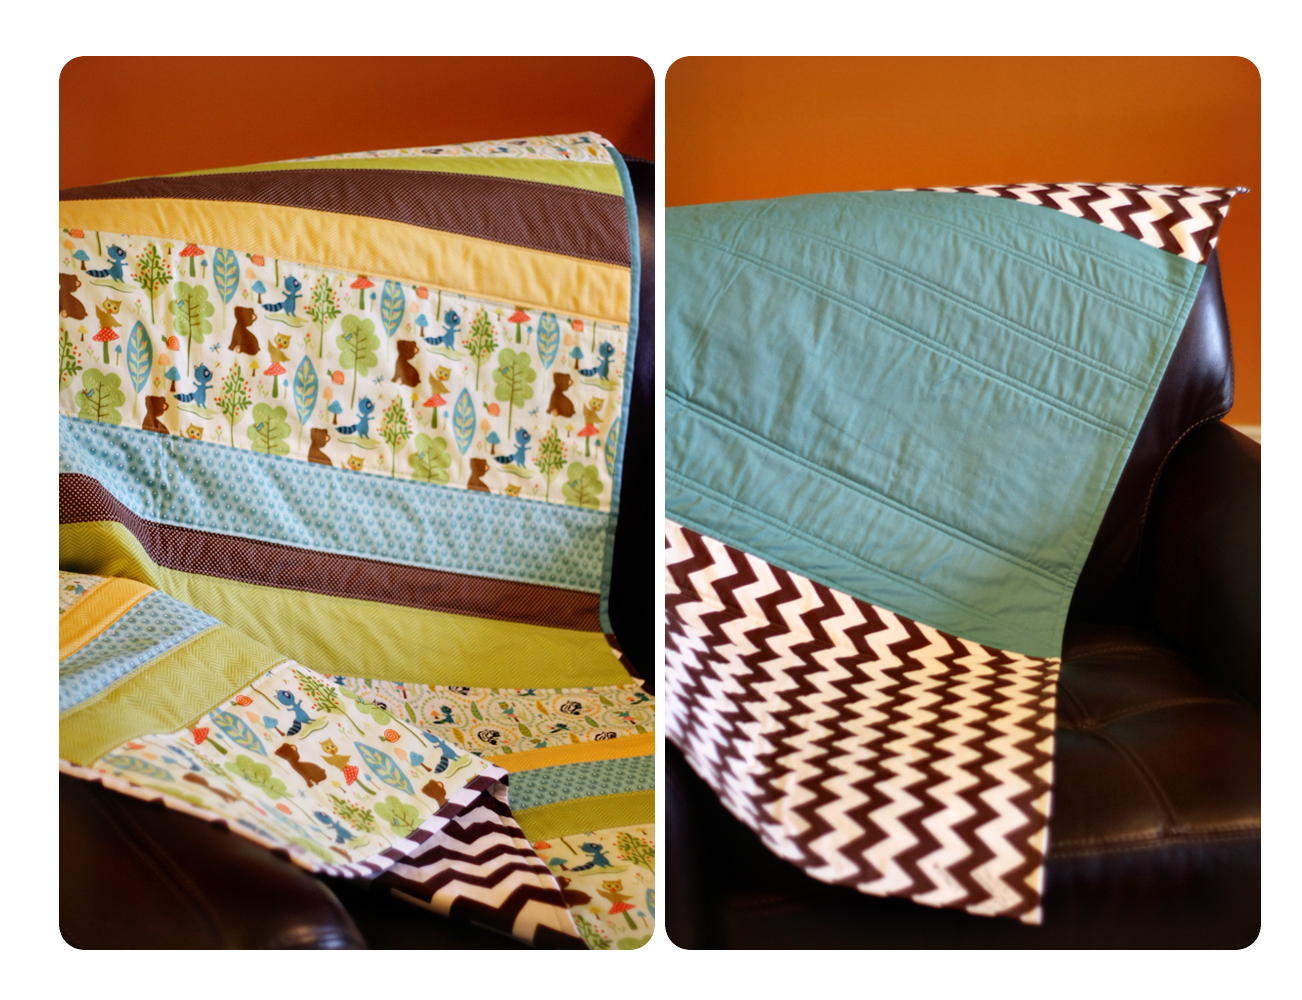
Preparing your backing. I didn’t have quite enough of the zig-zag fabric to cover the whole back, so I cut it in half and added a strip of solid fabric.You could just as easily use a solid cut of fabric {you would need 1 3/4 YD}.
Step 6.
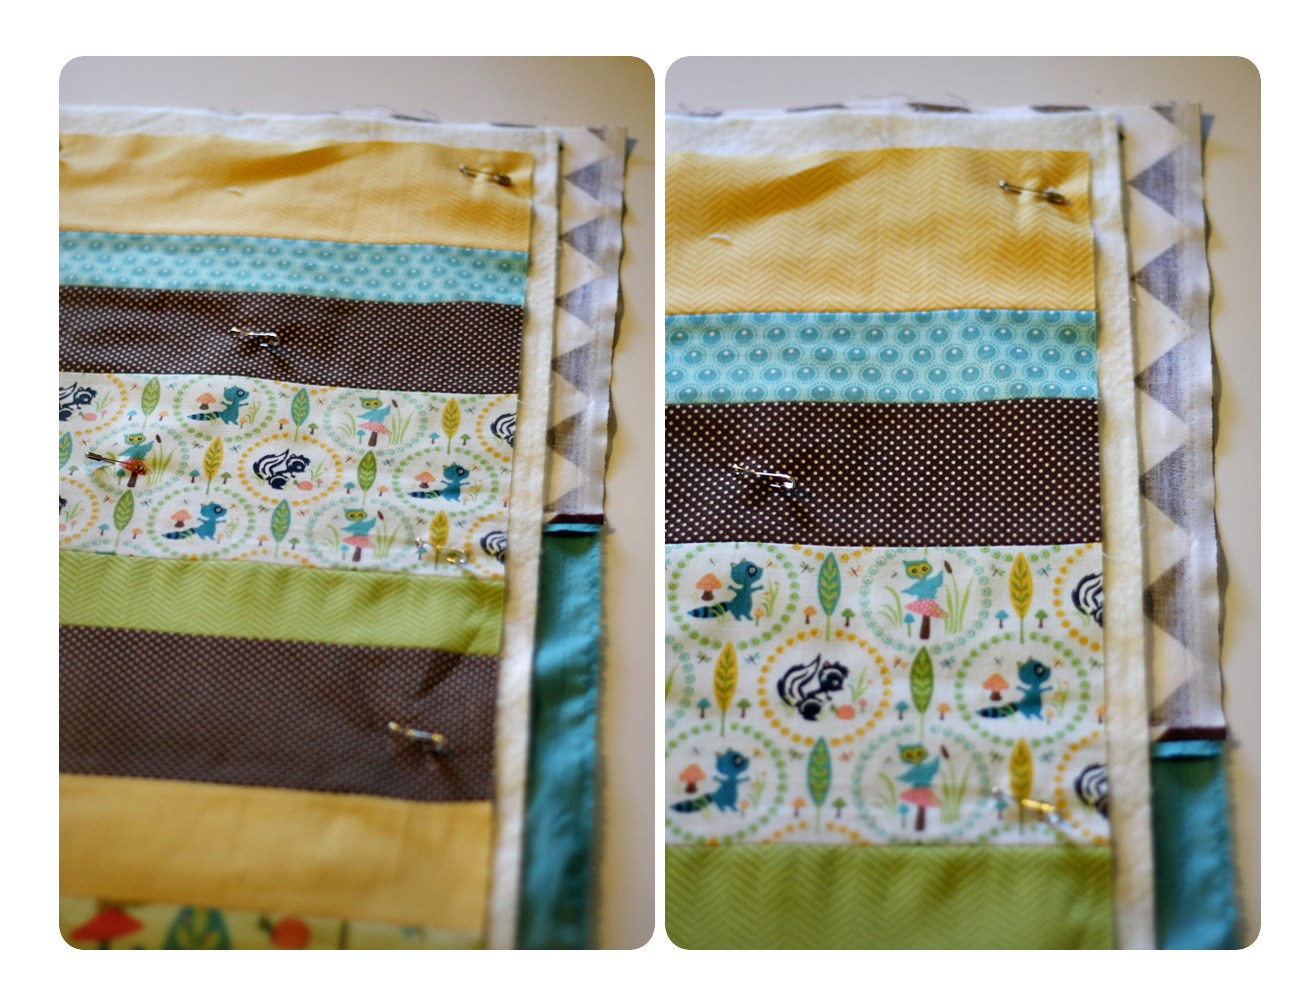
Making your quilt ‘sandwich.’ Your sandwich is: your quilt back right side down, batting and then your quilt top right side up. There are several good tutorials on how to do this in greater detail. The larger your quilt the more accurate you need to be. Because this is a small quilt {and because I didn’t want to clean my floors} I am sandwiching my quilt on my ironing board table. Start with your quilt top down, then layer on your batting and then place your quilt top, making sure you have at least a 1.5″ border of the backing showing all around. {To make it easier to see my backing, I cut my batting so that it was just slightly bigger than the front piece, but smaller than the back.}
Iron all three layers and begin to pin in place using quilting pins {they look like curved safety pins}. Carefully shift all three layers on the ironing board and smooth everything out, iron and pin. Make sure you keep checking you have at least a 1.5″ border of your back fabric on all sides.
Step 7.
Let’s quilt! We’re going to do straight line quilting which is really no different than the way you sewed your strips together EXCEPT you’ll want to use a much longer stitch length {about 3.5} and you might need to tighten your tension a bit {I tighten mine by 1 on my machine}. Ideally, you will also want to use a ‘walking foot.’ A walking foot provides ‘feed dogs’ on top to help pull all layers through at the same rate. They make a walking foot for most machines, but it doesn’t always come standard. A quick search should give you an online resource. If your machine came with an extension table now would be the time to use that as well {not necessary, but it will make things easier.}
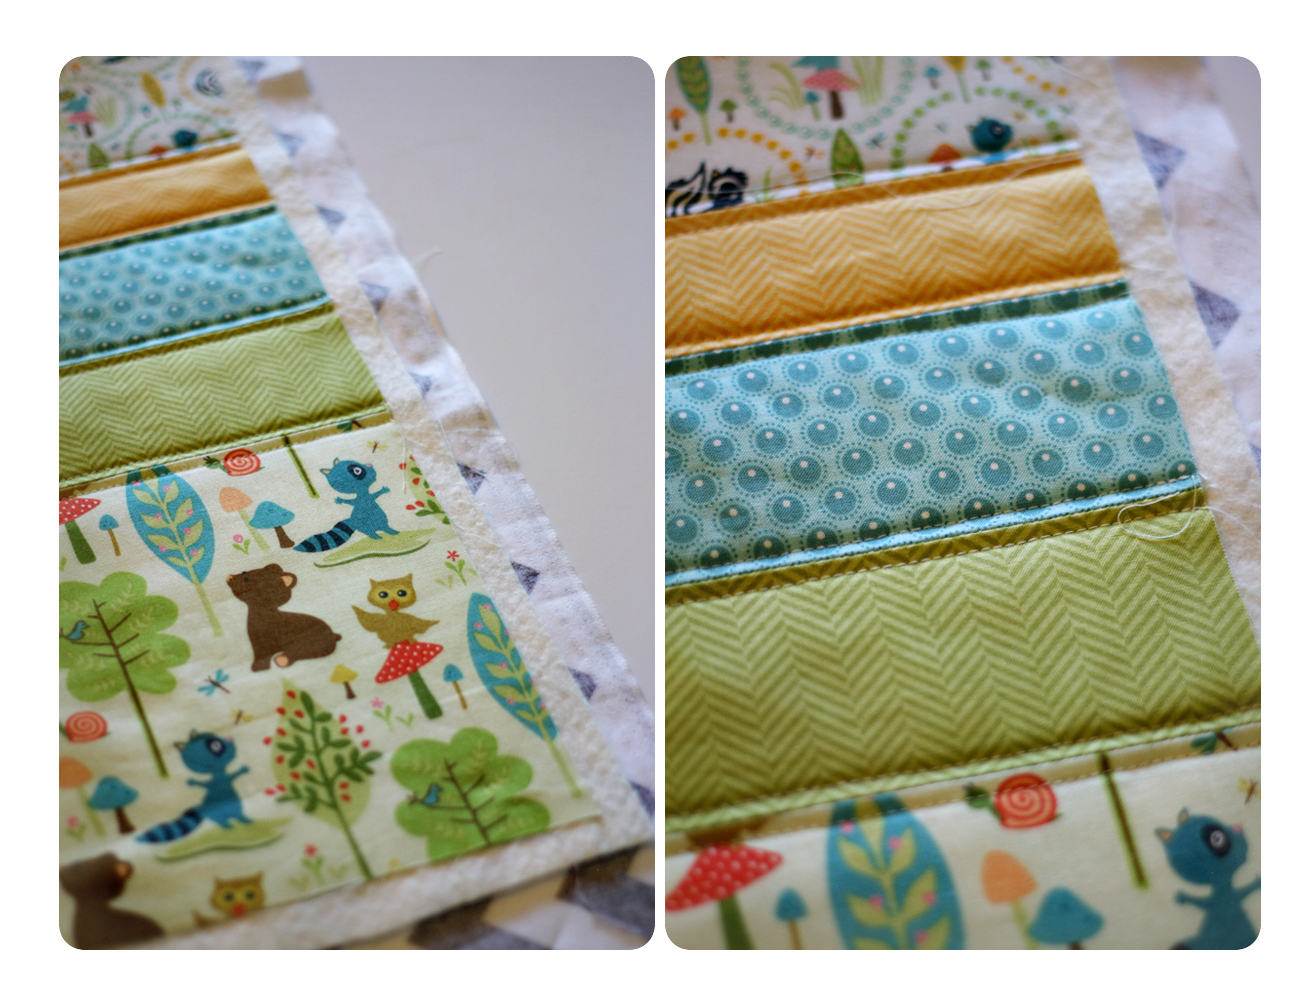
We’re going to first quilt on each side of the seams you sewed earlier when you sewed the strips together. Start by lining up your needle so that it is approx. 1/4″ to the right of your first seam. Back stitch at the beginning and end of each row. Stitch the whole width of the quilt, but DO NOT go past your quilt top. When you get to the end, sink your needle down, lift your foot and rotate your quilt so that you can stitch on the other side of the seam. Put your foot down, lift your needle and adjust so that again you’re stitching 1/4″ to the right of the seam. Continue stitching the rest of the quilt like this. I never cut threads until the very end, you should be able to just keep moving your quilt and lining up on the next seam.
You will notice that as you go back and forth, you’ll need to ‘roll’ your quilt sides to more easily fit it on your machine.
** Don’t forget to match your bobbin thread to your quilt back. In this case, I used a dark teal to match the solid fabric. I used a natural thread on top. **
** You will most likely run out of your bobbin thread a couple times during the quilting process. When this happens, simply snip the top thread and bottom thread, remove your quilt, reload your bobbin and get back to your ending spot. Go over a few of your stitches and make sure to back stitch before you continue quilting. **
** One of the best tips on quilting is to not let your quilt weight ‘drag’ down your stitching. Try to keep your quilt from pulling by keeping it on your lap or on your sewing table and not hanging off the side creating pull and drag. **
Step 8.
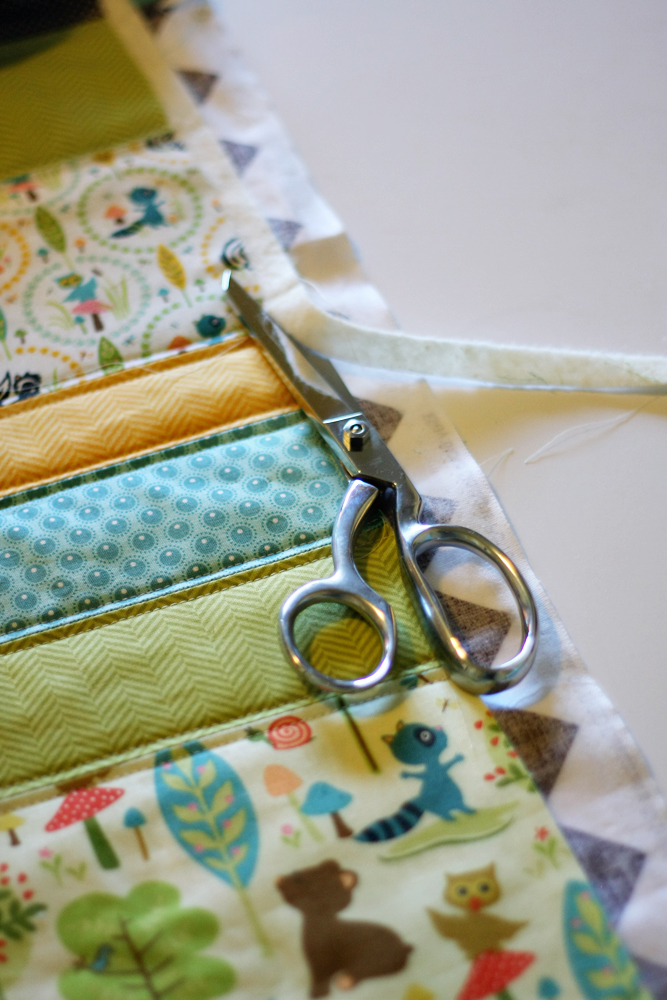
Trim the batting. Carefully go around the quilt and trim off JUST the batting. Be careful not to cut through the front or back of the quilt.
Step 9.
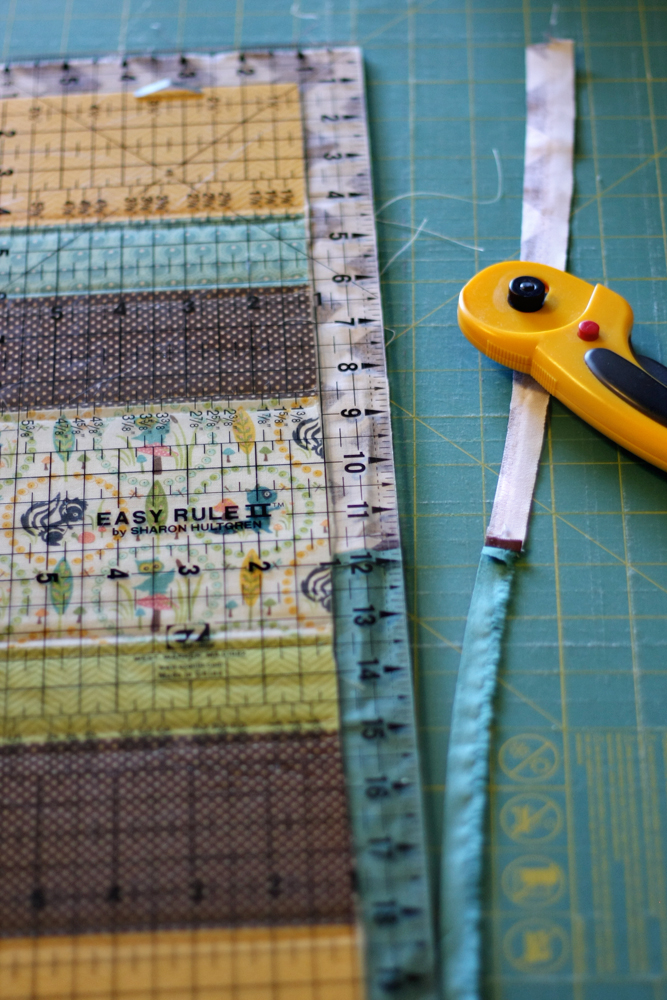
Trim the backing. You want to have a perfect 1″ border of your backing fabric all the way around your quilt. Using your ruler and rotary cutter, trim the backing to 1″ from the quilt top edge.
Step 10.
Cheater binding. I’m using the method I learned from Made by Rae‘s tutorial. It works beautifully and has a ‘professional’ looking finish. You can read Rae’s full tutorial and this post of mine for some helpful tips. Use quilt binding clips {which look like hair clips} to hold your binding in place. Stitch binding down using a 2.5 stitch length and stitching as close to the edge of the binding as you feel comfortable. When you get to a corner, sink your needle down and pivot your quilt and continue on the next side until you’re back to your starting point.
Hurrah! Snip your thread and you’ve got yourself a beautiful handmade quilt!
Riley Blake sweetly sponsored this tutorial by providing all of the fabric I used for the quilt. Links to specific fabrics used are included in the “Materials Needed” above. Thank you Riley Blake!
For more Knitty Bitties, you can find me rambling on my Blog; trying to keep connected on Facebook; tweeting on Twitter, pinning on Pinterest and my latest love, Instagram! Or check out my previous 30days posts here.


I’m going to attempt to make this quilt, and hopefully it’ll turn out as beautiful as yours. Your tutorial is so easy to follow, thanks for that. But I do have one question: in step 3b, you write to sew the 3rd piece from bottom to top to keep it from curving. What do you mean by that? Do you mean to sew the strips from right to left then the next one from left to right (if facing the front of the quilt)?
Thanks
I love it!
Hi There-
Love this quilt and your pattern! Super easy for this beginner?!
Quick question… Can I use Fat Quarters for this project?
Thanks!
Amiee
It’s the best time to make some plans for the future and it is time to be happy.
I’ve read this post and if I could I desire to suggest
you few interesting things or suggestions. Maybe
you could write next articles referring to this article.
I desire to read more things about it!
http://www.tommiekelly.com/thportfoli
I found your tutorial on Friday and finished the quilt on Sunday (except for hand sewing the binding on) and it is easily one of my favorites!! I will definitely be making more strip quilts!! Thank you :)
Thank you for sending me the pattern. One more question. In the section that is “materials needed” the first line reads as follows
{1} 1/3 YD cut of  “main print fabric (quilt front)
what does the “of ” mean?
Thank you for your assistance. I am going shopping this weekend for fabric and I just would like to know that I am getting the right thing.
I just completed this quilt for my first grandchild. I love the way it turned out. The nursery is done in modern prints (i.e. chevrons, stripes, squares, squigglies). Since we don’t know the sex yet the colors are all bisexual. Love it, love it , love it!!!!
Simply desire tto say your article iss as astonishing.
The clearness in your post is just cool and i
could assume you are an expert on this subject.
Fine with your permission allow me to grab your RSS feed to keepp up to
date with forthcoming post. Thanks a million and please continue the enjoyable work.
Feel free to visit my web site … seo bedfordshire
I love the fabrics you chose – it is a lovely quilt!!
Do you have an easy quilt for a twin sized bed, looking to make some for my nieces???
Do you have an easy quilt to do for a twin sized bed, looking to make some for my nieces?
I recently made a baby quilt from 100% cotton fabric. After it was quilted , it feels hard and stiff. Should I have used flannel backing?
Regards
Tineke ( South Africa)
Hi Tineke,
Good quality cotton fabric should wash up and be very soft. Cheaper printing methods and lower quality cotton can cause a stiffer fabric and it may take a lot of washings for it to soften up. Because the backing is such a large piece of fabric, I’d recommend getting a small amount and testing it with a pre-wash and dry before you buy and complete your quilt. Kona cotton by Robert Kaufman is a lovely cotton that washes up nice and soft and is more reasonably priced than using a designer cotton print for the backing.
Of course you can go with flannel, but again, a low quality flannel will not hold up for the long run so make sure you make an investment in your quilt!
My last bit of advice would be to use 100% cotton or bamboo batting. I use Natural Warm & White cotton batting.
Hope that helps!!
Happy Sewing!
You have stitched lined on the green and black and white zig zag, how did you do that and keep colours of thread matching?? Your tutorial doesn’t say?
Tania,
I just used a natural off-white thread for the whole quilt. It blends nicely with most colors. You might see it/notice it more on the solid fabric … if that bothers you, you could always put a matching thread color on your bobbin for the underside. Hope that helps!
I always fill 2 or 3 bobbins before I start quilting, that way you don’t have to un-thread the machine and wind a new bobbin.
Love this tutorial and I plan on making a quilt for my daughter’s first birthday. Question though – did you wash the fabrics or the batting before cutting and sewing it all together? I noticed on the batting I bought that it has a 20% shrink possibility (or something like that). Should I wash/soak this before putting it all together?
By the way, all of my fabrics are 100% cotton. Thanks!
Hi Courtney!
I haven’t ever pre-washed my batting and I rarely pre-wash my fabric. It’s probably mostly personal preference whether you should or should not pre-wash. If you like the ‘crinkly’ look a quilt, then you don’t want to pre-wash. If you are working with a lower end fabric (not quilt shop higher end fabrics) you may want to test or pre-wash if you’re afraid of bleeding occurring.
Hope that helps and happy sewing!!
Hi!
I’m going to try to make a quilt for the first time for my sister’s baby. We don’t know the sex yet and I’ve been looking for unisex fabric and I LOVE the ones you choose! Would you still happen to know what they are? THANKS!
Hi Cecilia,
All of the fabrics were from Riley Blake Designs. Most of them were from the Woodland Tails line and I tried to link them above in the fabric requirements.
http://www.rileyblakedesigns.com/shop/category/sale-items/woodland-tails-1/woodland-tails-cottons-2/
Hope that helps! Happy Sewing!
So cute and easy! Our readers at FaveQuilts would love this. : )
Hi Kathryn,
I’d love for you to share this tutorial with your readers. I already have another tutorial on your site, so feel free to add this one to my profile as well. Thanks!!
This is a good good tutorial. Thank you for the details! LOVE that fabric Riley Blake!!
this is stunning! your sewing skills are amazing!
Ahhh, thank you so much! I’m not sure I’ve got amazing skills, but I will say that practice, practice, practice makes all the difference. This is a great project to get that practice :).
Happy Day!
Oh and Kelsey, I’ve seen your work up close and personal … you’ve got amazing skills!!
Great tutorial! I can’t wait to try making one of these!
Thank you and good luck! It’s so satisfying sewing up something like this … especially going from start to finish in a weekend.
Happy Day!
I love it!
Thank you!! Happy Day!