
I always come across these fake ranuculus flowers when I am craft shopping and wanted to create a project so that I could display them in my home without having them in a floral arrangement. Floral arrangements and a grabby two year old just don’t mix. Instead I came up with something that could be safely hung out of reach:
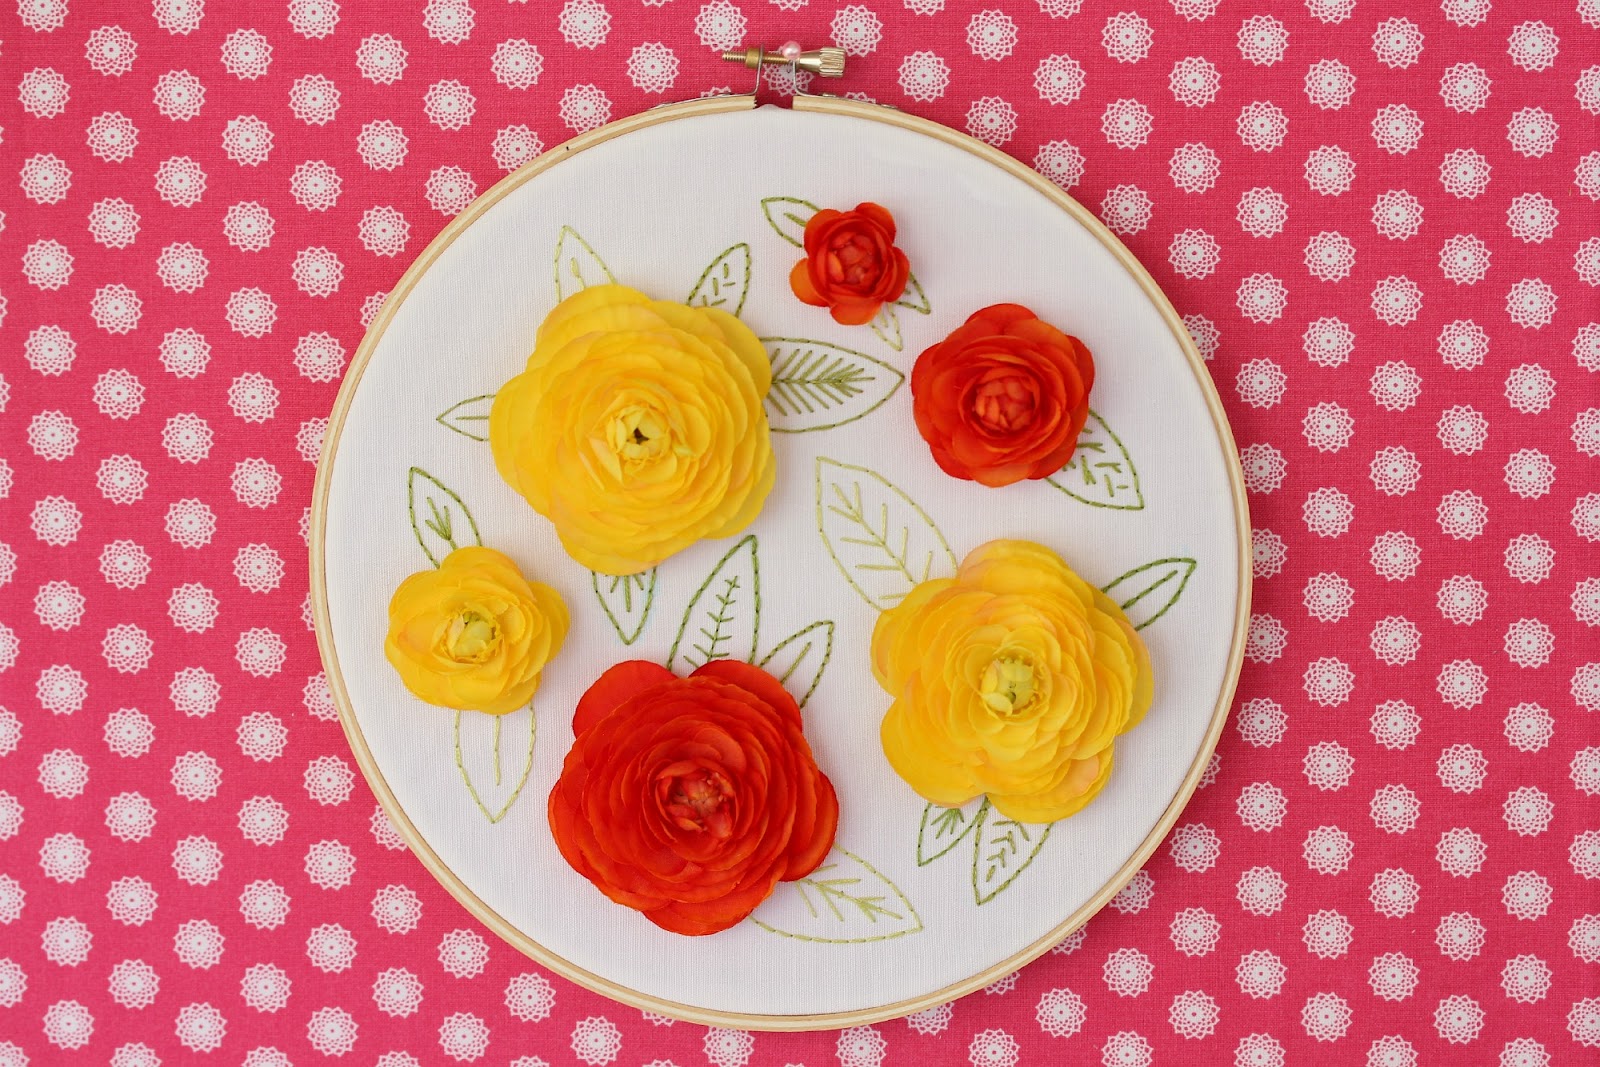
I just love how it came out! Let’s go over how to make your own.
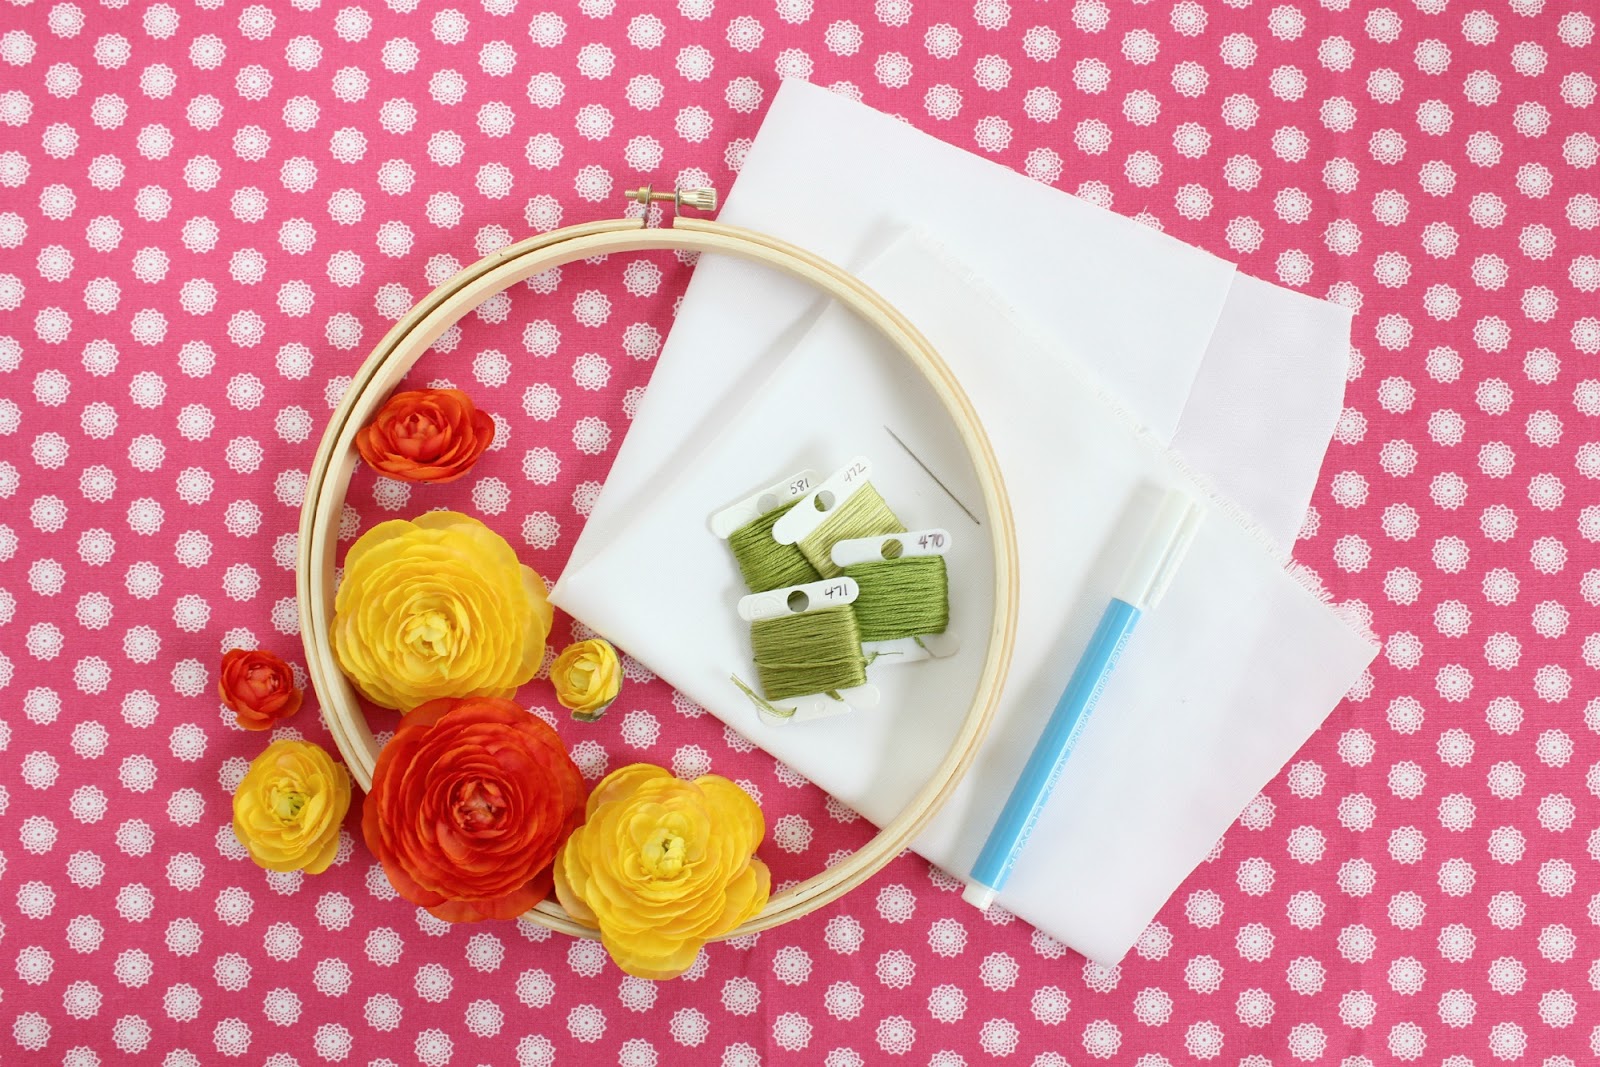
What you’ll need:
- embroidery hoop (mine is 8″)
- fabric (I used about an 11″ square)
- fake flowers
- embroidery thread/needle
- water soluble marking pen
- not pictured: hot glue gun, scissors
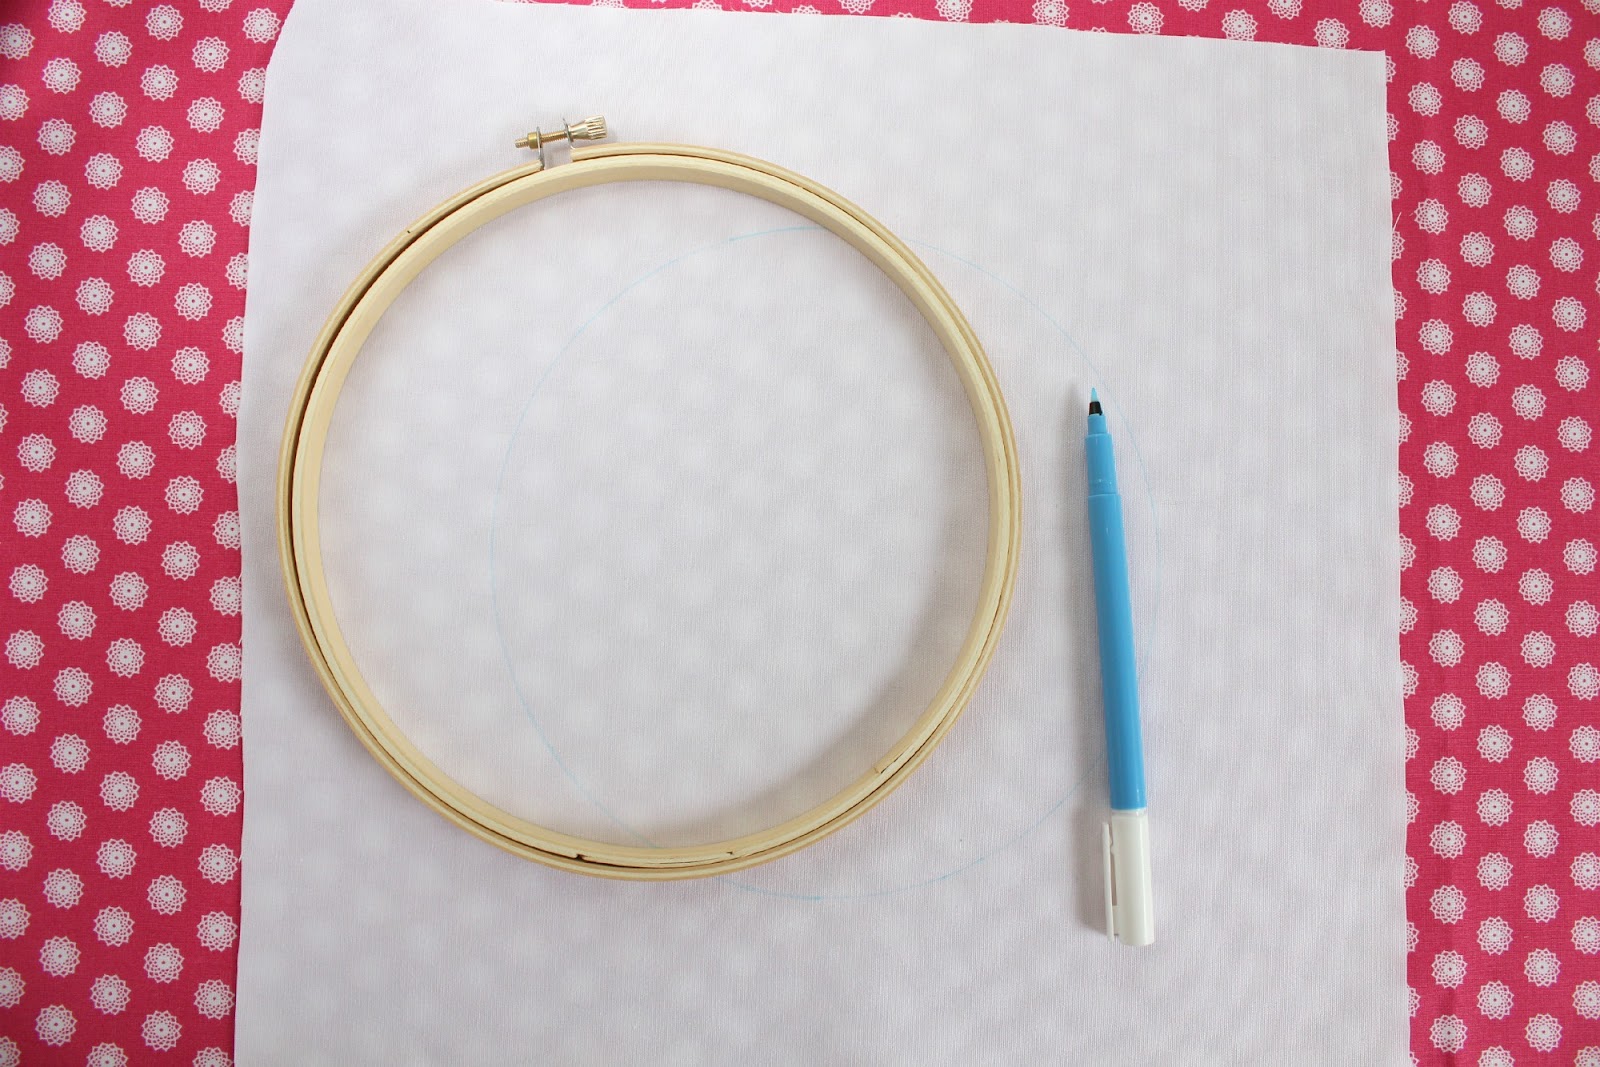
Lay your fabric flat and trace inside your embroidery hoop so you have a circle marked to help you place your flowers and leaves. Sorry it’s so hard to see some of the blue pen marks in these pictures. If you click on the picture to enlarge it you might be able to see better.
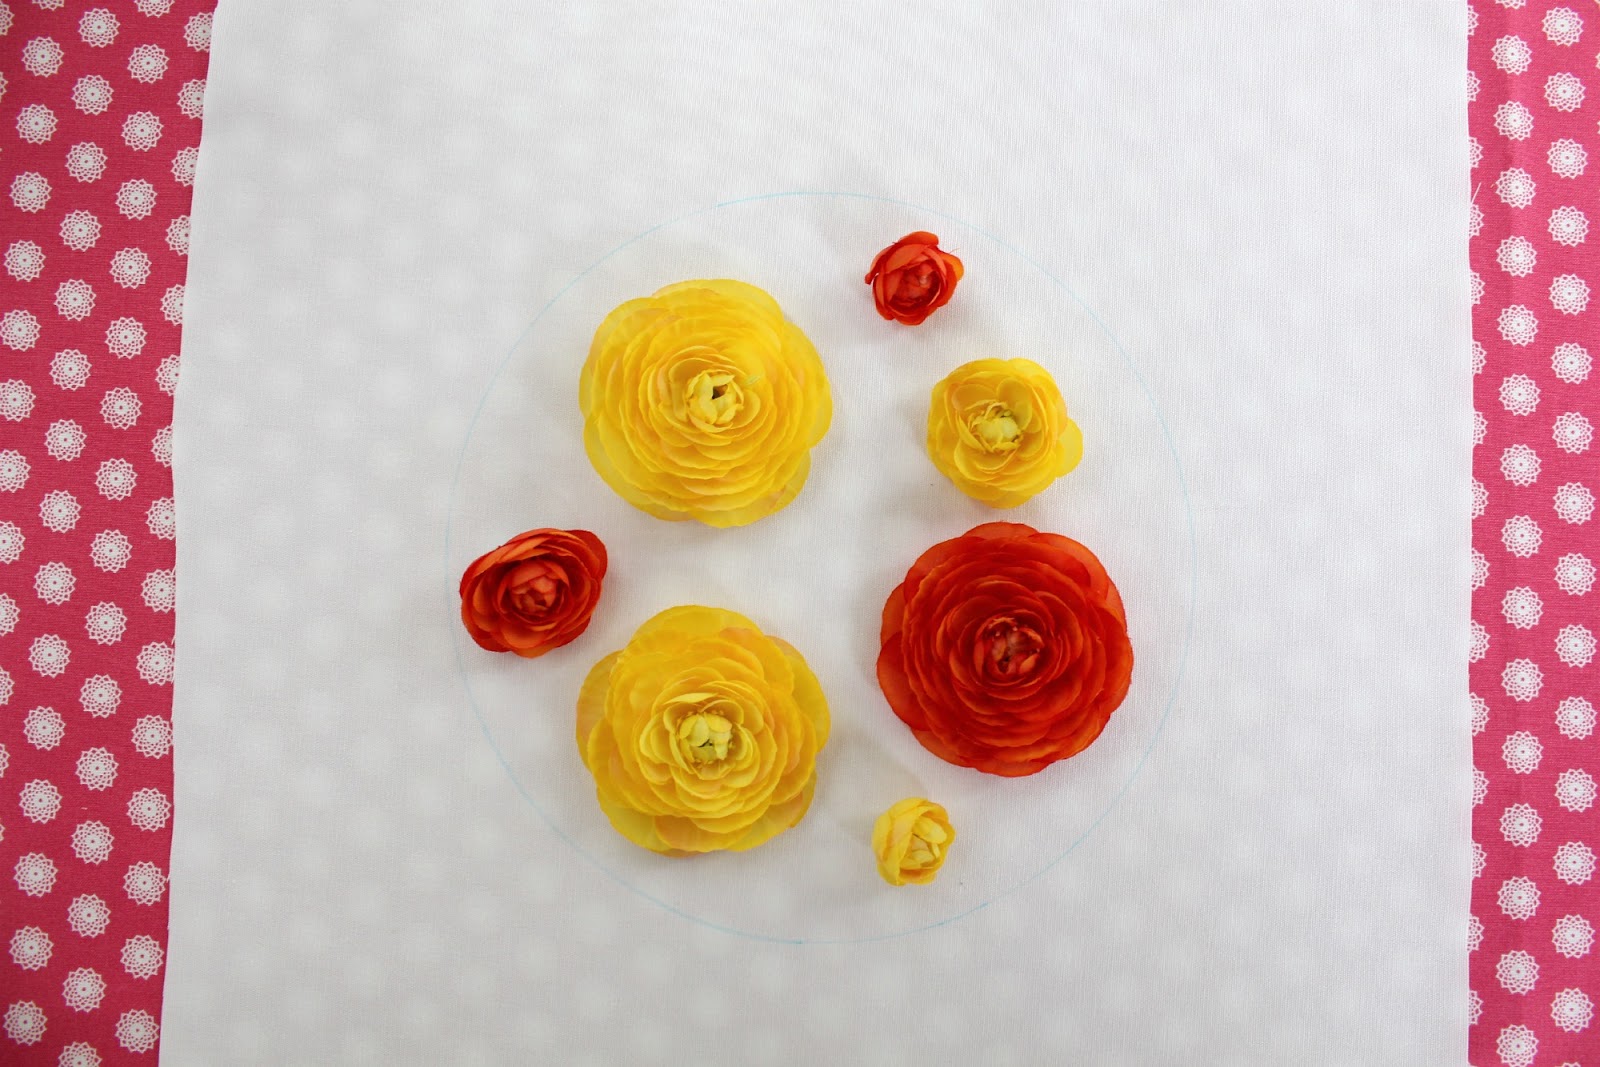
Using your circle as a guide, arrange your flowers how you like them.

Without moving your flowers, you are going to carefully trace around the flowers to mark where you laid them out.
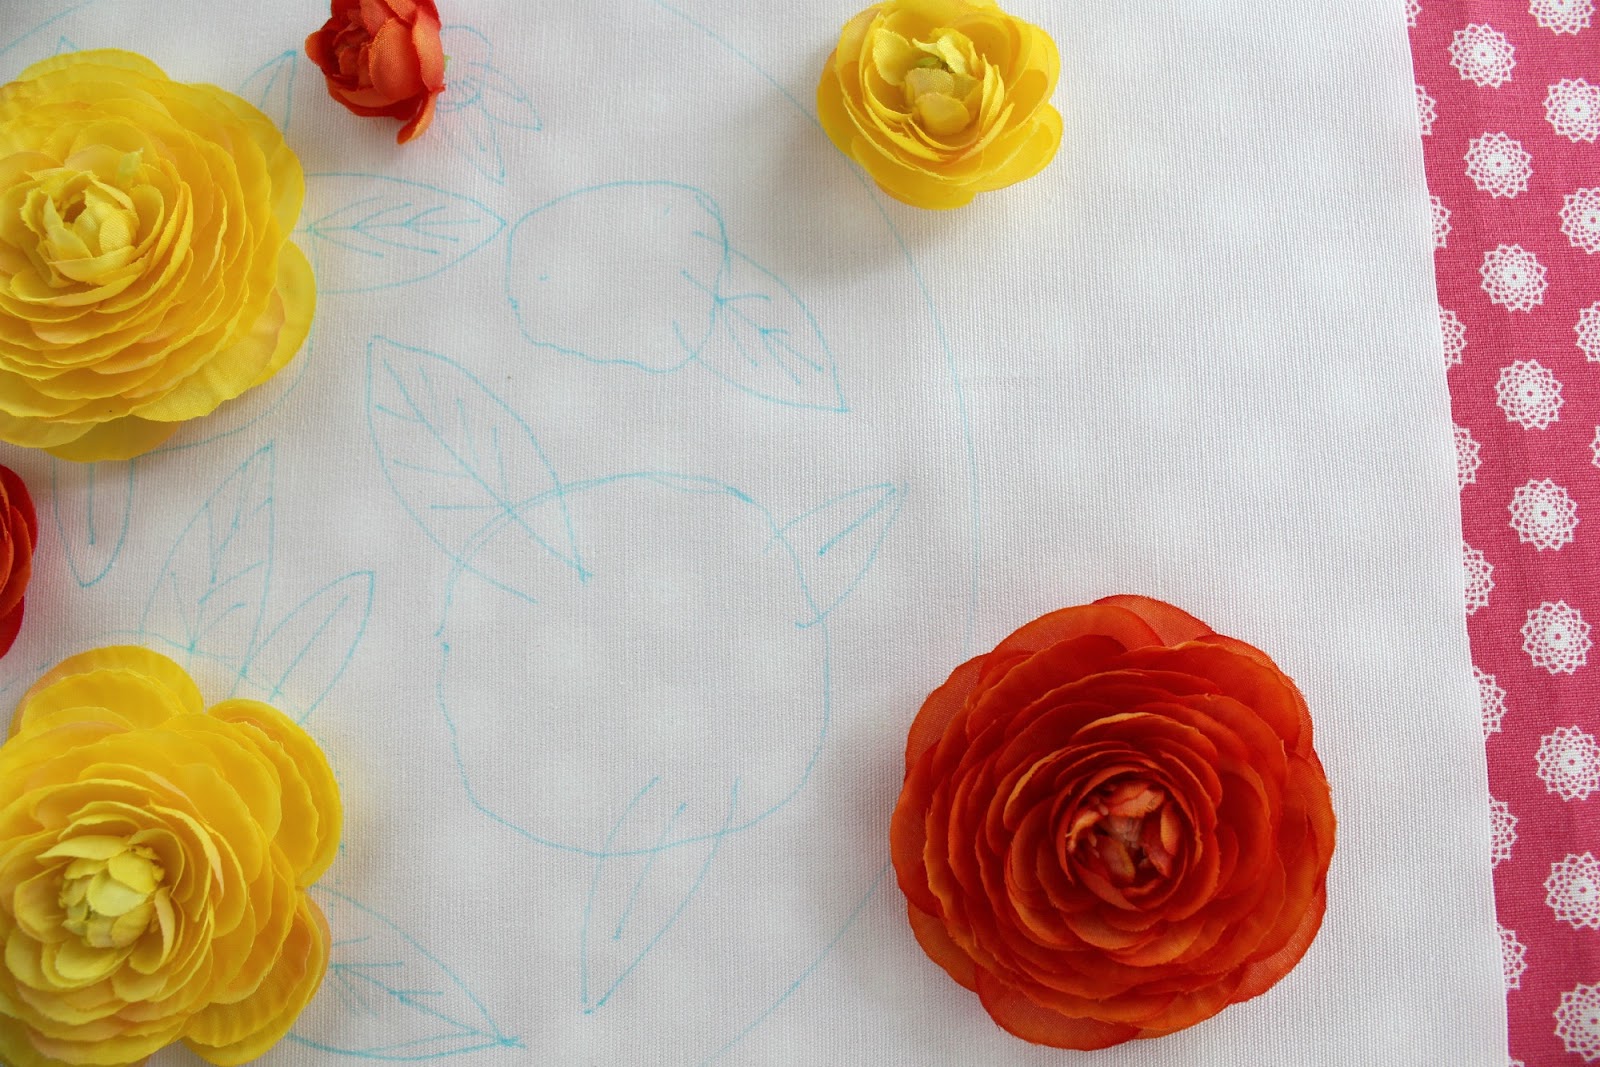
Once you have traced your flowers you can draw your leaves on wherever you like.
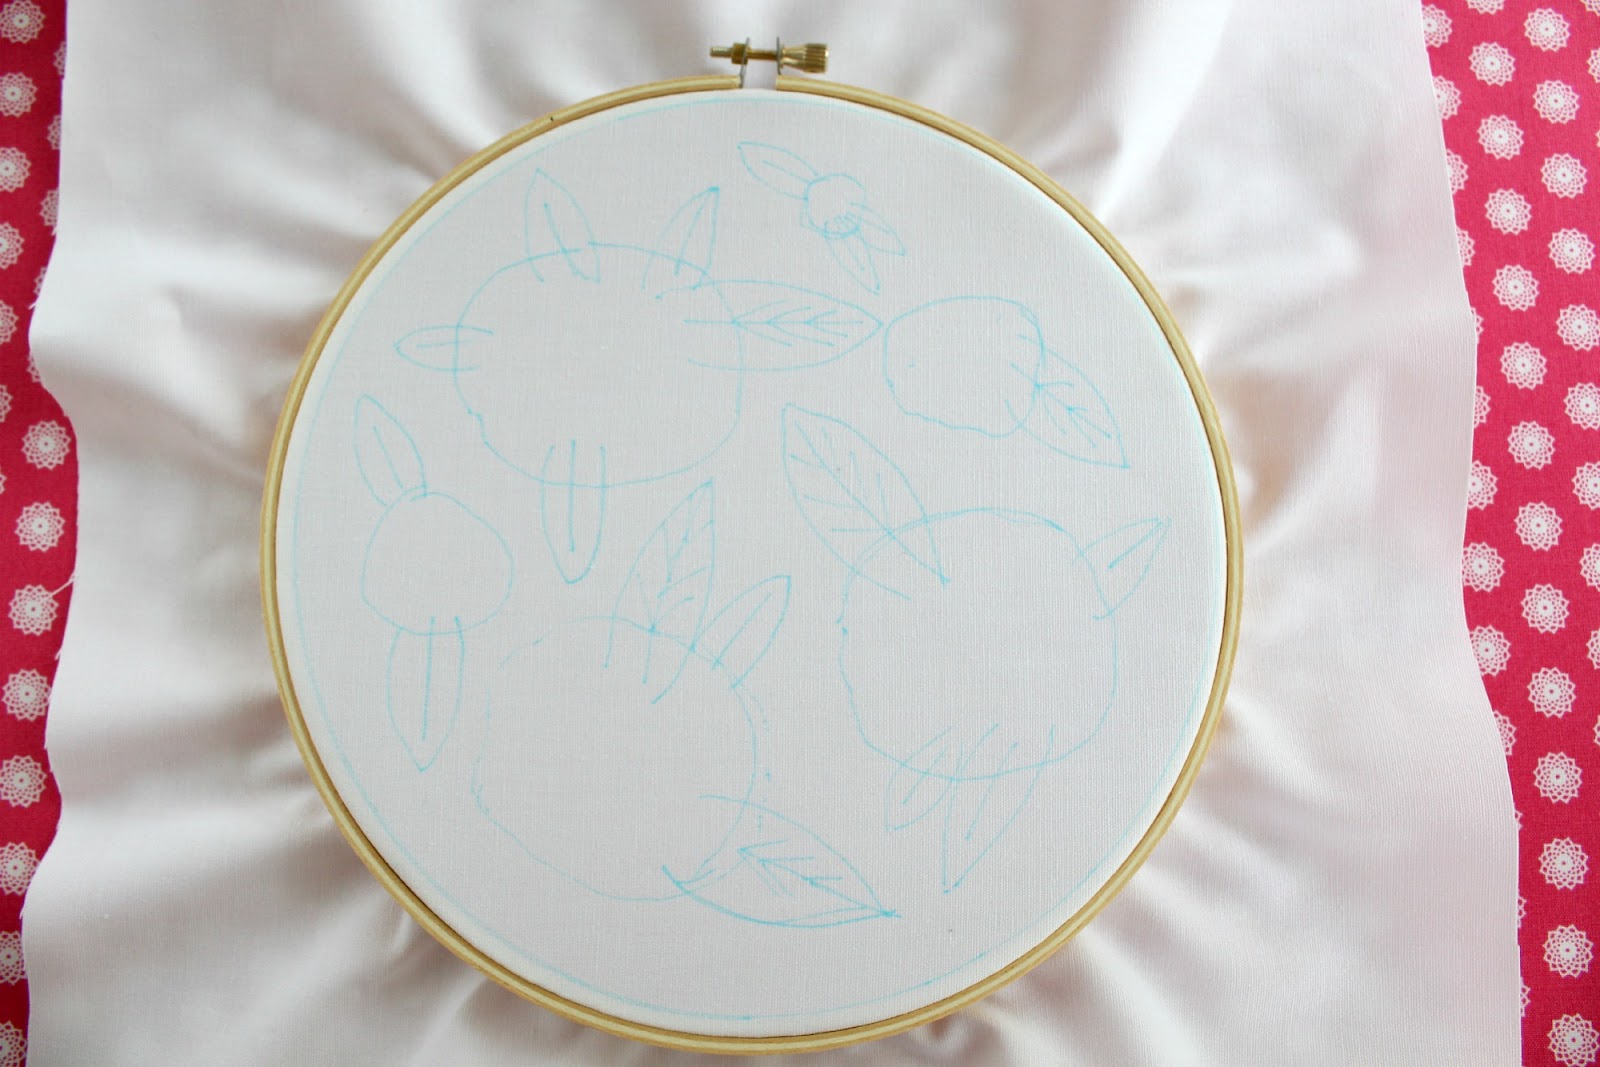
Put your fabric back in your hoop and stitch the leaves. I used 4 different shades of green to back stitch all of the leaves. (Here is my tutorial for the back stitch.)
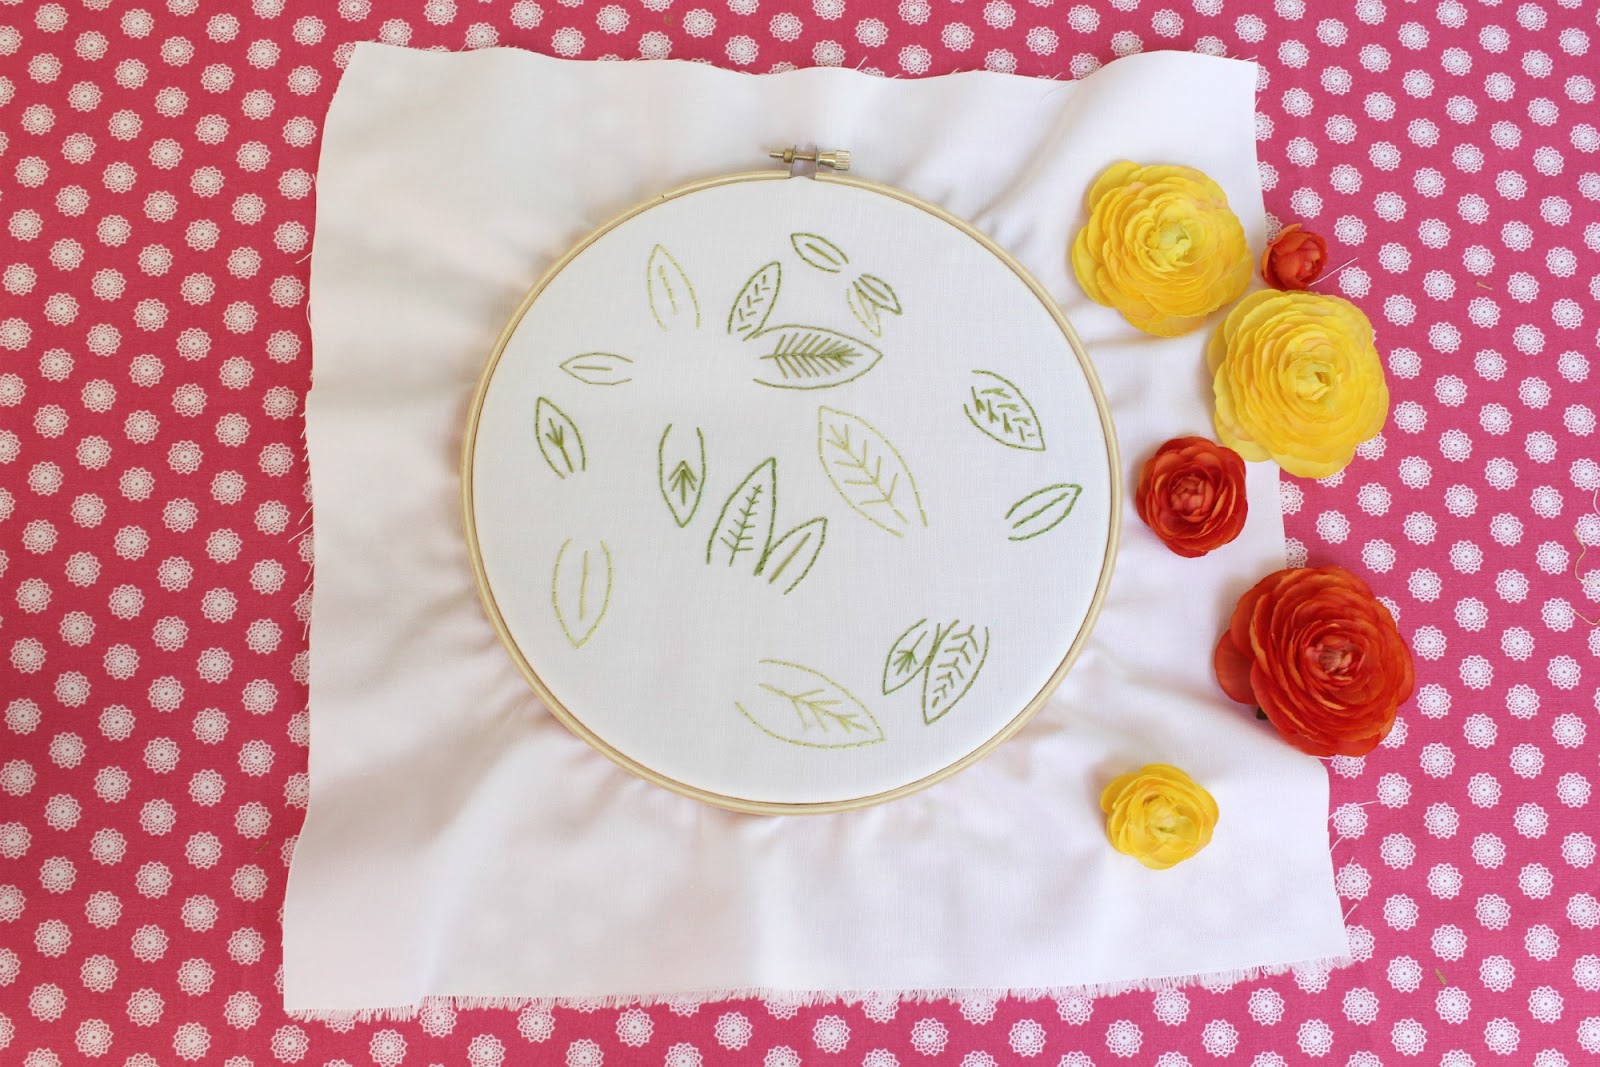
After you stitch your leaves, carefully wet the fabric to remove the water soluble pen lines. I don’t completely submerge my fabric underwater to do this – I just get a q-tip and some water and gently wipe the pen away. After the water dries, you may need to press your finished work.

Before you glue your flowers down to your embroidery, you’ll want to cut the stem on the back of the flower down as close as possible. This way it will lie flat on your finished work.
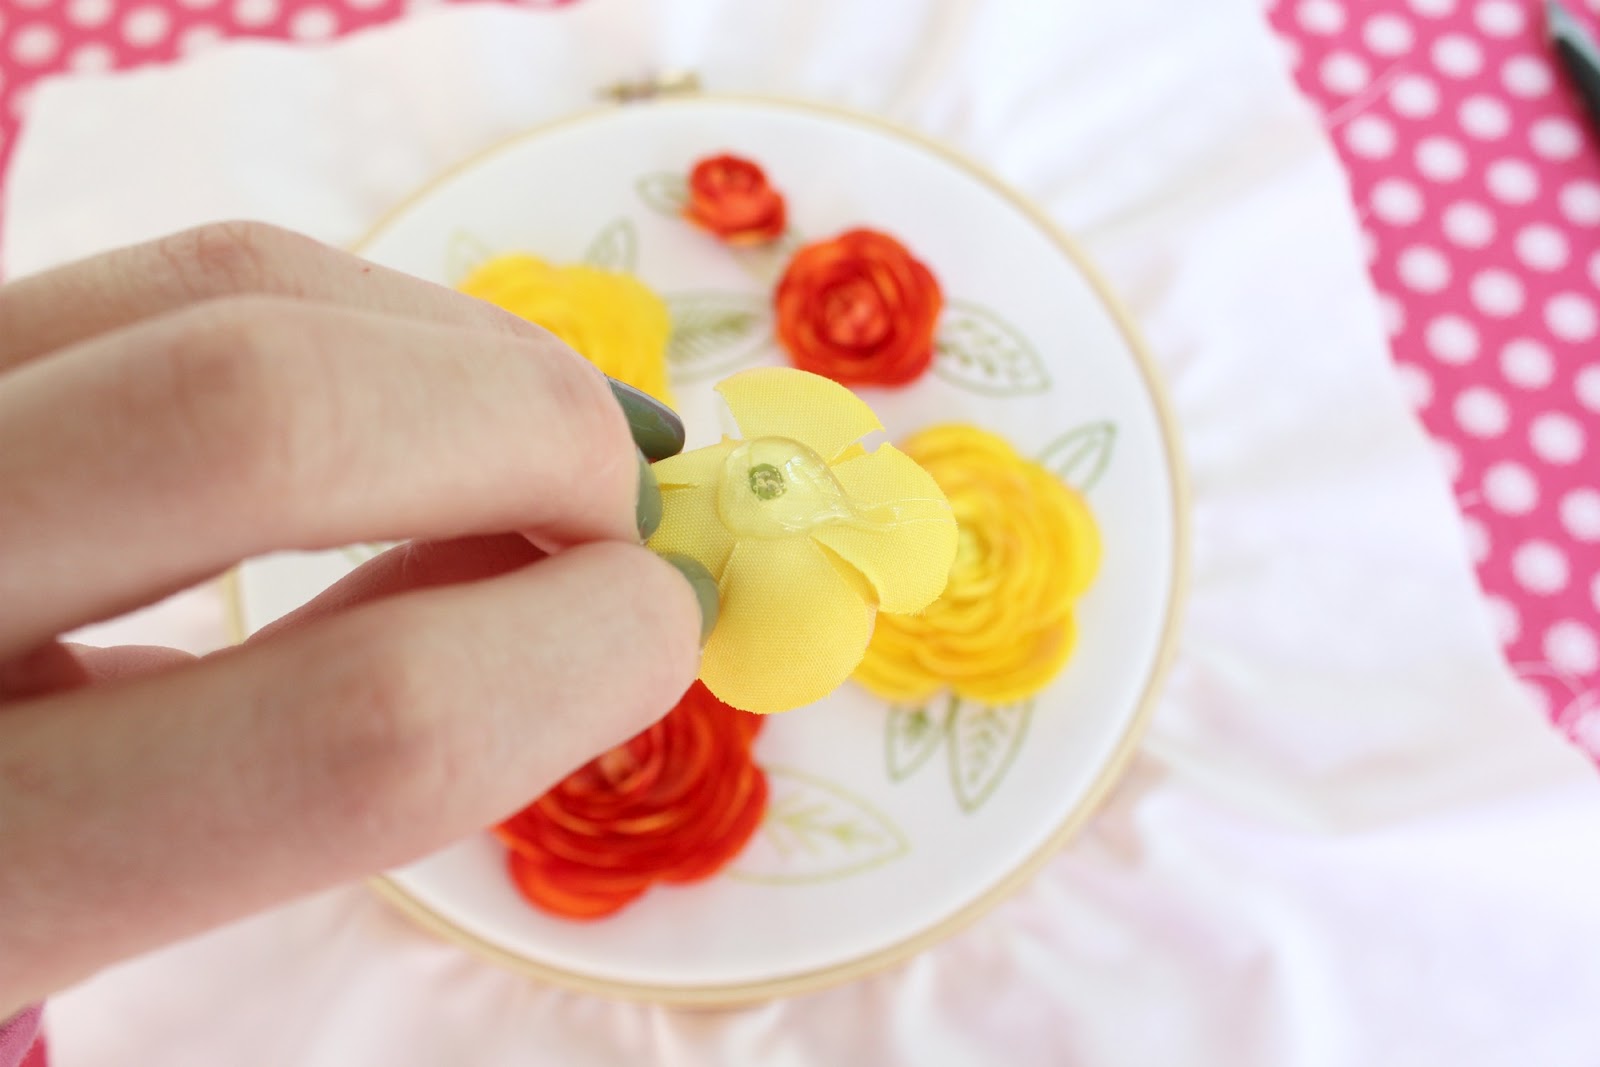
Use a generous amount of hot glue to adhere your flowers down.
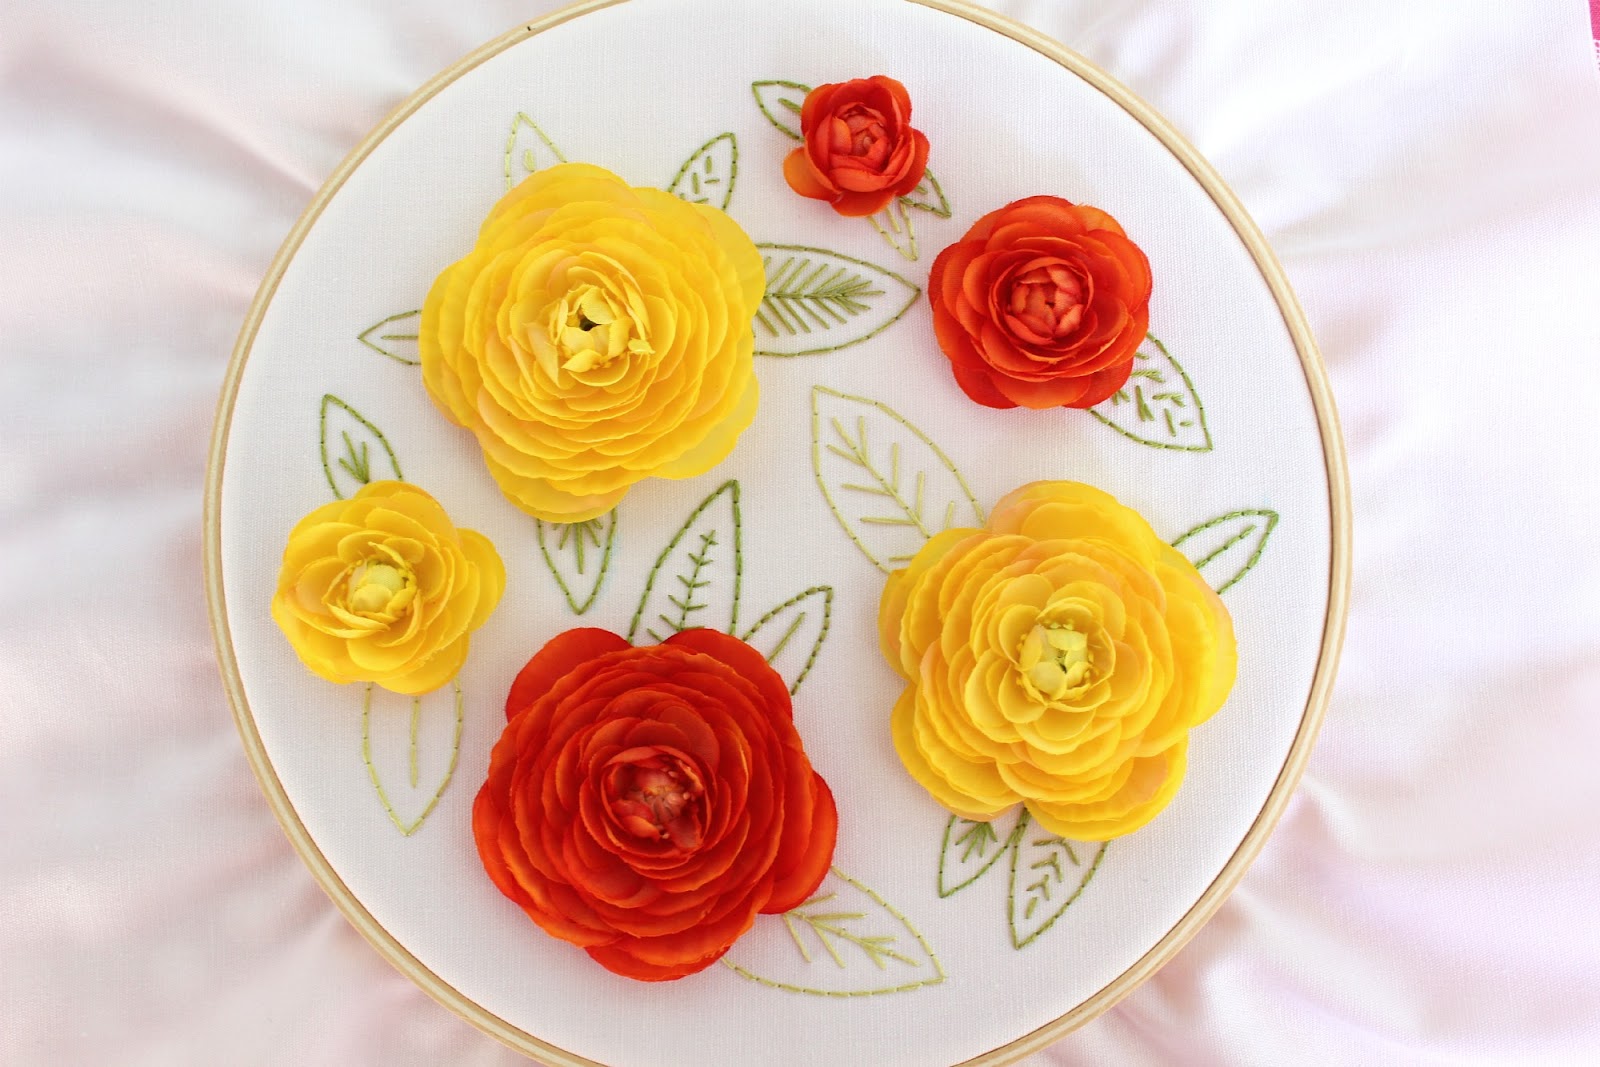
Once the glue has cooled, trim your fabric around of the edge of the hoop and hot glue to the inside of the hoop.


I love the three dimensional look that the flowers give! It’s such a cheery, pretty thing to have hanging in our home. This is a great project to customize and make your own – pick you favorite flower and get stitching!
I’d love for you to come visit me at my blog, little lovelies. You can also find me on facebook, twitter, and Pinterest.


I blog quite often and I seriously thank you for your information. Your article has really peaked my interest. I’m going to book mark your blog and keep checking for new information about once per week. I opted in for your Feed as well.
I absolutely love this! What a creative way to embellish embroidery!
Making crafts is a wonderful way for you to reduce tension, get your mind active, and pass time, plus it is just plain fun.In today’s busy world, how few people take some time to add any personality to their presents. Make your next gift extra-special with embroidery and see how much it’s appreciated.
I love it, pinned it. New follower. Have a great evening.
Very cute… this would make a perfect Mother’s Day Gift!
I love it!
This is so lovely Allison!
You can have this flowers in different colors. It’s very nice to be framed and hanged it in your wall. I love this craft!