
Happy Wednesday!!

I’m back {Andrea from Knitty Bitties} with an inspirational DIY. I hope today’s project will encourage you to think outside the box for what constitutes ‘material/fabric’ AND challenge you to add your signature to the rooms in your home {with what I call, “little pops of personality”}.
Last June {so excited it’s almost here again} I went on a girl’s trip to Spokane, WA to go to the annual Farm Chicks Show. It was so incredibly fun. So fun we’re headed back there in a few months {Hoo-rah!!}.

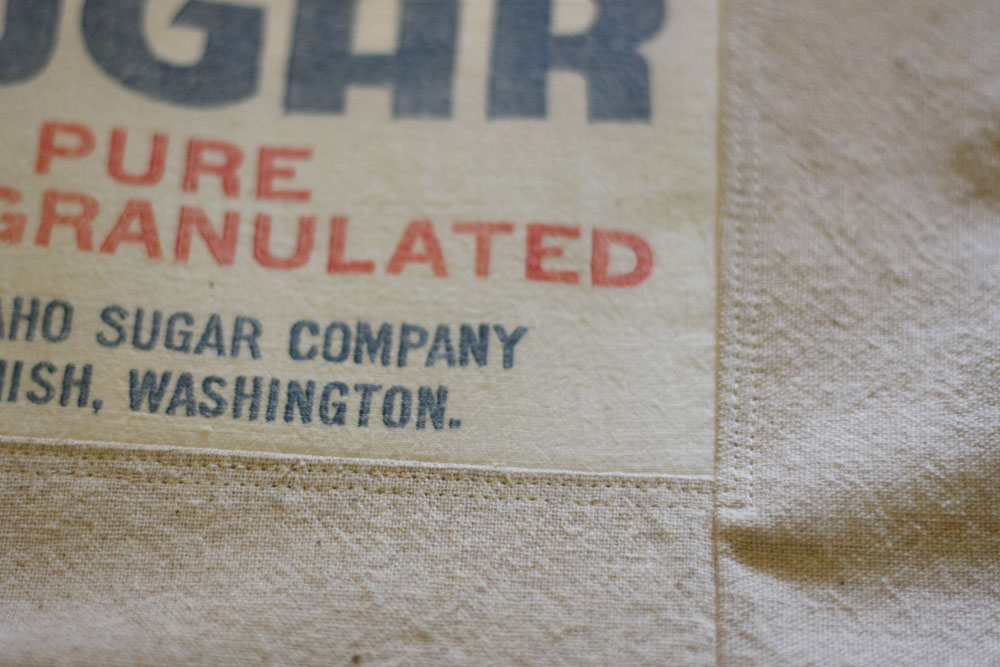
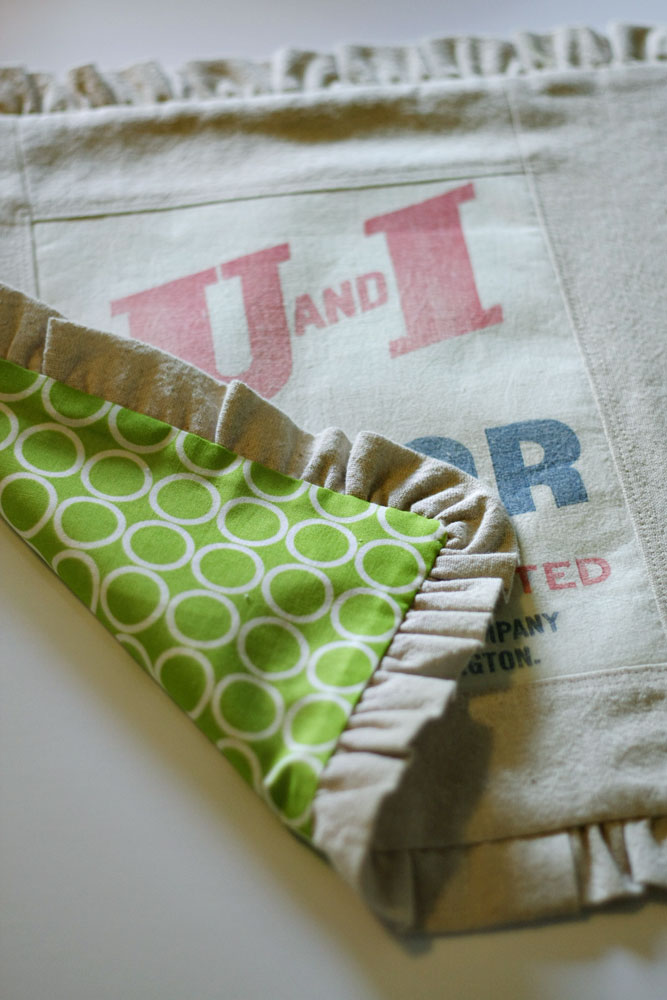
Picking through linens at one of the show booths, I came across this old cloth sugar sack. It was pretty faded and I didn’t really think twice about it until I saw IT … the “U and I, Sugar” or at least that’s how I read it. I instantly had a vision of turning it into something for our master bedroom. I mean come on, how cute is that?!? And it had Idaho {our home state} printed on it too. It was meant to be.
And then it sat in my sewing room … until last week when I decided to finally turn it into a pillow.
This is not really a tutorial so much, but more of an inspirational DIY. I’ll give you the basics on how I created the pillow and you can customize your own from there. There are many wonderful ‘how to’ tutorials on making your own pillows. You can find one with more detail on my blog, Spring Day Pillow Tutorial.

What you need::
- Cloth Sugar Sack {or accent piece}
- Pillow Form {mine is 14×14}
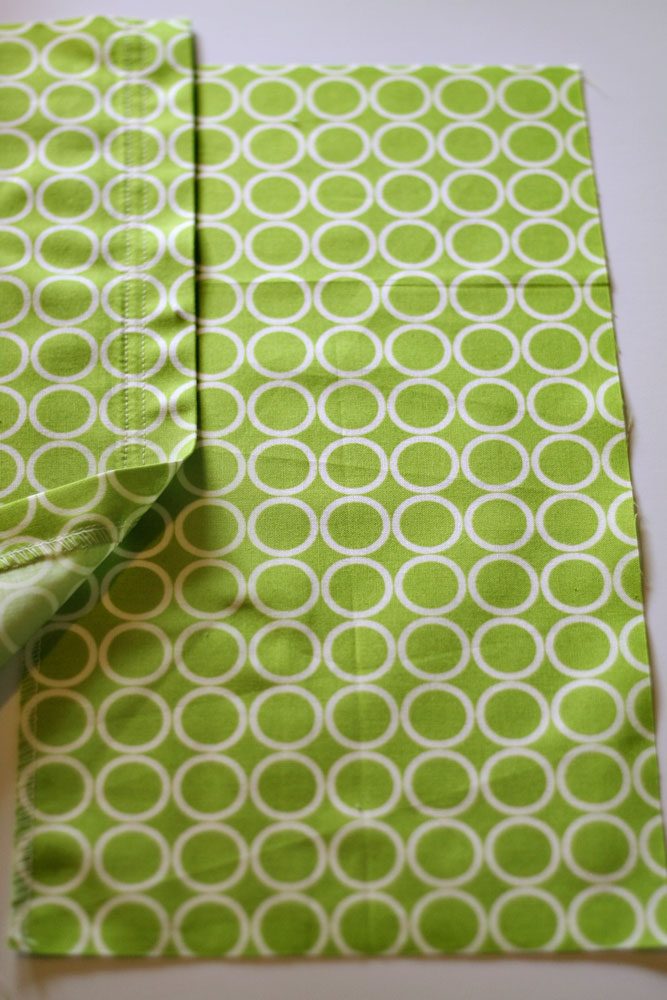
- Front Fabric – 3/4 YD {I used natural cotton/Osnaburg for the sashing & ruffle}
- Back Fabric – 1/2 YD {I used a fun bright geometric print for a little ‘surprise’ when you see the back}

Cut accent piece to fit pillow form. I wanted to get the “U and I Sugar” and distribution printing at the bottom on the accent piece. I trimmed to 8×9.5″. Because this is OLD fabric and well LOVED fabric, I went ahead and ironed a piece of fusible interfacing to the back to give it a little more structure and hopefully a longer life.

Sew sashing pieces to your accent piece to create your pillow front. I like a SNUG fit for my pillow covers so I usually only add .5″ to the pillow form size. So, I created a 14.5×14.5″ front piece.


For the added ruffle {which is totally optional, but in this case added a bit of interest to a rather ‘dull’ color pallet} cut {3} 3″ strips of my front fabric, sewed the short ends together to make a continuous piece, folded it in half, serged the long edge and then ran a gathering/basting stitch. I attached the ruffle to the edge of the front using a 1/4″ SA.
I also added two lines of decorative stitching around my accent piece to make it pop a bit more. I had debated hand stitching around ‘U and I’ with embroidery floss, but decided to leave well enough alone ;).
For the back, I created an envelope closure. You’ll want one piece of your back fabric to be about 4″ wider than the other piece to account for a 1″ hem and overlap. {Mine were 12×14.5″ and 8×14.5″}. Finish one raw 14.5″ edge of each piece with either a serger or zig-zag stitch. On the wider piece, fold the finished edge, 1″ to the wrong side. Top stitch to create a hemmed edge.
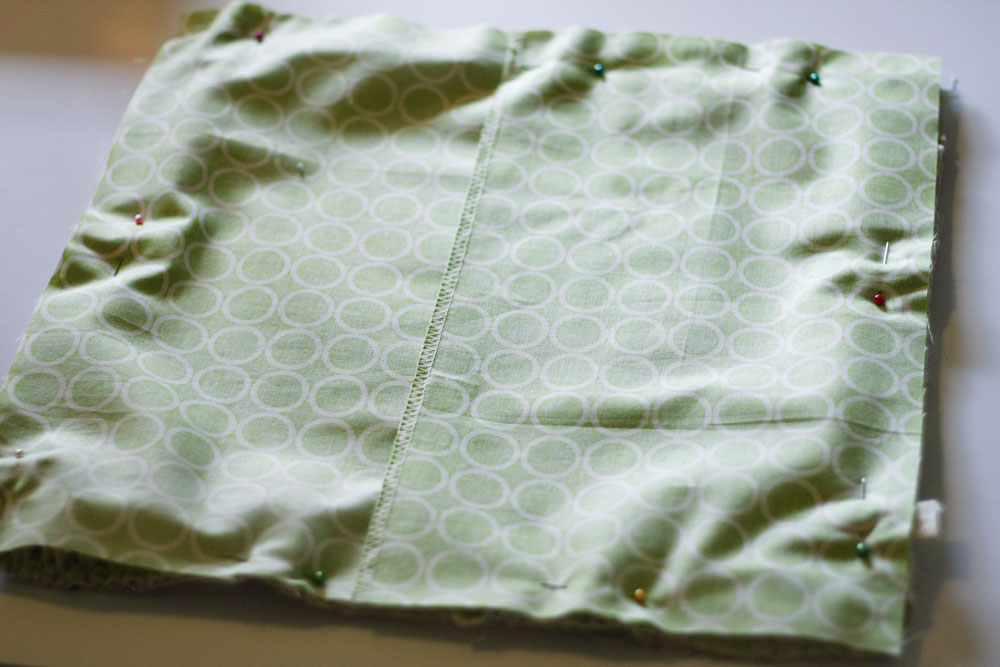
With right sides together, pin your {2} back pieces to your front taking care to keep the ruffle tucked into the center, especially at the corners. You’ll want to first lay down your finished/hemmed edge piece and then overlap your additional piece. Stitch around the entire perimeter, back stitching at the front, at the overlap points and at the end.

Clip corner and turn right side out. Insert pillow form.

Smile and go add your creation to one of your rooms to give it a pop of personality!

For more Knitty Bitties, you can find me rambling on my Blog; trying to keep connected on Facebook; tweeting on Twitter and most assuredly pinning on Pinterest ! Or check out my previous 30days posts here.


Great idea!
Completely cool! Individual decor really makes a home in my opinion. Thanks for sharing your super cute idea! :)
I like the idea you have here…This can help me and even my friends too…
All I can say is how sweet! U and I. . cute.The ruffles are very pretty. I like how this is reversible too. Well done!
I absolutely love that. I grew up in Idaho and my dad grew sugar beets on our farm for U and I Sugar!!!! Brings back lots of memories!!
Gah!! I think you need one of these … how perfect is that!! Thanks for sharing that ;).
Way cute! And I want to go to that show in Washington!
If at all possible you should … the girlfriend I went with has also been to the Country Living fair and said that the quality of the booths at Farm Chicks was better than Country Living!! It was such a fun girls weekend!
I may just have to make that happen!
You know someday I want to go Mom! Just wish they’d be more considerate and not plan it always the last week of school for my kids. ;) Someday……….
ahhhhhh u & i how cute! well done & nice instructions. send this pillow over to my cottage when you’re done with it….i have just the spot. jk! super super cute!
What a cute idea – and I love that what you read from it first was “U and I, Sugar.”