
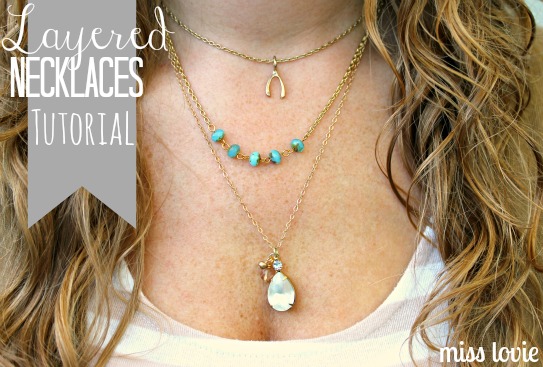
Hello, 30 Days Readers! I’m so excited to share my Layered Necklaces Tutorial with you today! I have always loved the idea of layered necklaces, but I’ve never had any necklaces that worked well enough together to try it out. So, of course, I decided to just make some.

I think these necklaces are just simple enough that they go together without being too match-y. I love how they turned out.
If you look at current trends right now, you’ll see that layering necklaces is a big thing. Here are some ideas I found around the internet…
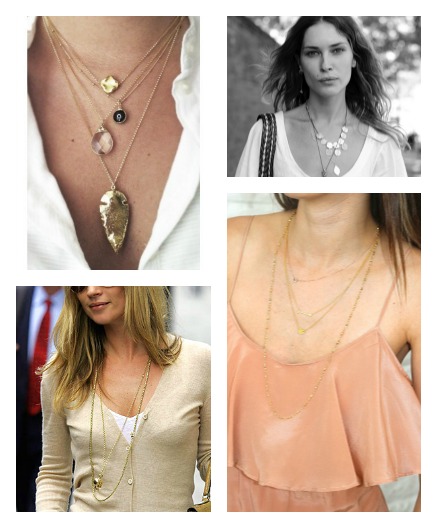
source1, source2, source3, source4
Most of the looks I shared here include pretty dainty necklaces, but some looks I found (especially on celebrities) were a little out of control with too much going on when they included huge chunky/ornate necklaces and then layered more on top. I decided to play it safe and create simple necklaces to layer this time around instead of using anything ornate. Also, since I teach kindergarten, a billion long necklaces flying around would drive me crazy, so I decided to go with layering short ones, instead.

I like using a pendant type of necklace as the focal necklace and then let the other two be just added details that make the look more interesting, but not cluttered. If you would like to make your own, read on!
First grab your jewelry tools.
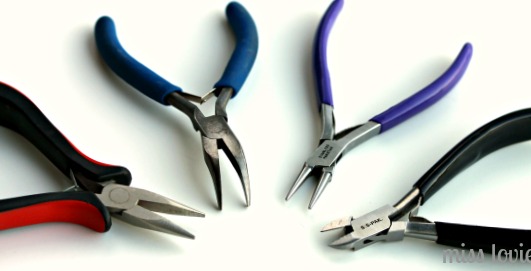
Clockwise from left – Flat nose pliers, bent nose pliers, needle nose pliers, and wire cutters.
***All jewelry materials used in this tutorial (including my tools) can be found at any craft store (Michael’s JoAnn’s, Hobby Lobby), with the exception of the glass drop pendant used in the pendant necklace, which I ordered from the Etsy shop, Way to Bead and the wishbone charm which was a gift. ***
First we’ll make the Wishbone Charm Necklace
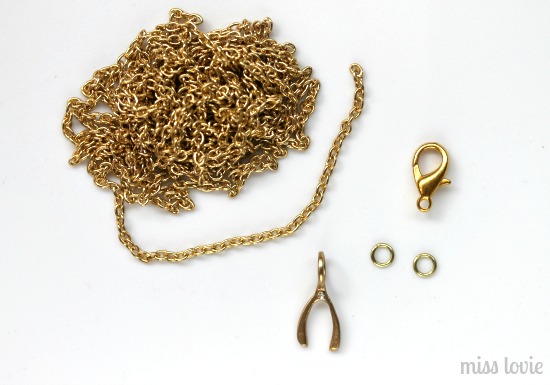
Materials Needed: clockwise from left:
small link chain, lobster clasp, two tiny jump rings, and a charm (any small one will do!)
This is the easiest one to make.
First, cut a length of chain about 14 inches long. On one side attach one of the jump rings (and extra chain if you want to make this necklace adjustable). Do this by twisting open your jump ring with the flat and bent nose pliers, slide on one end of the chain, slide on another small length of chain (optional), and then twist the jump ring closed.
Then (not pictured) slide on the charm to the other end of the chain. Be sure it is facing the correct way.
Next, grab the other jump ring, twist it open with the bent and flat nose pliers, then slide on the other end of the chain and lobster clasp. Twist closed and you’re done with the Charm Necklace!
Now let’s make the Beaded Chain Necklace
Materials Needed-clockwise from left:
small link chain, lobster clasp, jump rings, wire (or eye pins-pictured below), and 5 small beads.
source
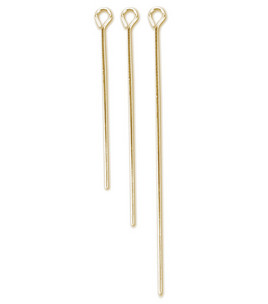
I ran out of eye pins so I made my own, but you can easily buy eye pins at the craft store. If you run out, like me, simply make a simple loop on a piece of wire big enough to create a two simple loops and hold a bead in between. Once you have one simple loop created, slide the bead on top just like you would the eye pin and then continue with the tutorial. Buying your own is probably easier. :)
Next, you’re going to make simple loops above all the beads you add to the eye pins. Above you can see the bead on top of an eye pin. You will make a simple loop above this bead so that there will be two simple loops on each side of the bead. You will make 5 (double simple loop) beads for this necklace.
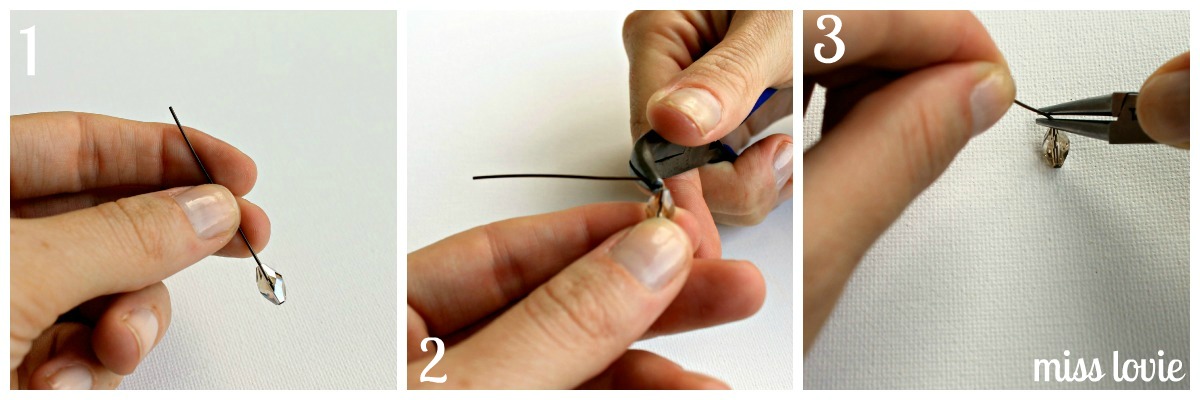
To make a simple loop, bend the wire directly above the bead at a 90 degree angle with the bent nose pliers, then place the round nose pliers as close to the bead as possible in that bend and wrap the wire over the top or the pliers.
Then re-position the round nose pliers and wrap the wire around the bottom of the pliers, completing the loop. Cut off the excess wire with the wire cutters where the loop connects.
After all your simple loops are made, twist one open with your bent nose pliers and hook it onto another, then twist it closed.
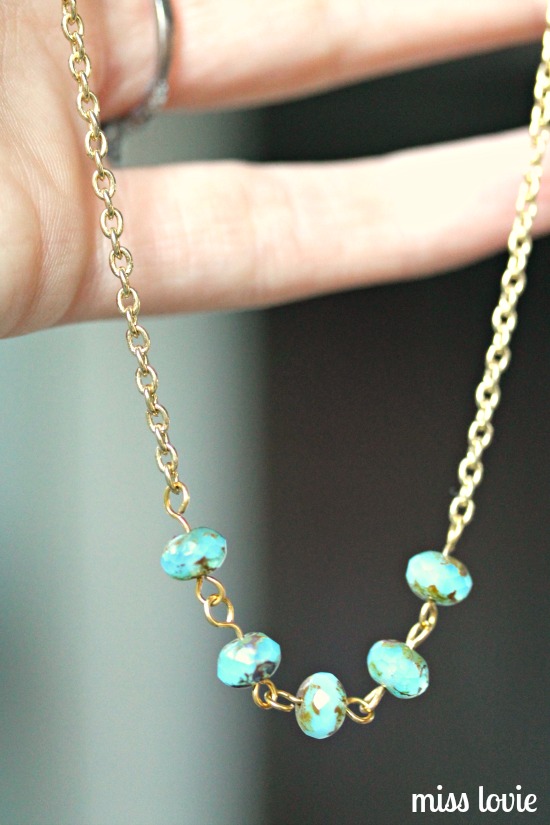
Continue this process until you have a beaded chain like this!
Then connect your beaded chain to a 14 inch length of chain cut in half, connecting a section of chain to both ends of the beaded chain as shown above. Use jump rings to attach closure as shown in the Charm Necklace Tutorial.
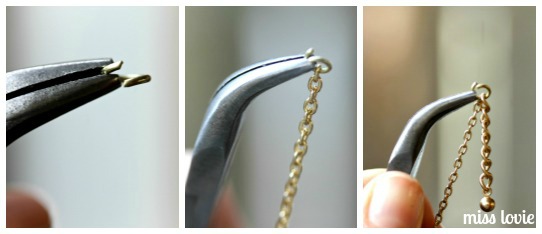
Now let’s make the Pendant Necklace!
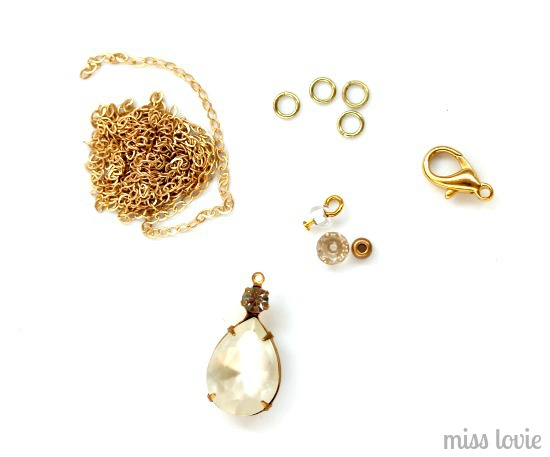
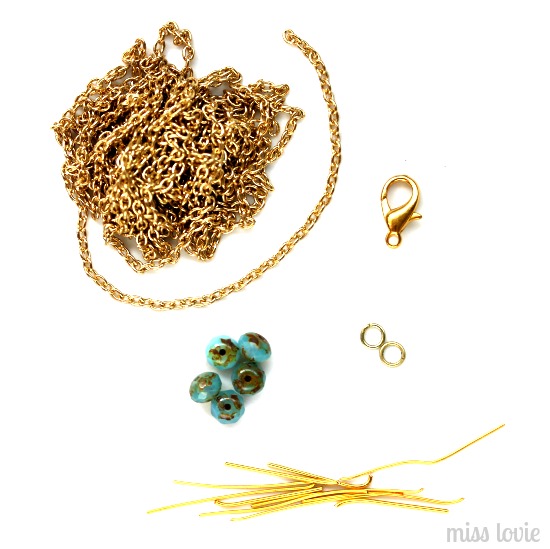
Materials Needed-clockwise from left: small link chain, jump rings, lobster clasp, seed beads and another small-ish bead, and some sort of drop pendant. As stated earlier, I ordered this pretty glass pendant from the Etsy shop, Way to Bead. If you’re going to make a lot of jewelry, the Jewelry in Supplies section on Etsy is a great resource.
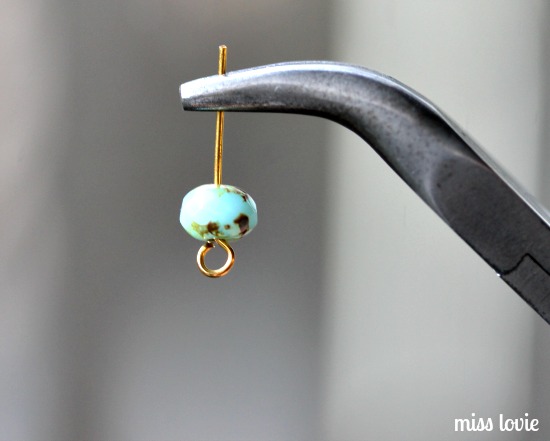
To create the pendant necklace, you will first need cut a 18 inch length chain and set aside. Then you need to create simple loops above the two seed beads (not pictured) and a wrapped loop around the other small-ish bead. See below for how to create a wrapped loop.

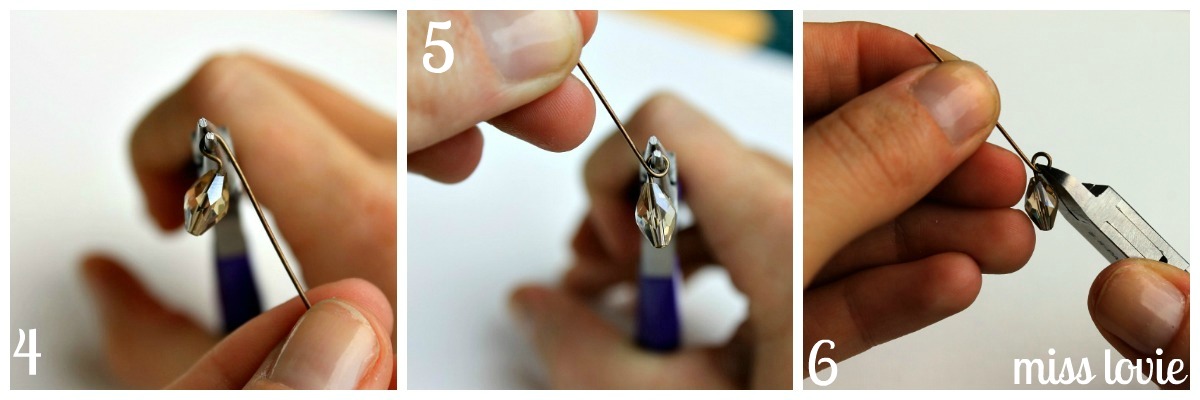
You make a wrapped the same way you would a simple loop except instead of bending the wire directly above the bead, you leave a tiny bit of space between the bead and the bend. Then create a simple loop like always- bend the wire directly above the bead at a 90 degree angle with the bent nose pliers, then place the round nose pliers in that bend and wrap the wire over the top or the pliers. Then re-position the round nose pliers and wrap the wire around the bottom of the pliers, completing the loop.
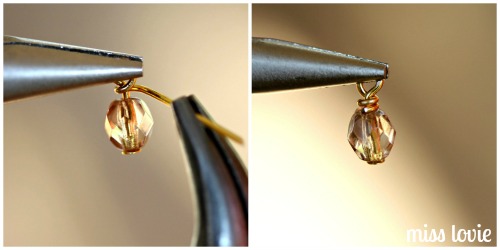
Then instead of cutting off the excess wire, grasp the loop with your flat nose pliers and grab the excess wire with the bent nose pliers and wrap the wire around itself under the loop. Cover the exposed wire under the loop and then cut off the excess. Tuck the loose end in with your bent nose pliers.
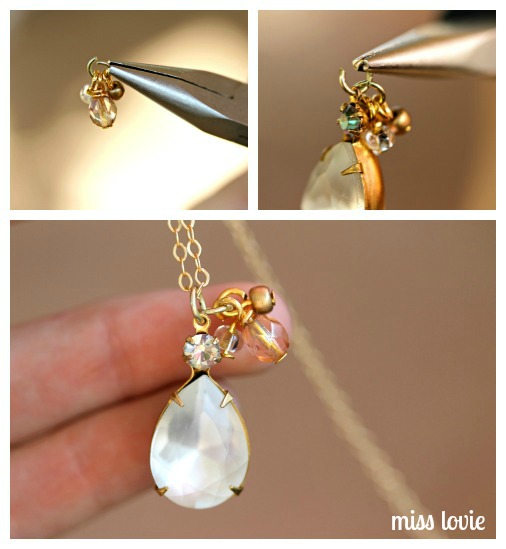
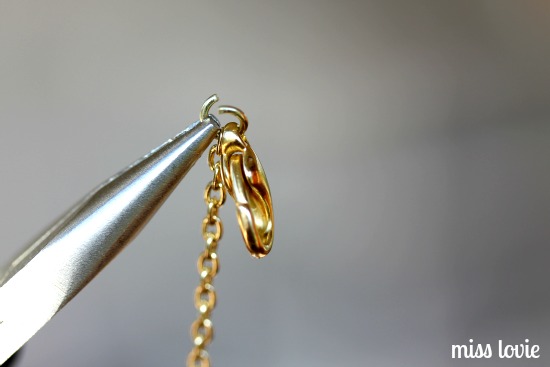
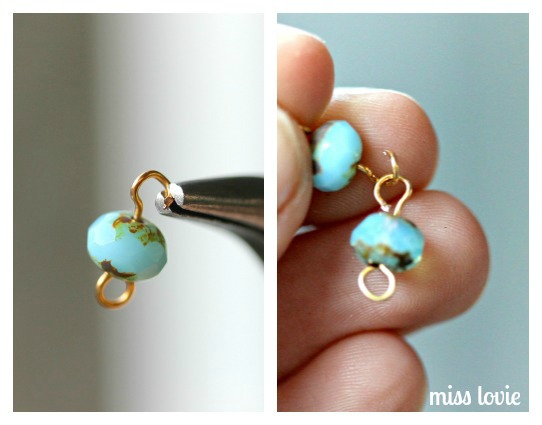
After all loops are created, open a jump ring and slide all three on it and then close the jump ring (first picture above). Then open a second jump ring and slide on the pendant and then the first jump ring with beads attached, then twist that jump ring closed. I placed my beads behind my pendant because I didn’t want them to detract from the pendant itself-as shown in the second picture above. Sometimes, however, you may want them to sit on top of the pendant so you would place the jump ring in front. It all depends on what kind of pendant you are working with. This jump ring is the one you will slide your chain into (with the other jump ring behind the pendant) – as shown in the bottom picture above.
Then simply attach the closure using jump rings and you’re done with the last necklace!
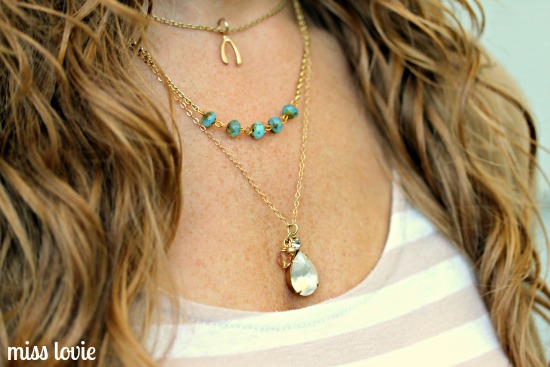
Put them on and enjoy those gorgeous layers!
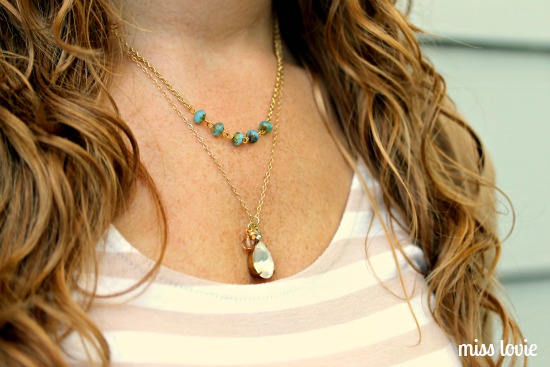
You could also go for an even simpler look, of course, with just layering two necklaces!
I hope you loved this project! I can’t wait to try out this layering idea with other types of necklaces, too!
If you enjoyed this tutorial, be sure to check out my other jewelry projects on 30 Handmade Days or go check out my blog for LOTS more jewelry projects! Thanks for reading!
I linked this project up at some of these fun parties.


Avoid conditioners with sulfates and keep one protein based conditioner at
hand whenever you experience excessive shedding, breakage and lost moisture.
Prepare a paste of gram (Cicer arietinum) flour in raw milk.
It becomes difficult to treat these scars and therefore acne must be
treated with the help of oral drugs and topical creams and lotions.
Look into my website – toppik hair products review
Okay, so you have a decent starting portfolio of ‘glamour photography’ shots you’ve taken and assembled to show the possibilities
of your range and depth of photographic artistry. Dress
up in peacock blue, soft pinks and bright orange sexiest colours
of this season. Fortunately, in this day and age of the Internet and the increasingly diverse global fashion market, you
certainly don’t need to go all the way to Japan to get the very latest in Japanese
fashion.
Review my web page – celebrity solstice dress code
Okay, so you have a decent starting portfolio of ‘glamour
photography’ shots you’ve taken and assembled to
show the possibilities of your range and depth of photographic artistry.
Indeed, Roberto Cavalli has drawn its own spot as one of Hollywood’s most sought-after Italian fashion brands.
Make room for your trendy new wardrobe by going through your old
clothes and getting rid of unwanted clothes.
My homepage :: boutique dresses for wedding guests 2014
Finding the right house for your family means finding the best nest will help you to take care of your kids better.
Buying your own home is one of the biggest investments and
commitments that most people will experience in a lifetime.
Average cost of home survey report is $530 (£350).
My webpage storage units martin county fl
‘ Propecia is meant to be used in men suffering
from male pattern baldness after consulting a doctor.
A study published in The Journal of Dermatology revealed that
chlorine causes discolouration and a change in hair texture.
Because of this, you need to clean your hairs and make them tidy at all the times.
Also visit my web page … best hair growth for women
The older you get, the more likely it is that you’ll start to experience thinning
and hair loss. Used in determining menstrual
irregularities, menopause, pituitary problems, suspected gonadal failure and infertility tests.
These products work the best in younger men who have only
begun to lose their hair, and in those whose androgenetic alopecia is still in the early stages where
hair is thinning but continuing to grow.
Here is my site :: laser capillary removal
Plastic surgery has become immensely popular in the last few years.
Treatments for Treacher Collins syndrome commonly require surgery to
remove the area in which blockage occurs. Women are more
likely to undergo plastic surgery but some males also undergo this medical procedure if
they think they need to have some major changes in their
body.
Stop by my blog plastic surgery simulator
I’m not that much of a internet reader to be honest but your sites really nice, keep it up!
I’ll go ahead and bookmark your site to come back later on.
All the best
I love the pendant necklace! So pretty :) I had trouble finding that specific bead in the store, any way you could give a direct link? I hope it’s not sold out :(
xoxo thanks!
That is beautiful! How fun… Thank you so much for coming to share at Super Saturday Show & Tell! I’d love to have you come and share again today http://www.whatscookingwithruthie.com Have a great weekend! xoxo~ Ruthie
What a great tutorial! I have a good friend that makes beautiful jewelry and I have always been envious of her talent!
I love this look so much and I’ve made a few similar, but the chains always seem to get all tangled up in each other, is there a way to prevent this, without having to take the necklace off and detangle umteen times a day?