
Hi Thirty Handmade Days Readers! I am thrilled to be over here today. This is one of my favorite blogs and I am tickled to be a part of it today. Normally I can be found over at my blog Just Another Day in Paradise.
My little spot in blogland to create, craft, cook, and all together go crazy. I am the momma to three Little Men, so when I am not creating I am cleaning up dirt, toys, diapers, and food. I am loving life and each day I am grateful for another day in my own little paradise. I would love for you to come on by. Today I have a tutorial on how to take 2 simple t-shirts easily found at a craft store, like JoAnn’s

What you will need: 2 craft t-shirts, one in your size and one in an XLarge one of your own tees to use as a pattern Lay out the craft t-shirt that is your current size. Lay out your own tee over it. Trace one edge, being generous by about an inch.
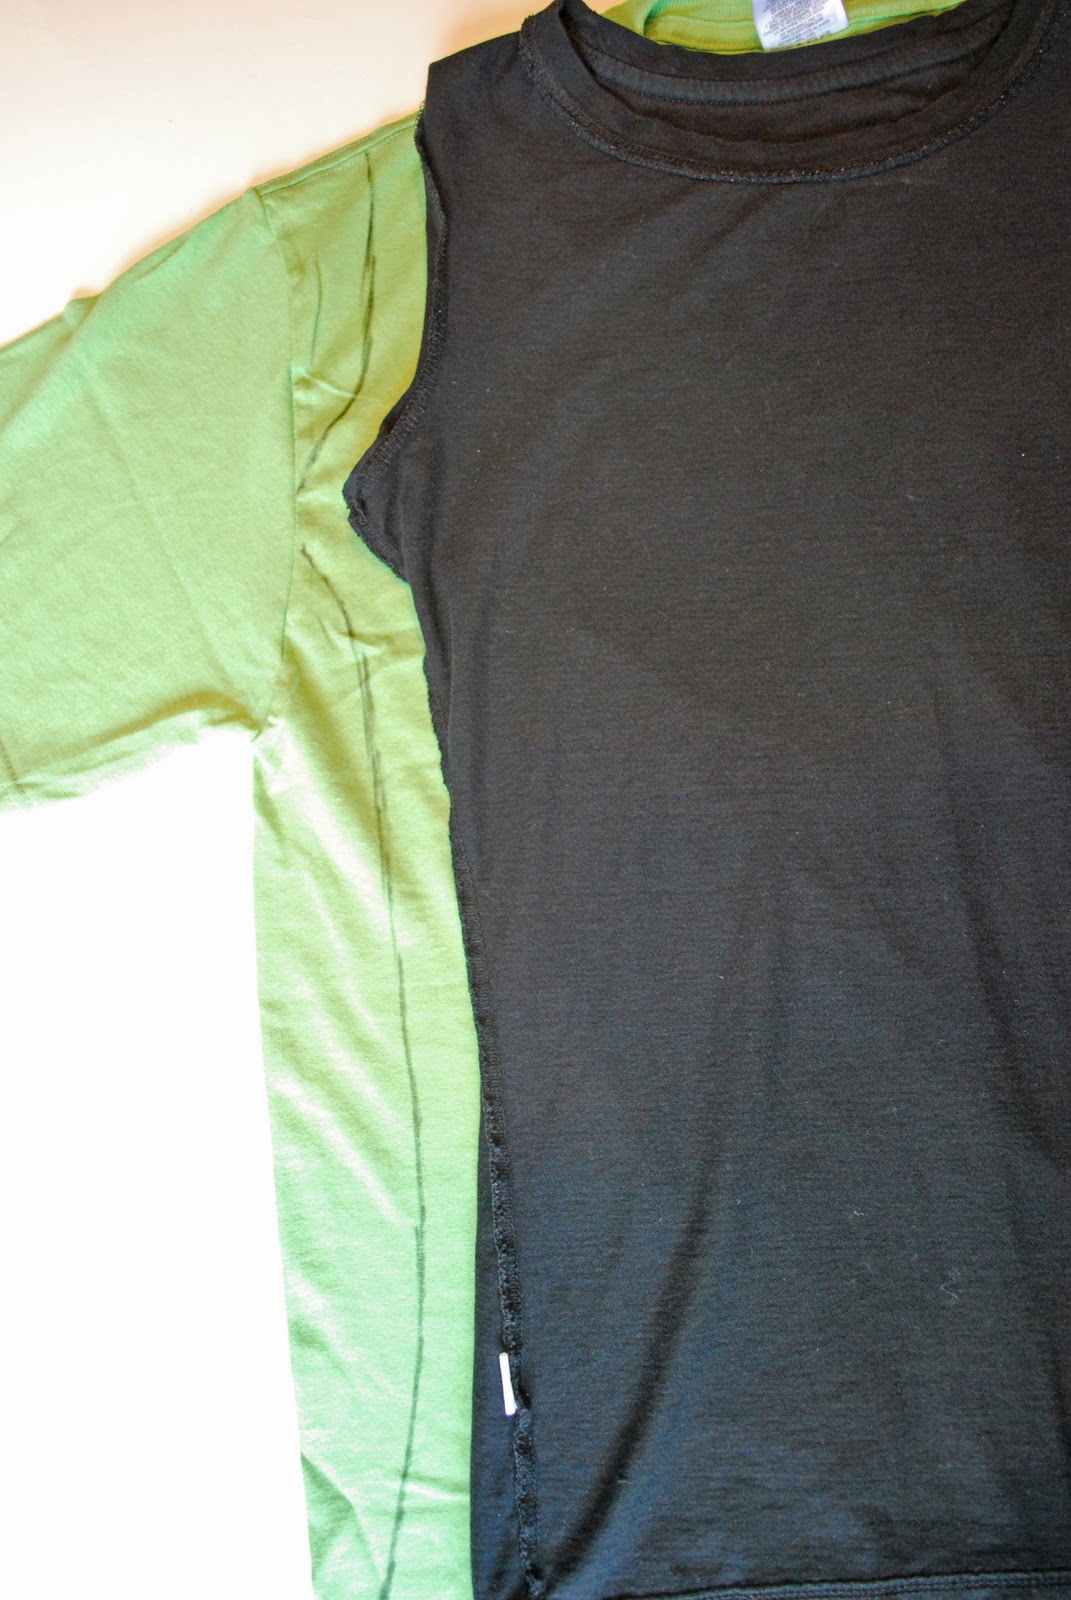
In order to assure symmetry, I folded over the shirt and then cut out the shape of my shirt.
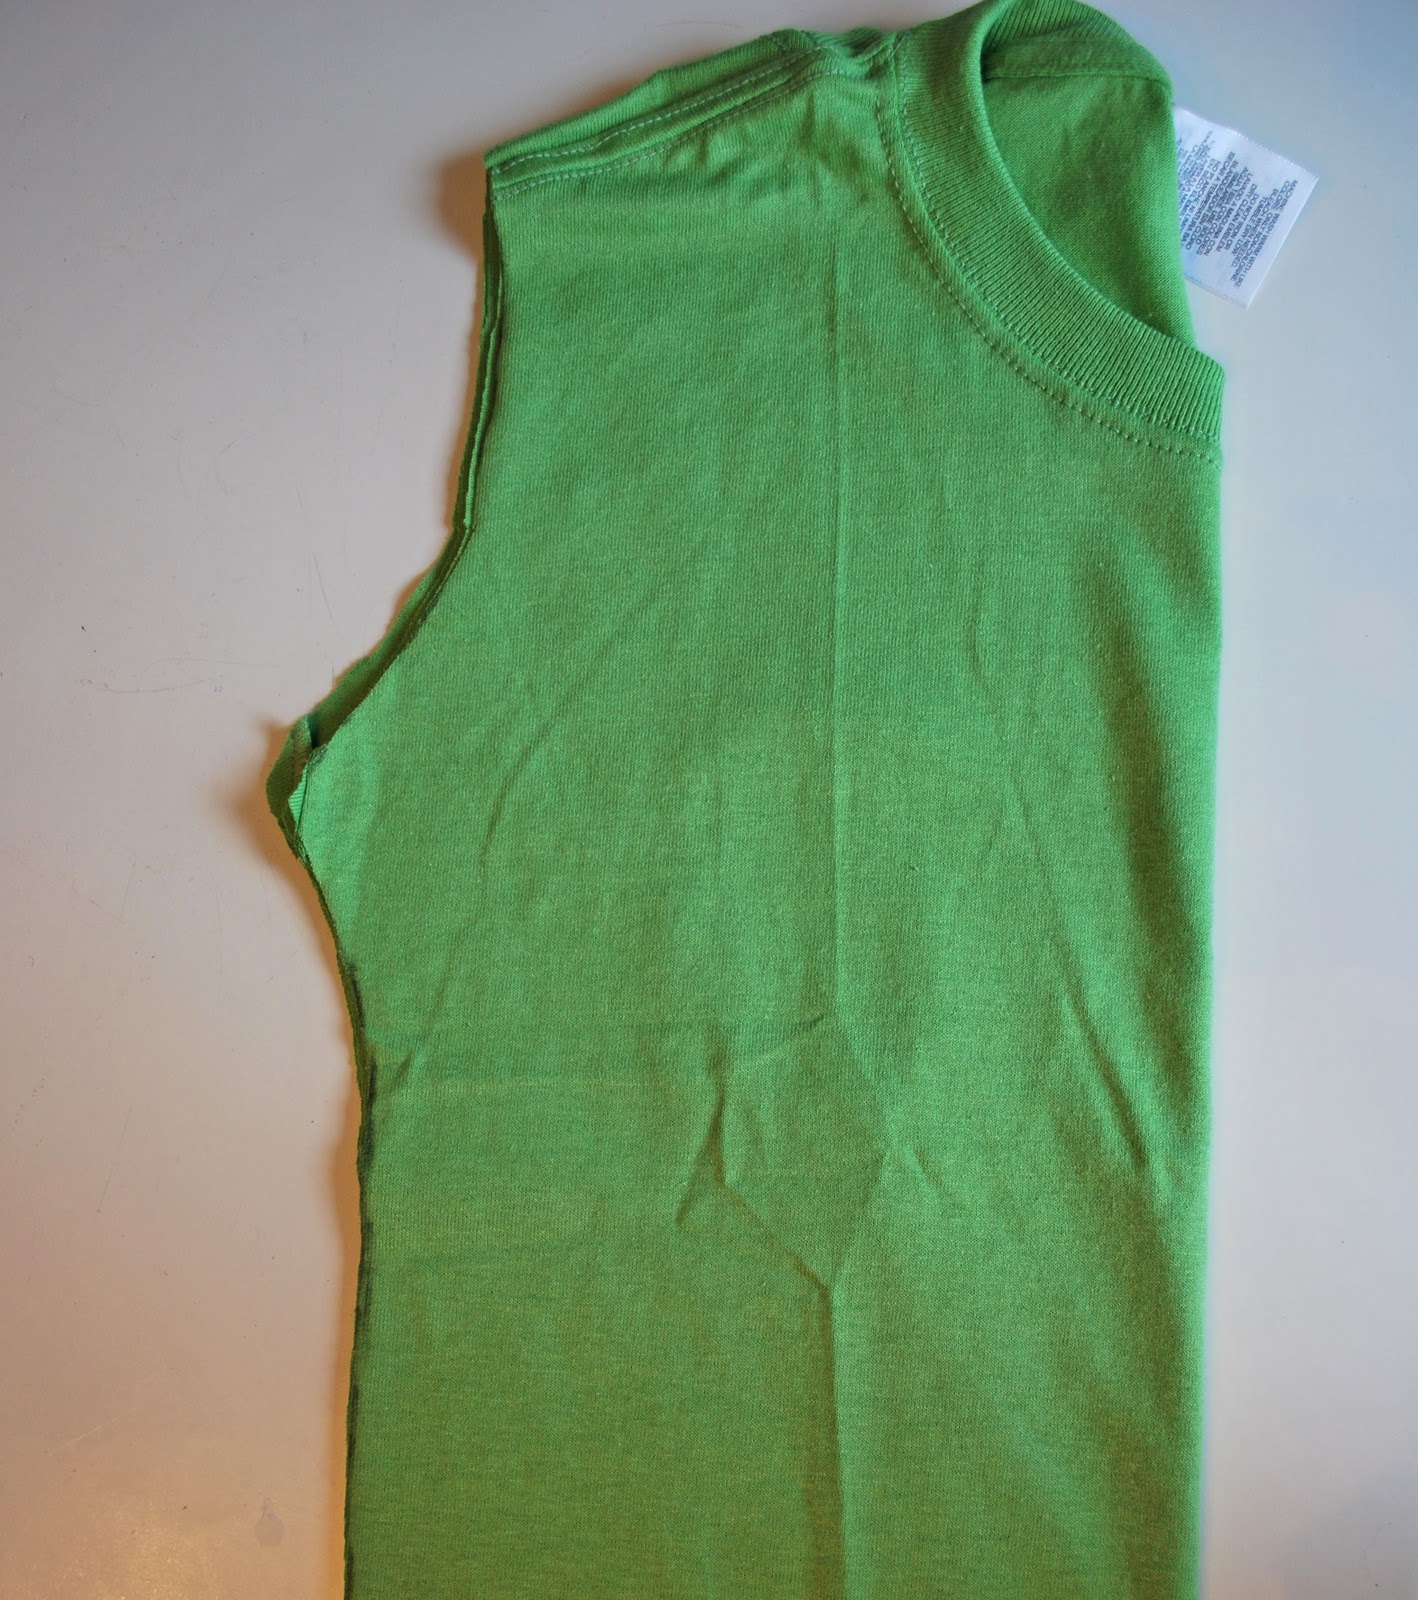
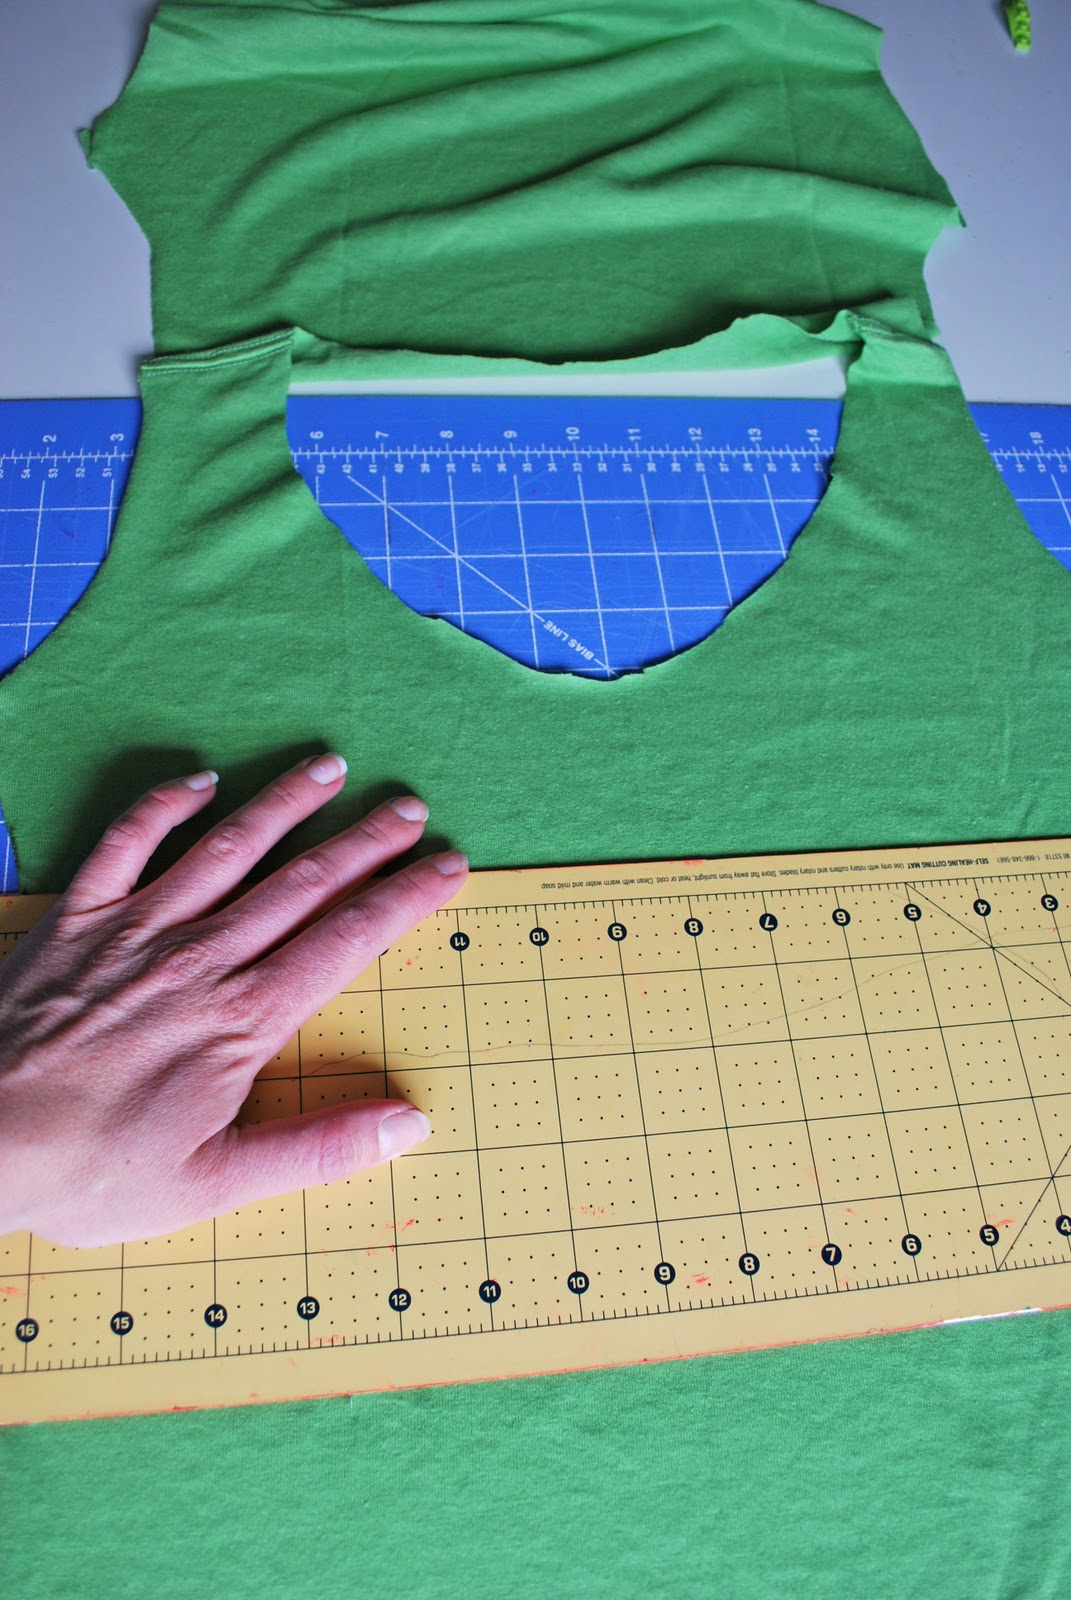
Next it is time to cut out the new neckline. The best way to do that is to fold the shirt in half so the neckline lies like this.

Draw a line marking your new neckline. You can play around where you would like it to fall.

Cut out your new neckline.

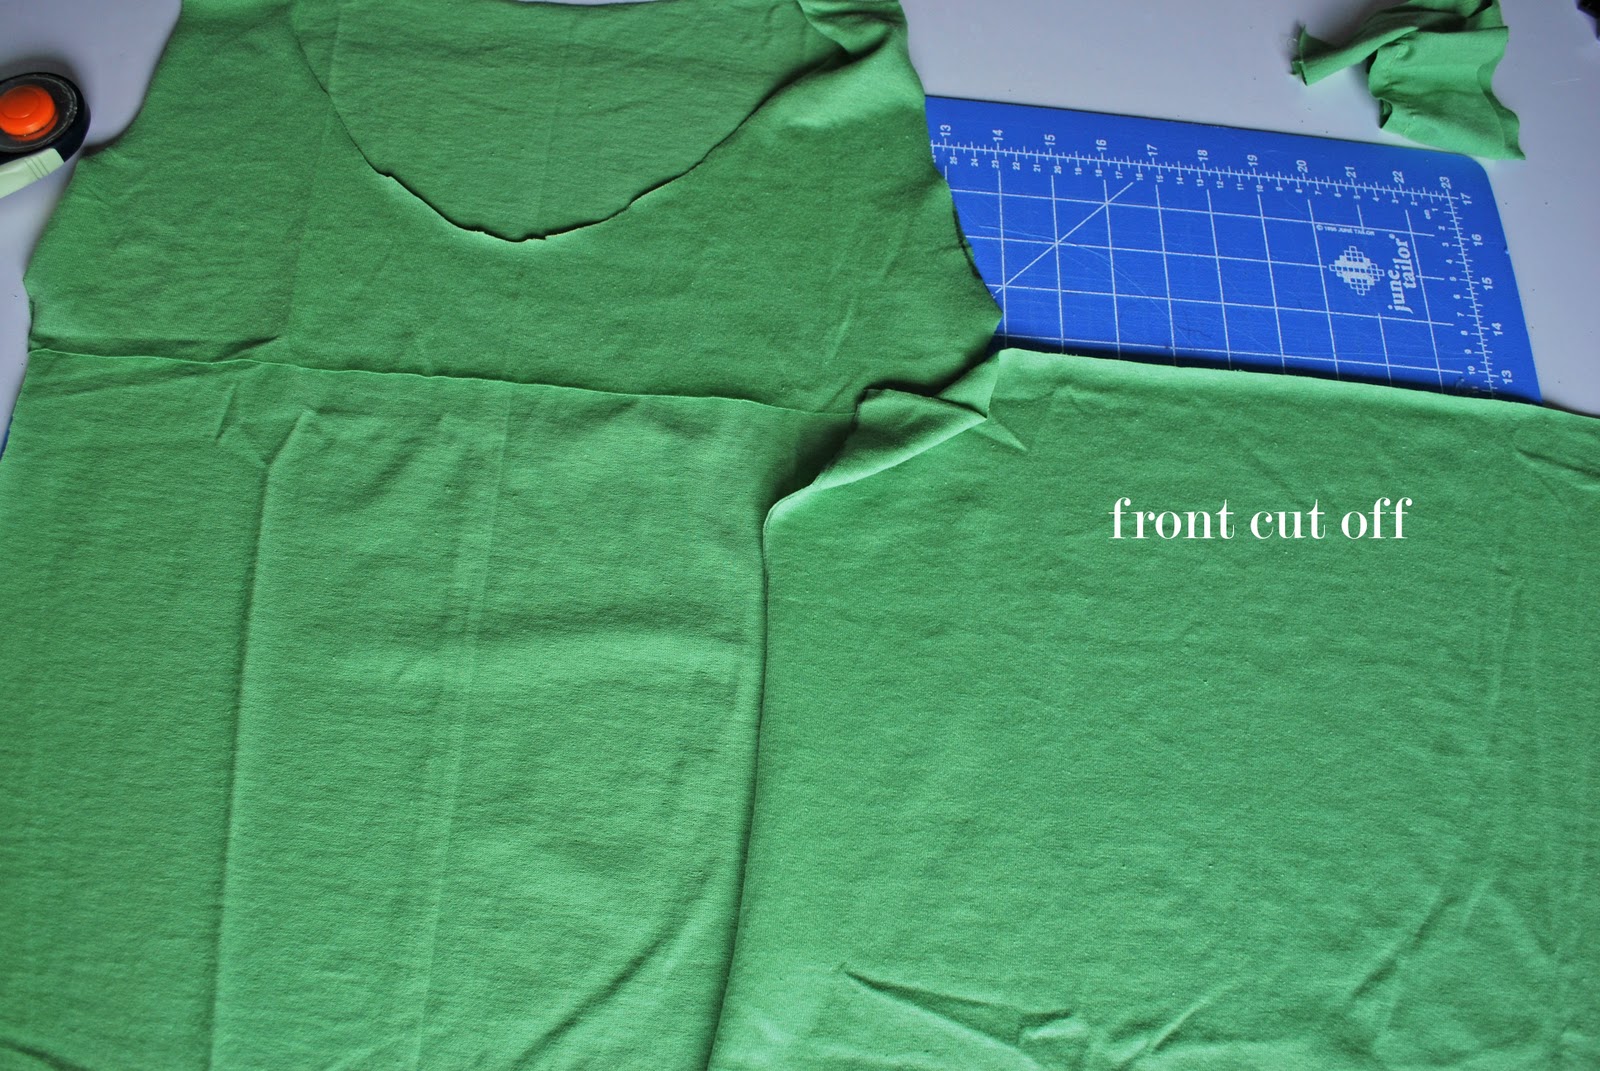
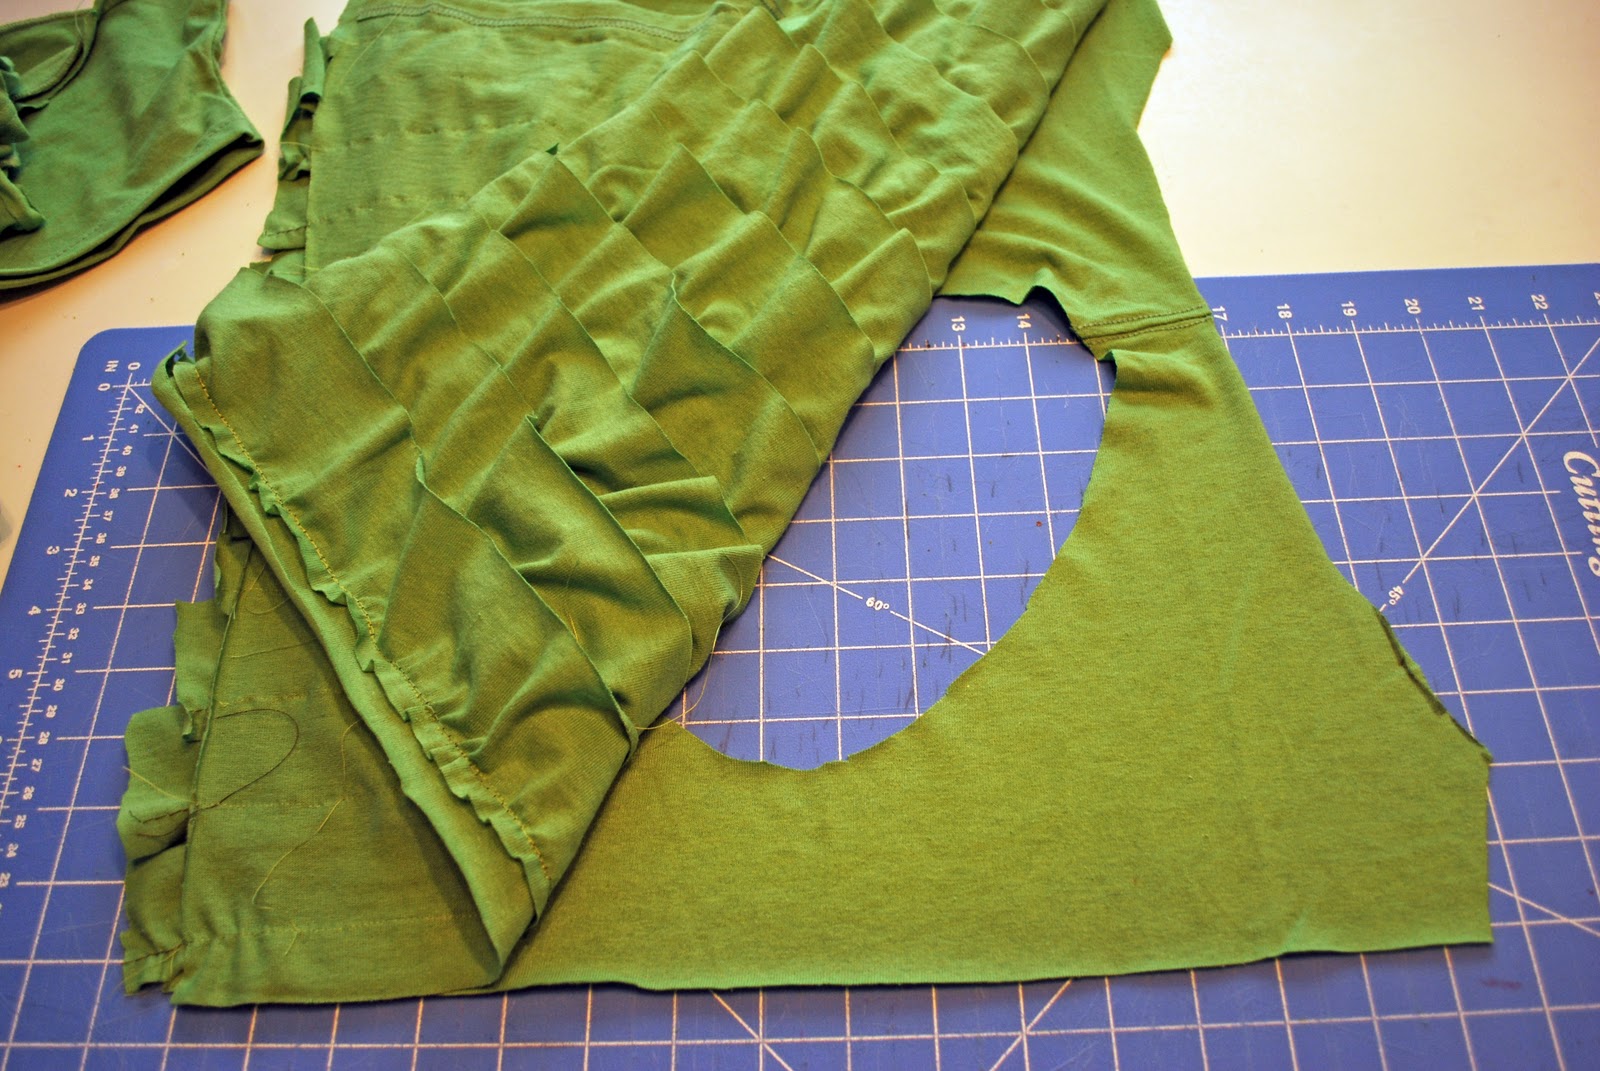
Before you can attach any ruffles you need to cut the front of the shirt so that you are creating a panel to attach the ruffles to. Measure about 3-4 inches down from the bottom of the scoop in the neckline. Using a straight edge, cut off creating your panel.
So there will be the original shirt with a new cut off section.
Now it is time to make some ruffles. Grab your XL shirt. Cut off the sleeves and the top of the shirt at the neckline.

Next you will cut 2 1/2″ wide strips. If you left your shirt folded, then you will cut each strip in half.

Using a basting stitch, loosely ruffle each strip.
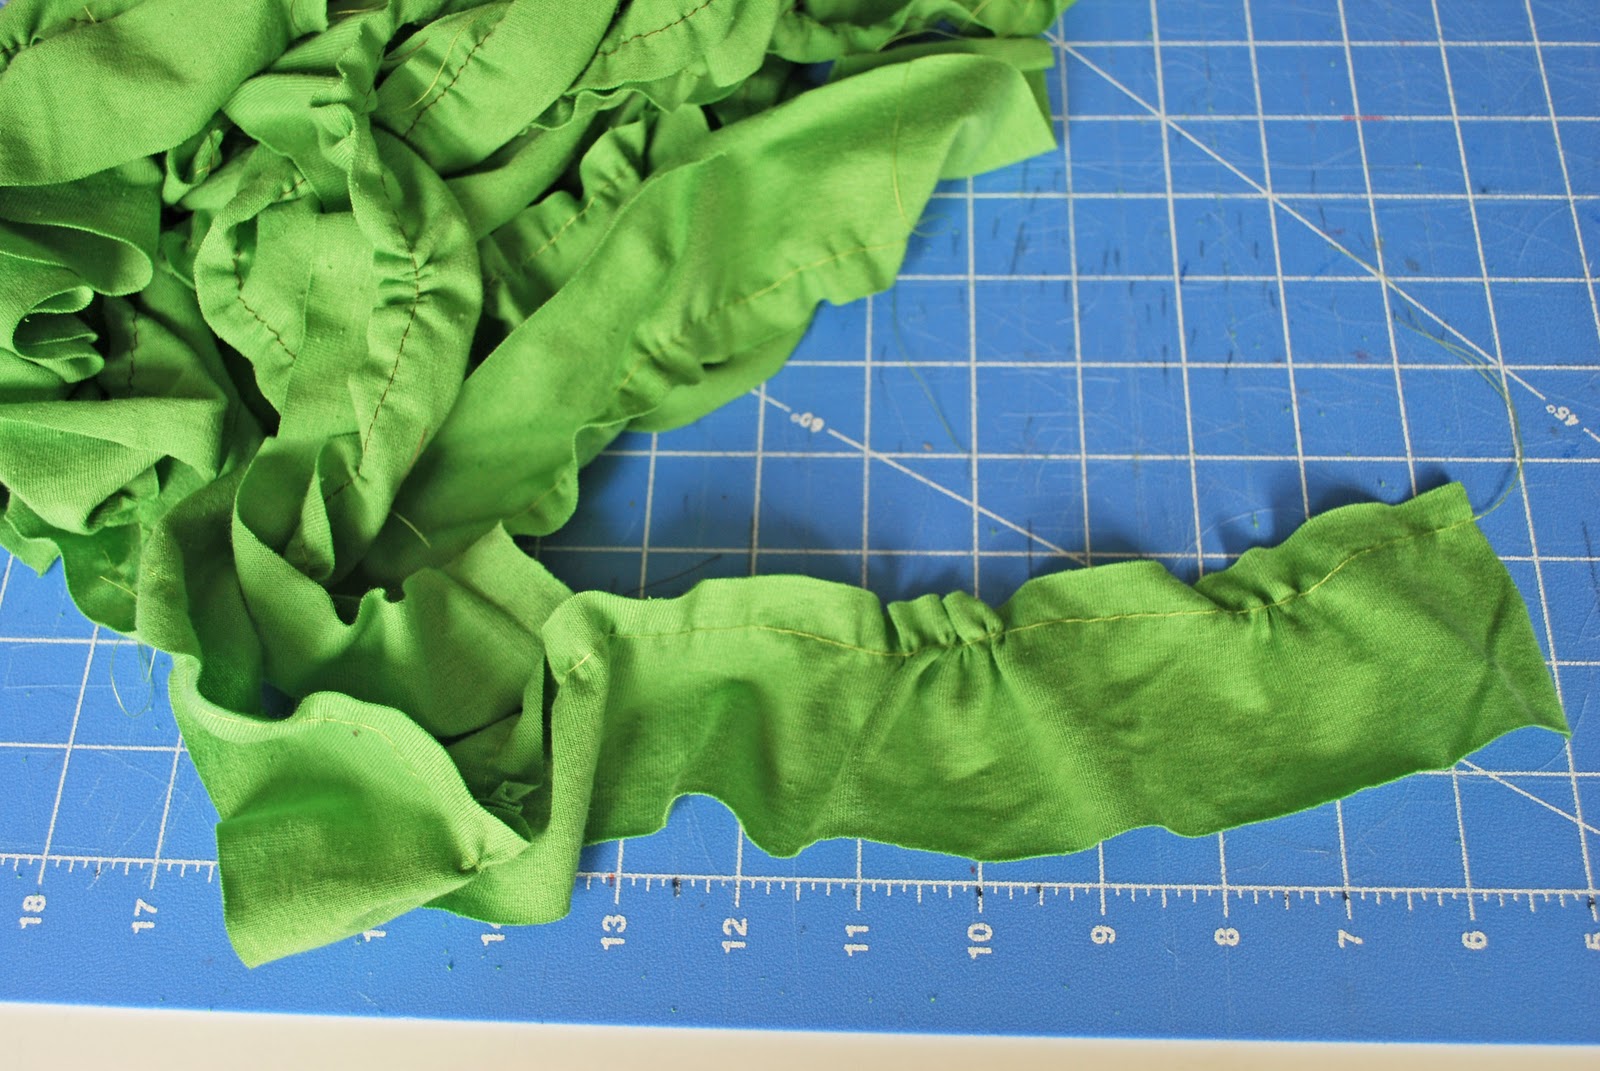
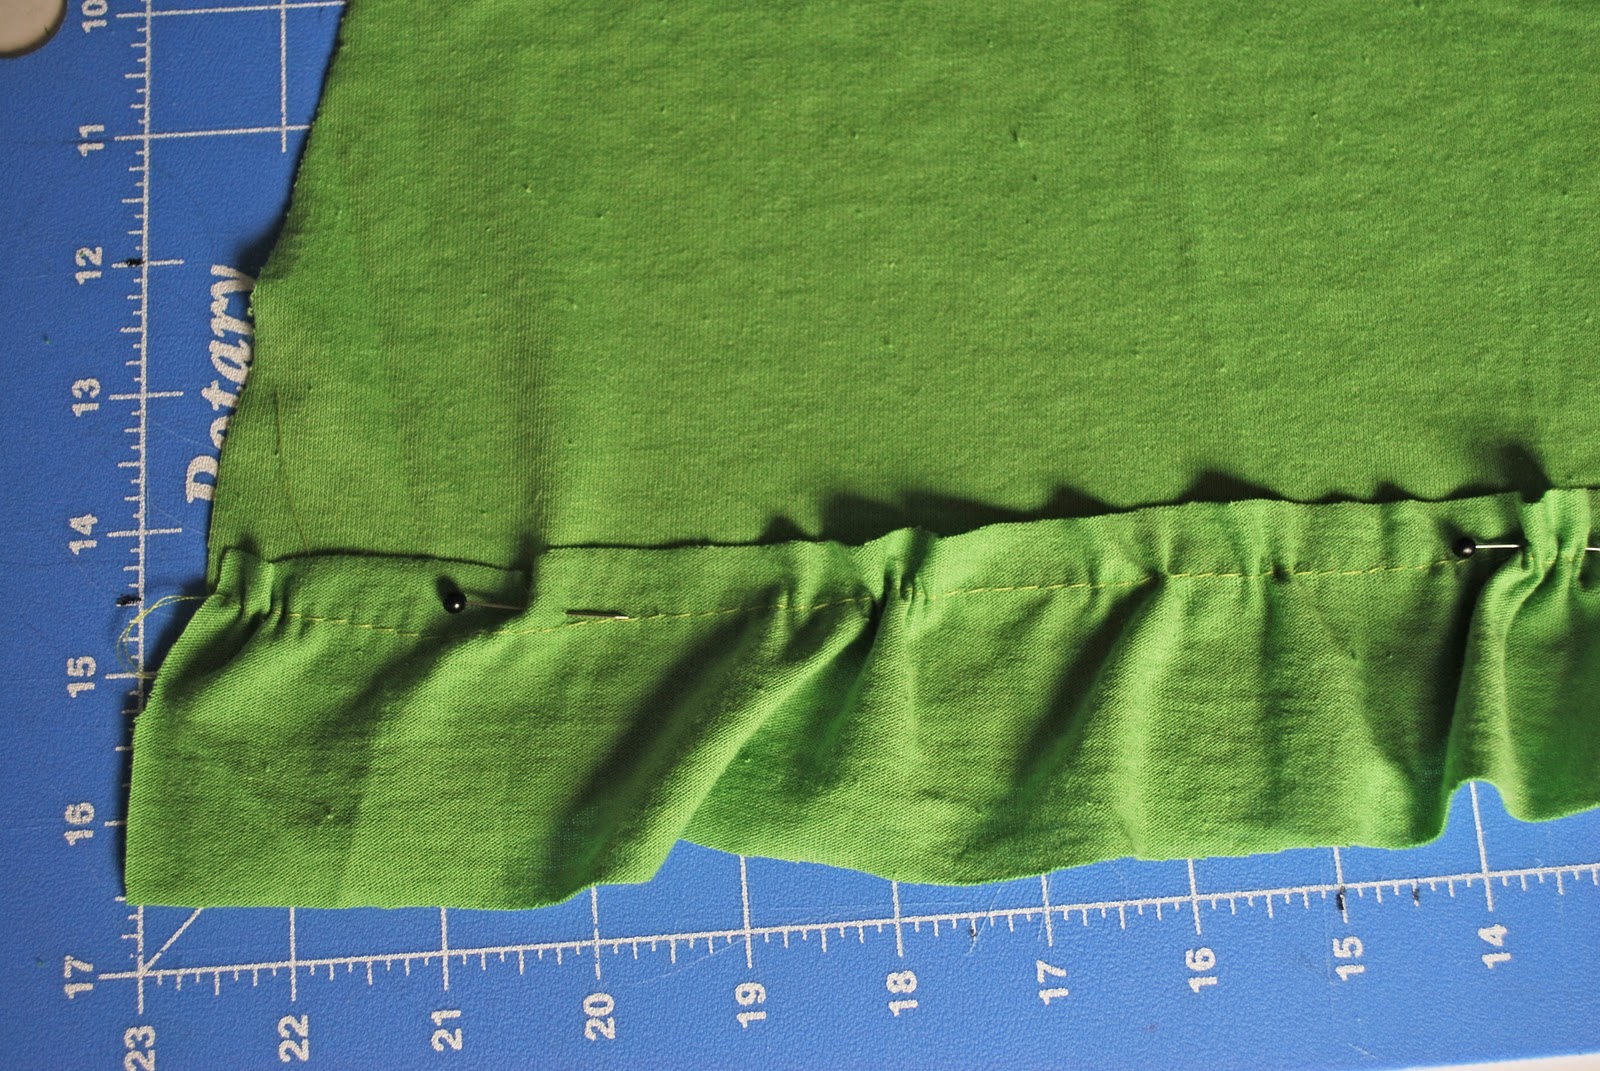
Make sure that each ruffle is loosely gathered. The strips need to be long enough to span the length of your shirt panel. Starting at the bottom, pin on one ruffle at a time and then sew in place. Continue to pin and sew, overlapping the ruffles enough so that you can not see where sewed them on.
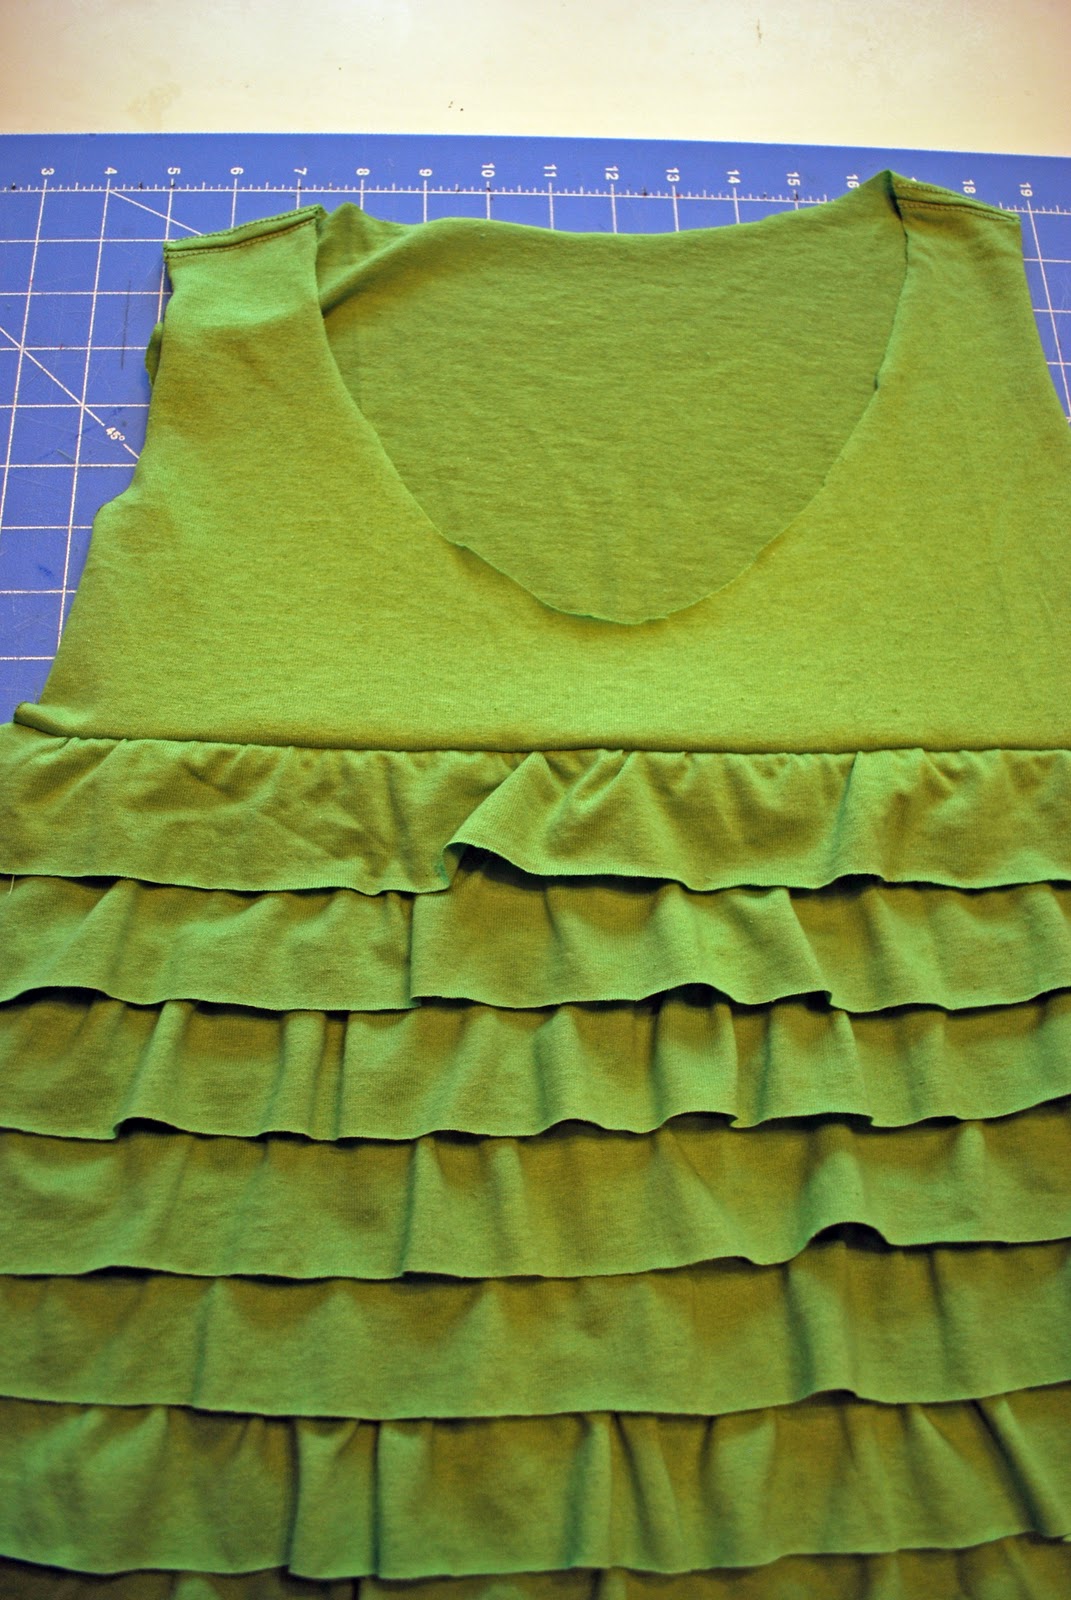
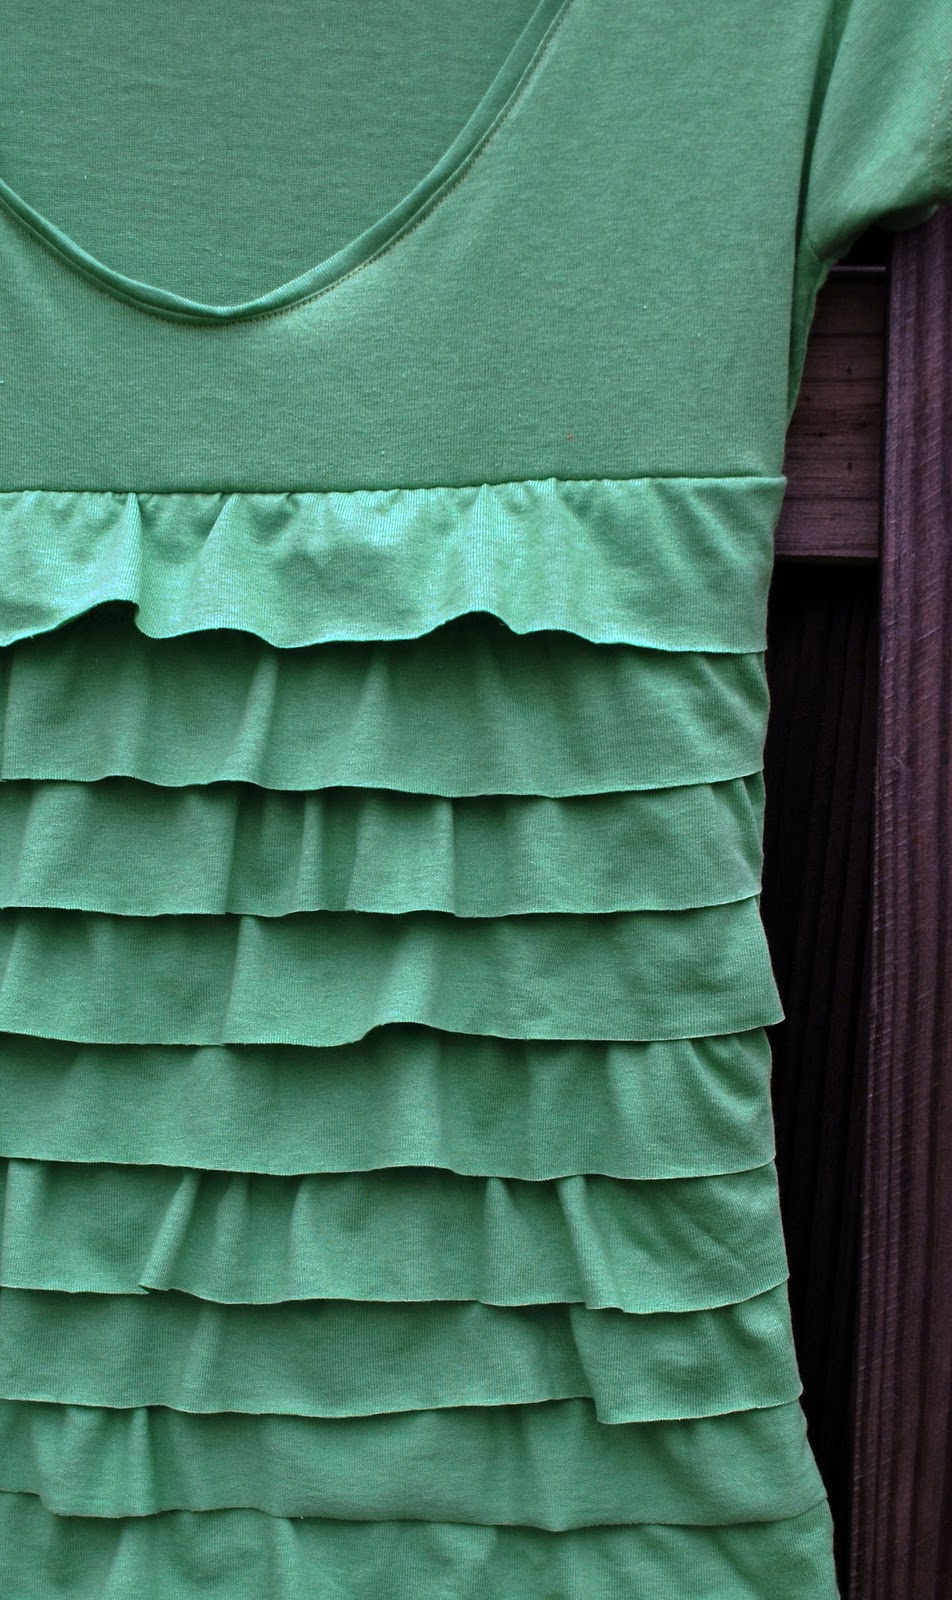
When all of your ruffles are sewn on (approximately 13), it is time to attach the shirt panel back to the front of the shirt. Lay the top edge of the panel on the front of the shirt matching to the edge you cut it off of. Right sides facing. Pin in place. Sew making that the where the ruffle was sewn on is not going to show.
Your new shirt front should look like this-
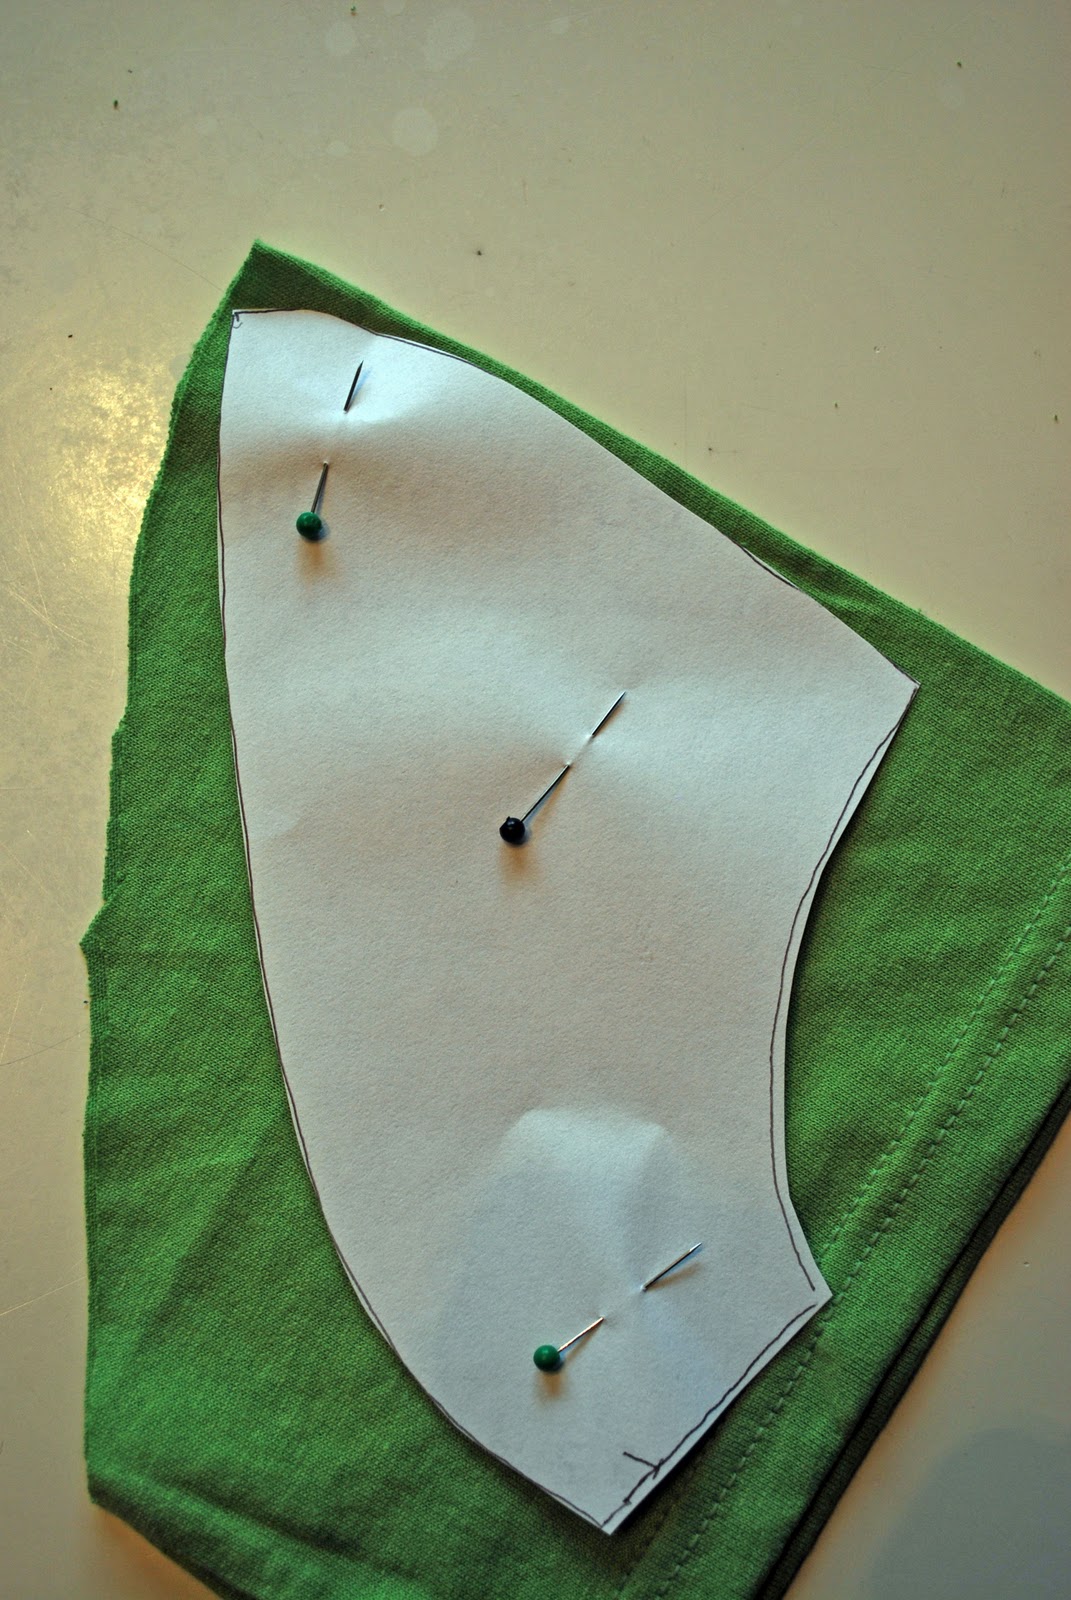
Time for the sleeves. Draw a pattern from the sleeve on your original tee. I roughly outlined around my tees sleeve without cutting it loose from my original tee. Pin the pattern to the cut off sleeves from either shirt. Line up the top of the sleeve pattern with the top of the sleeve. Cut around the pattern without cutting the top of the sleeve.
Finish the sleeve edge before attaching to the shirt. Fold over the edge twice and iron. Then finish the edge by sewing a double stitch.
To attach the sleeves, pin the sleeve in place making sure the top of the sleeve matches up to the shoulder seam of the original shirt. Sew with a 1/2″ seam allowance.

Now you have a sleeve. Repeat with the other sleeve.
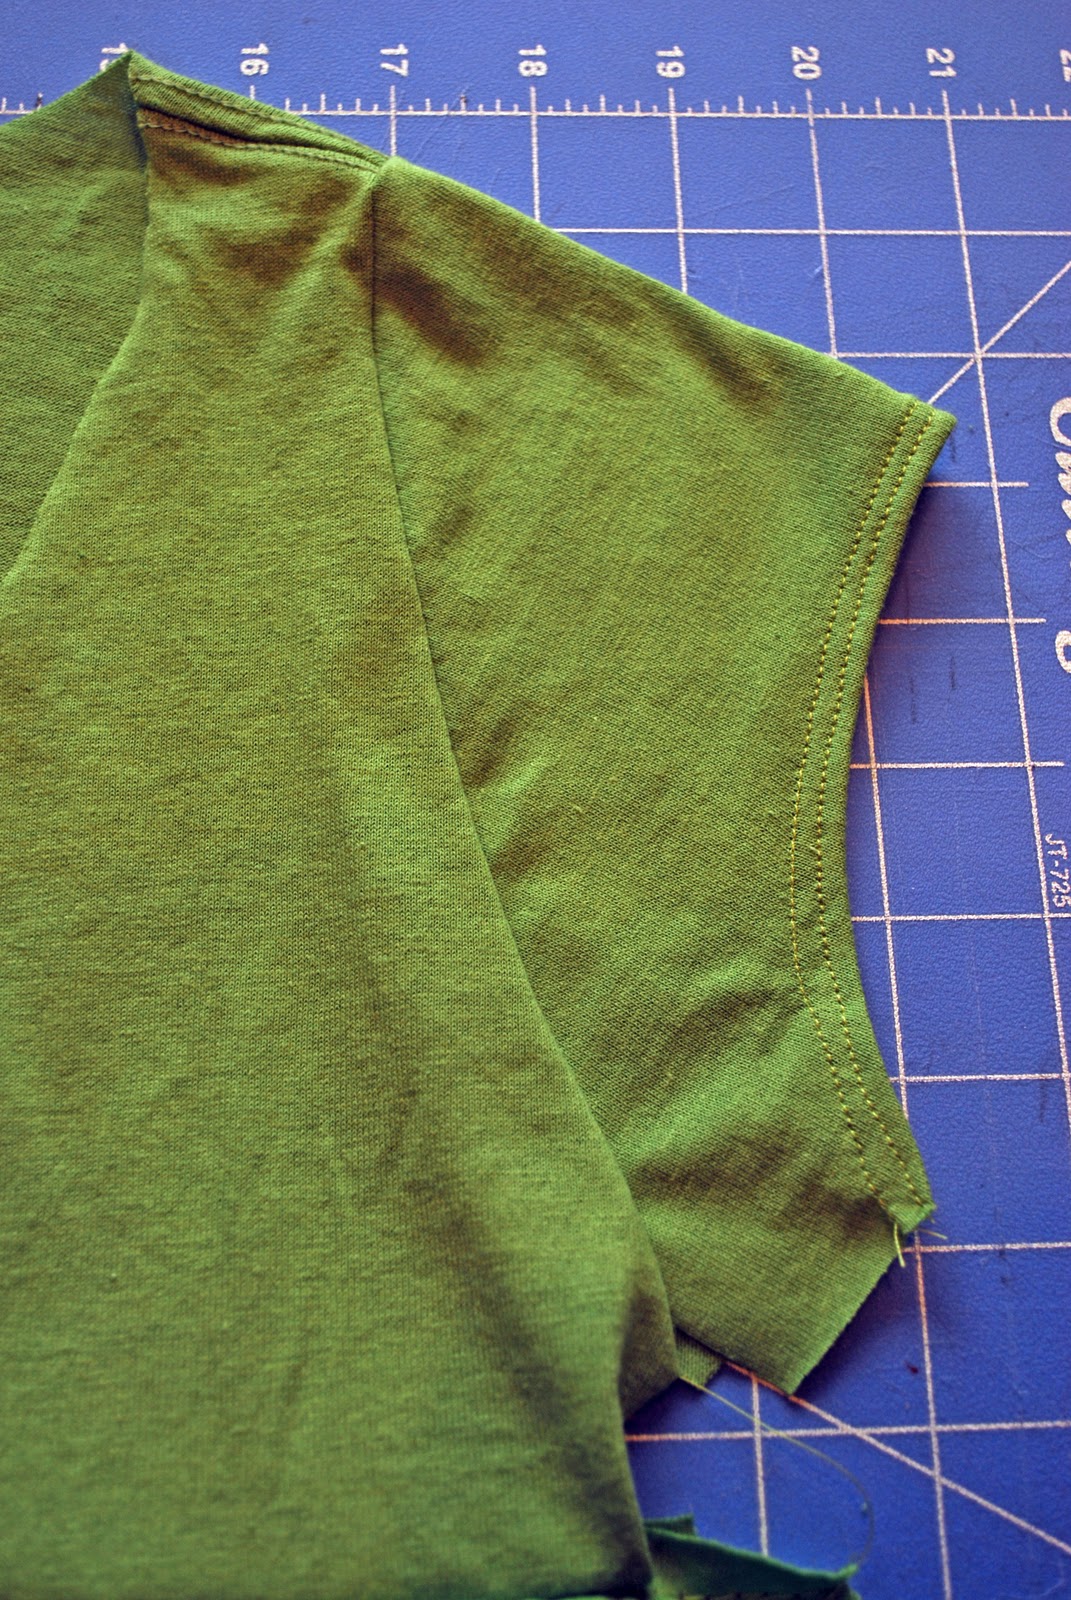
Once the both sleeves are attached it is time to sew the side seams and the underside of the sleeves. Match up the side seams with right sides facing. Pin and sew up the sides following the edge up and under the sleeve…aka the armpit.

The back bottom edge of you shirt might be too long since you have cut and resewn the front of the shirt. If that is the case, just pin up and hem a new edge.

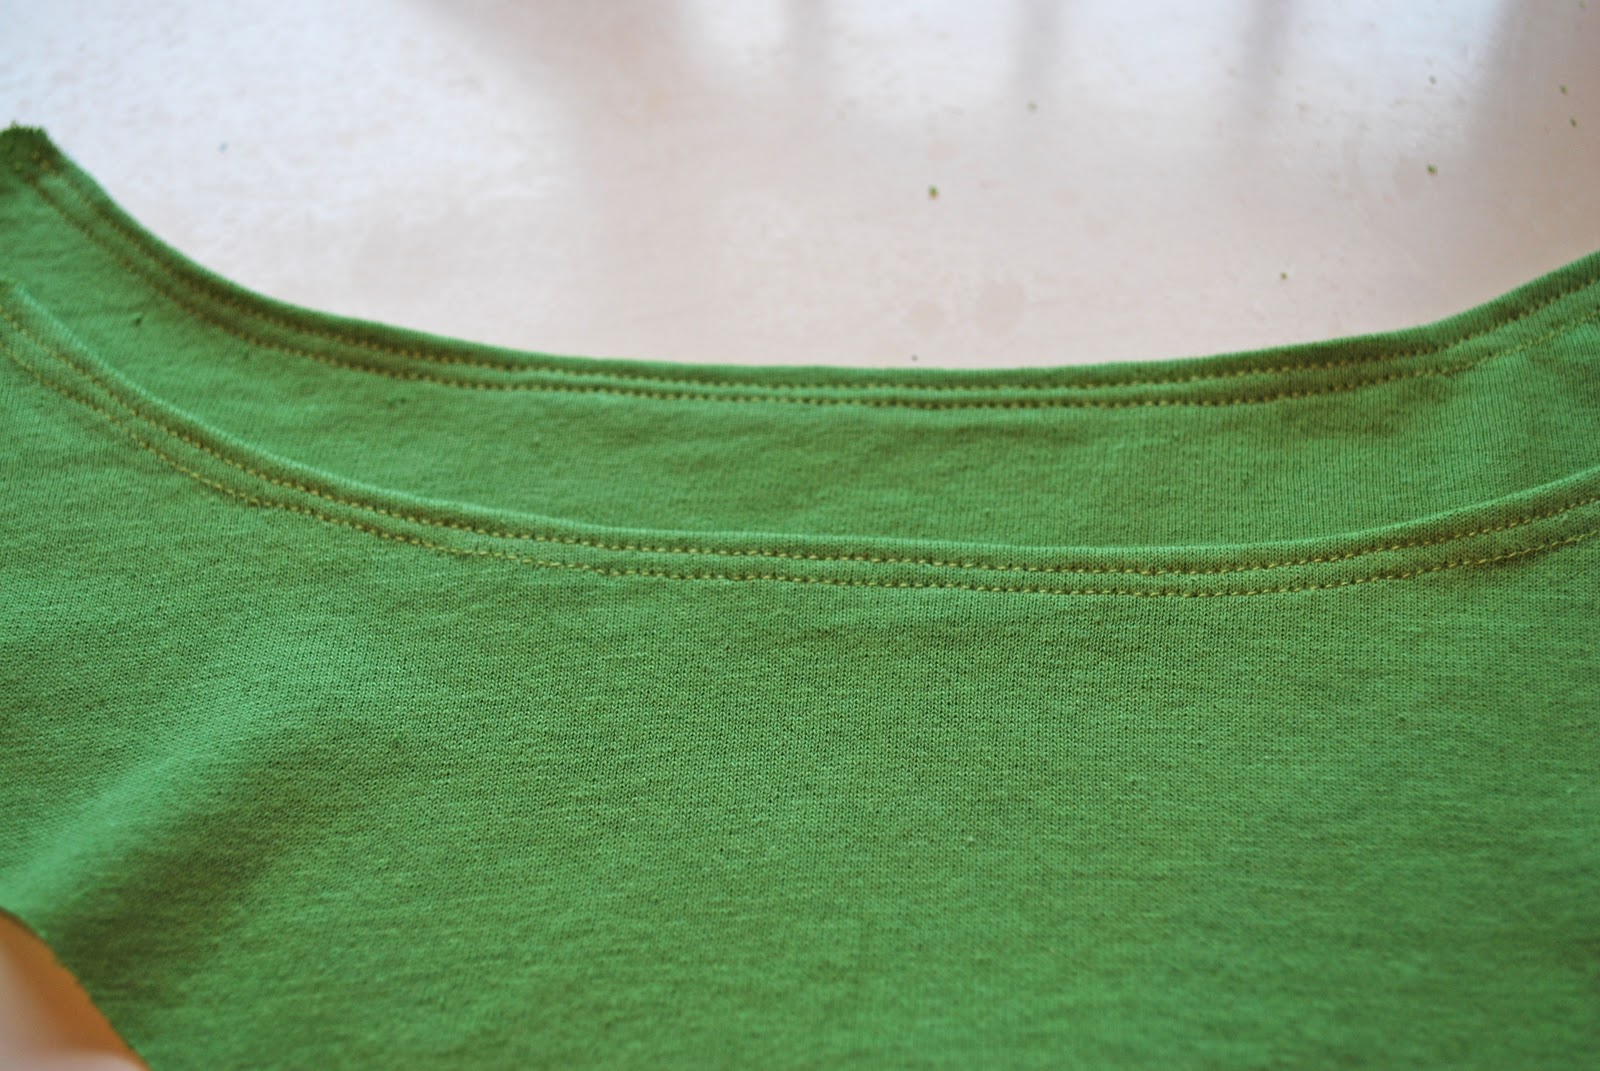
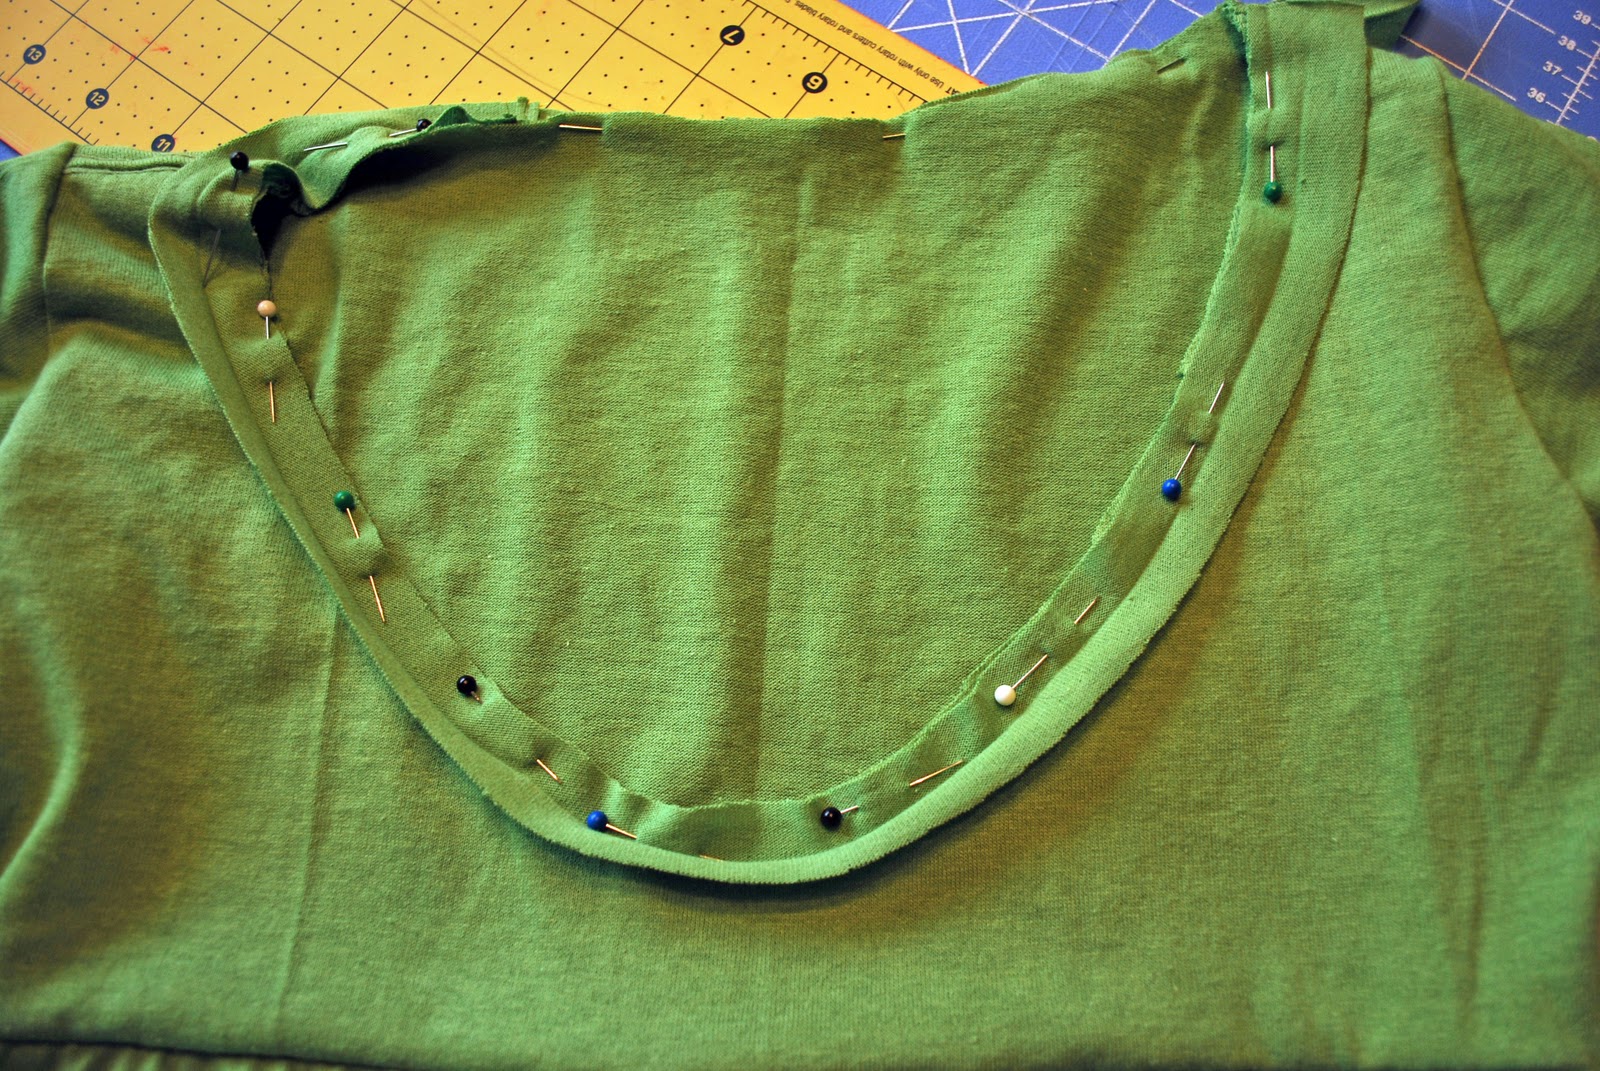
Still with me… Whew. Okay last step is to finish of the neckline. Out of your t-shirt scraps, cut either 2 strips measuring 1×20 and sew them together to make one long strip. OR if you have enough scraps cut one long strip measuring 1×40.

Iron strip in half lengthwise. Pin the strip to the open neckline right sides facing. Attach about 1/8th inch from the raw edge. Sew all the way around the neckline.

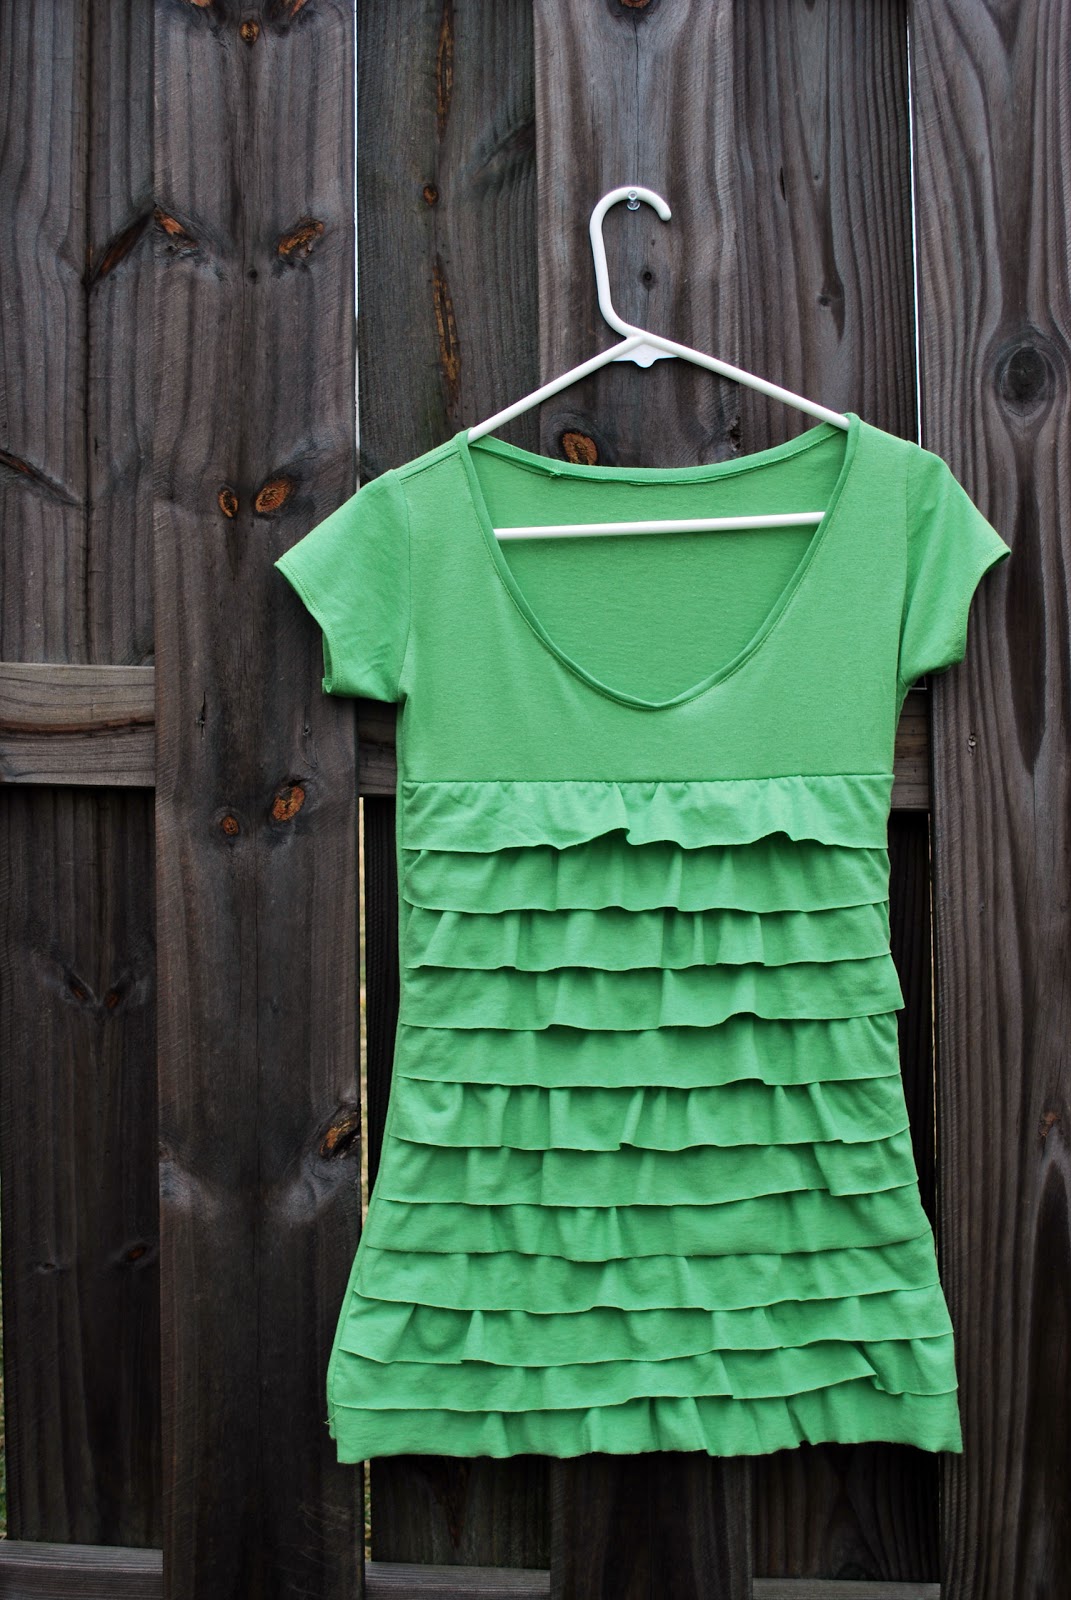
Okay we are officially done. All that is left is to admire it’s ruffley gorgeousness… Put it on, pair it with a cami… and wait for everyone to start pouring out the compliments on your cuteness.


Currently it seems like Expression Engine is the best blogging
platform available right now. (from what I’ve read) Is that what you are using on your blog?
I adore this shirt and I just had to include it in my St. Patrick’s Day round-up today. I hope you have a great weekend.
http://crazydazedesigns.blogspot.com/2012/03/seeing-green.html
I’m so excited to try this idea, thank you for posting your tutorial!!
how nice..so cute :)
Love the adorable tshirt. I have tried sewing on tshirt fabric before and all I got for it was a bunch of fabric that looked like lettuce leaves. How do you keep it from doing this? Do you use a special needle or something?
Oh my goodness how lovely! Great idea to make a front panel. I really like your sleeve seams. Did you use a regular sewing machine for it?
Great tutorial!!! Will be making this next week…thank you so very much!
I love this!! I linked to your tutorial on Craft Gossip Sewing:
http://sewing.craftgossip.com/tutorial-pretty-ruffle-tee-from-a-pair-of-plain-t-shirts/2011/03/06/
–Anne
so stinkin’ cute!
ohhhhhhhh that is CUTE!
oh my goodness….this is the cutest!
i want to make one, but i am not skilled enough with my sewing machine, I think i need have my mother in law help me with this….so, so, cute!
want want want ♥