
Hi 30 days readers! It’s Allison again, visiting from little lovelies, here to talk embroidery. So far, we have covered getting started, the back stitch, and the chain stitch and today we are going to cover the stem stitch. Admittedly, it is not one of my favorites, but it does come in handy especially for curved lines. It has a pretty rope like look and adds a nice texture to your stitching.
I have seen the stem stitch done a few different ways, but I am going to show you how I do it. At the end of the post, I will link to a couple other tutorials for this stitch. We all learn differently, so there is a chance that something that doesn’t work for me might work for you.
Let’s get started.
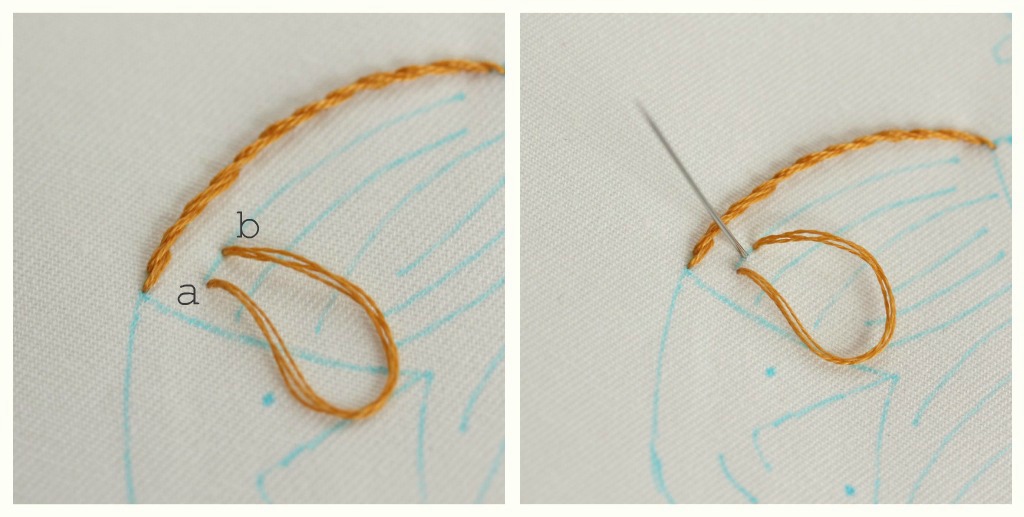

Put your needle down through a stitch length away, but don’t pull your thread through yet.
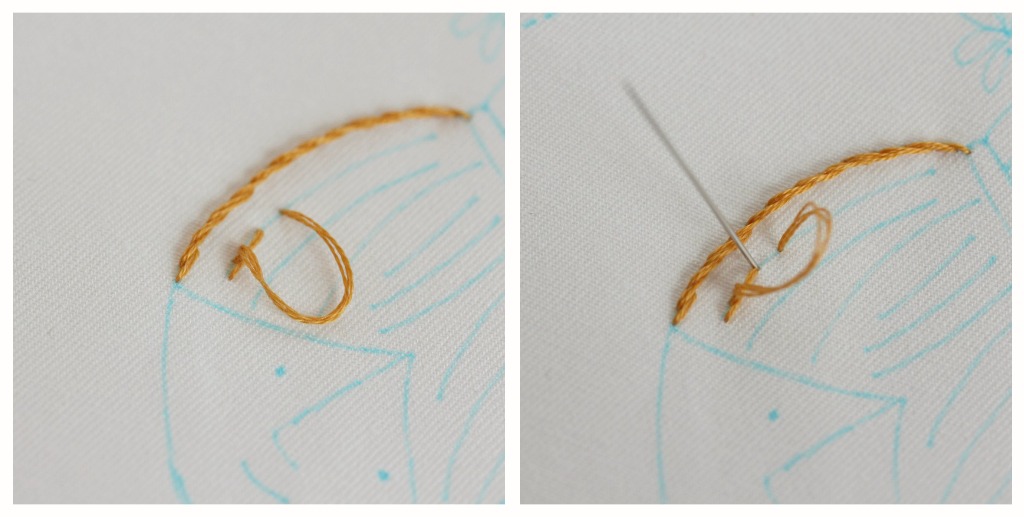
Making sure to keep your thread below your needle, bring your needle up through the end of the previous stitch. Pull the stitch through.
Repeat the two steps above until you have reached the end of your stitching.

In case you were wondering, the pattern I am working on is Betty’s Beehive by Shiny Happy World. Cute!
Like I promised, here are a couple different methods for this stitch: Wild Olive shares a couple of different methods (and her pictures put mine to shame!). Coats and Clark has a drawing that might be helpful. If you need to see it in action, this youtube video by Make It Mine magazine is a good one.
If you have any questions – ask away! I would love to help.
As always, you can find me all over the place: blog – facebook – twitter – pinterest
Happy stitching!


I LOVE THIS! THanks, can’t wait to try it. I think I’ll get addicted.
Oh yay!!! I so need these tutorials! I’ve wanted to learn to embroider, but I’ve been reluctant because every time I’ve tried my stitches are just plain yuck! Thank you so much for the lovely photos & explanations!
Wow, doesn’t look as hard as I thought! Thanks, great tutorial as I am looking to start teaching my self how to work a little bit more with a needle!