
Hi! I am Heather from over at June {Vintage}…I love making new things, giving new life to old things and capturing it all with my camera. I am in love with my sailor and our son and enjoy running {slowly}, reading, and all things retro.
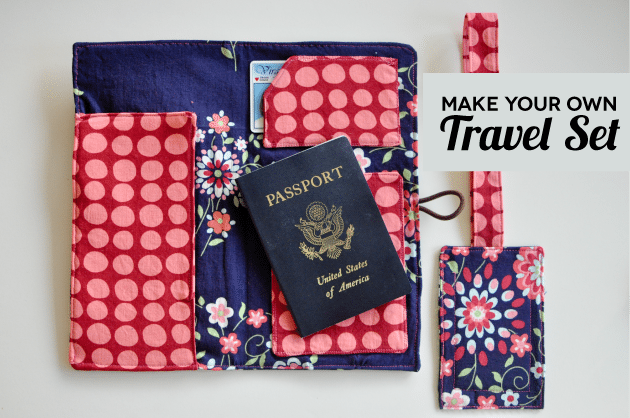
I am so excited (and honored!) to be able to bring you a little tutorial over here on Mique’s beautiful blog! If you are like me, the cold weather and snow days have me itching with a little Spring fever. Plus, our family is making a huge transition to moving to Guyana (in South America) this summer, so I decided to whip up a travel set perfect for our trip, upcoming Spring Break travels or for those heading to Blissdom!
What you will need:
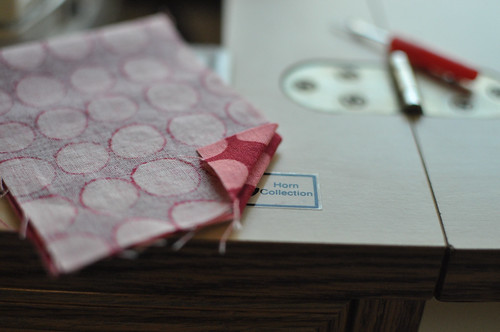
- 2 coordinating fat quarters or equal amounts fabric
- fusible interfacing {heavy weight stabilizer}
- 1 button {your choice but a larger button works best}
- 1 stretchy hair tie {coordinate color with fabric, if possible}
- 1 plastic sheet protector {like you put into a 3-ring binder}
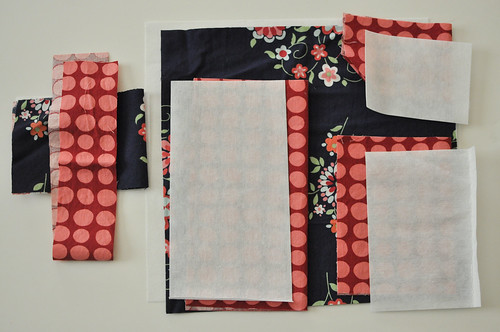
1. Here is the fun part: cutting out all the different pieces!
*Just to clarify for all the pieces: you will have one piece of interfacing for each piece of fabric.
For the Travel Wallet:
Cut from main fabric/interfacing: 2 pieces (each) 10.5 in (L) x 10 in (H)
Cut from coordinating fabric/interfacing:
Ticket pocket: 2 pieces (each) 4 in (L) x 9 in (H)
ID pocket: 2 pieces (each) 4 in (L) x 3 in (H)
Passport pocket: 2 pieces (each) 4 in (L) x 5.5 in (H)
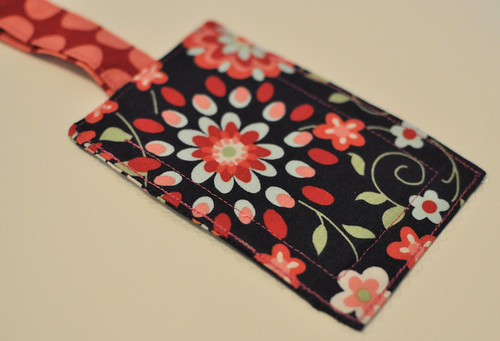
For the Bag Tag:
Main Fabric/interfacing: 2 pieces (each) 3.5 in (L) x 4.75 in (H)
Coordinating fabric: 1 piece 15 in (L) x 2 in (W)
2. Fuse interfacing to wrong side of the fabric per product instructions.
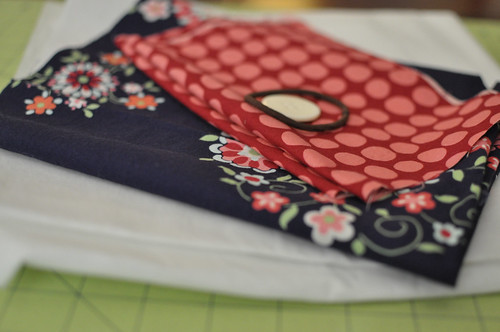
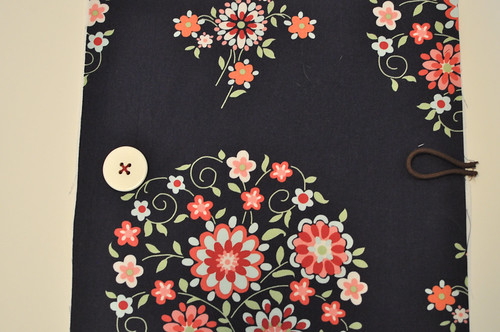
3. On one piece of the main wallet fabric, position button approx. 0.5 in. from right side, mark and then sew button on.
4. Place hair tie opposite of button with approx. 1.5 in facing toward the button. Secure hair tie with a couple of stitches close to the edge, cut off access.
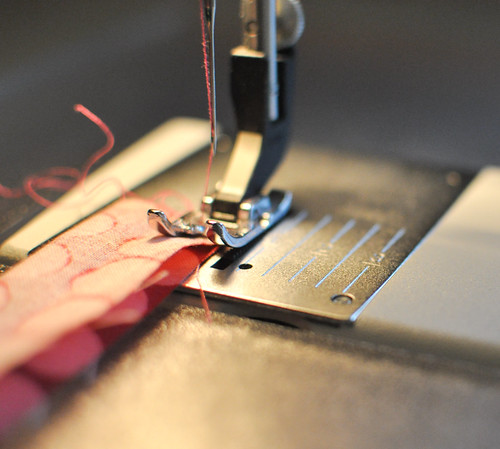
5. With the smallest pocket pieces (for the ID card), face right sides together and fold two edges back (away from each other, towards the wrong side as shown. Note: Oops! I took a picture of this step before I finished fusing my interfacing. You should be doing this step with interfacing fused on each piece.}
5. Stitch each pocket piece together with wrong sides together, leaving a small opening. Turn fabric right sides out, press and top stitch. (FYI: I use a 1/2 in seam allowance for the first stitch and a 1/4 in seam allowance for the top stitching.)
6. Fold 2nd main wallet piece (the one without the button), pressing so you have a visible middle line. Position ticket pocket flush against the bottom left side/corner. Position the ID and passport pocket in the middle of their “half” of the wallet inside as show below. Pin in place.
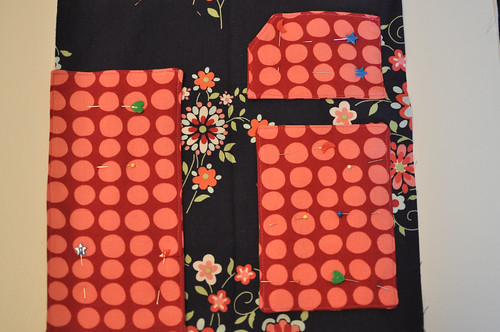
7. Sew ID pocket onto main fabric piece, leaving opening for ID insertion on left/angled side. Stitch passport pocket on, leaving top open. Using a wide/basting stitch to secure ticket pocket along fabric edge (left side and bottom.)
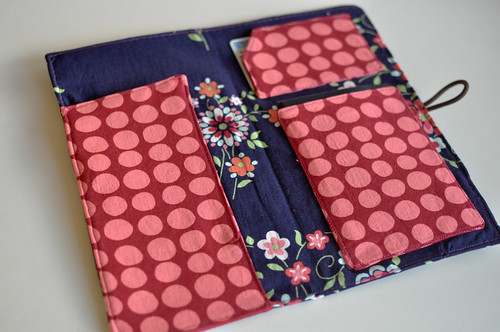
8. Place two main wallet pieced together, wrong sides together. Pin, sew (leaving opening), turn and topstitch. Wallet is now complete.
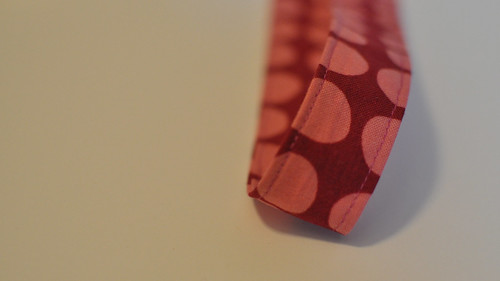
9. For the bag tag: Take long coordinating pieces and fold/press in half with wrong sides together. Sew up non-folded side.
10. Using a safety pin attached to one side, push pin through fabric tube, bring the right sides out. Press flat and sew up a stitch on both sides of loop.
11. Tuck loop inside the bag tag as show and pin (with tag pieces facing wrong sides together.)
12. Stitch around outside, leaving small hole, turn and topstitch.
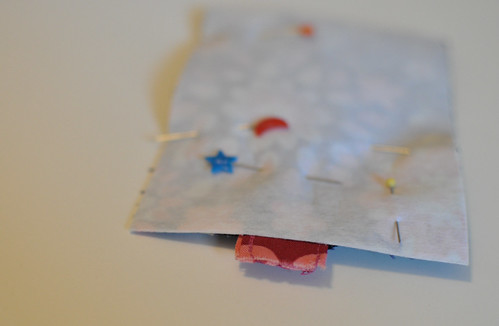
13. Take one cut piece of plastic sheet protector (you will only need one side of the sheet protector.) Using a business card as a guide, lay plastic piece (which can be cut large at this point), pin along outside. (Do NOT pin the plastic near the inside as you will see the pin holes.)
14. Sew 3 sides around the business card, as close as possible. (This will ensure that your business card will remain secure in your tag.) Note: backstitching at the beginning and end of each stitching is really important with sewing on the plastic.
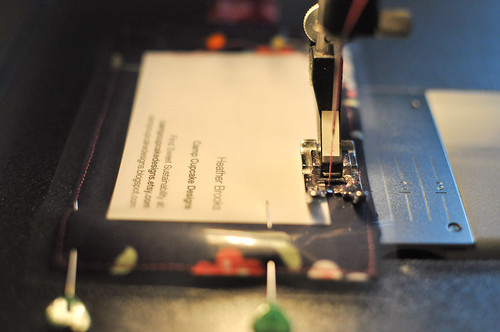
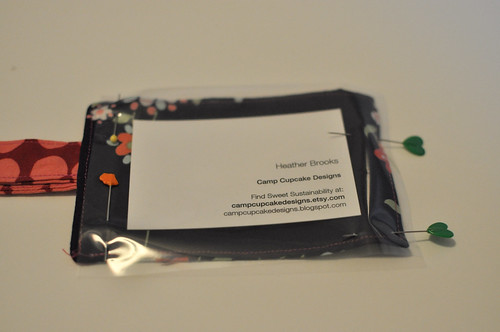
15. Sew along the same three sides on top of the top-stitching you made in step 12. Cut off any additional plastic.
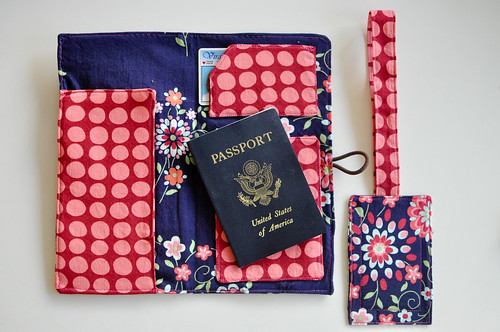
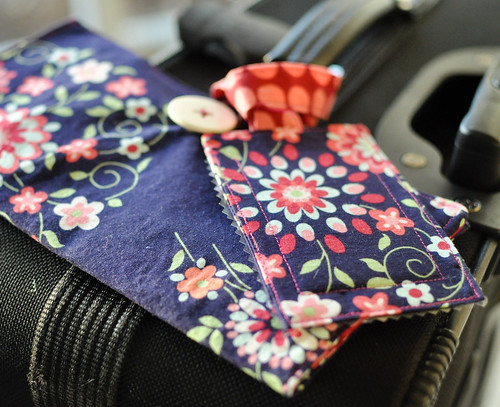
16. Attach your bag tag to your suitcase, insert your passport, ID and airplane tickets into your travel wallet and Jet Set!
—————————————————-
Seriously- are you dying like I am over this tutorial? IN LOVE! So clear and so fun. Perfect for traveling. I love the fabric combo too. Make sure to head over to June {Vintage} and say hi. Thanks so much for sharing Heather!


this is so much fun. thanks.
do you have a video?
This is an AWESOME tutorial. I bought a pattern online for something similar a few days ago and it was such a nightmare to follow and put together. Yours went together like a dream! Your instructions were clear, photos were great, and the project was exactly what I need for my upcoming trip to Europe! I literally can’t say enough good. I did add some heavy weight fusible interfacing (craft weight) to the large pieces to give the wallet more structure. It made turning a challenge but I like the body it now has. The only problem I ran into was that I put the button on the wrong side but I’m the only one who will ever notice that! Thanks for taking the time to put together a great project!