
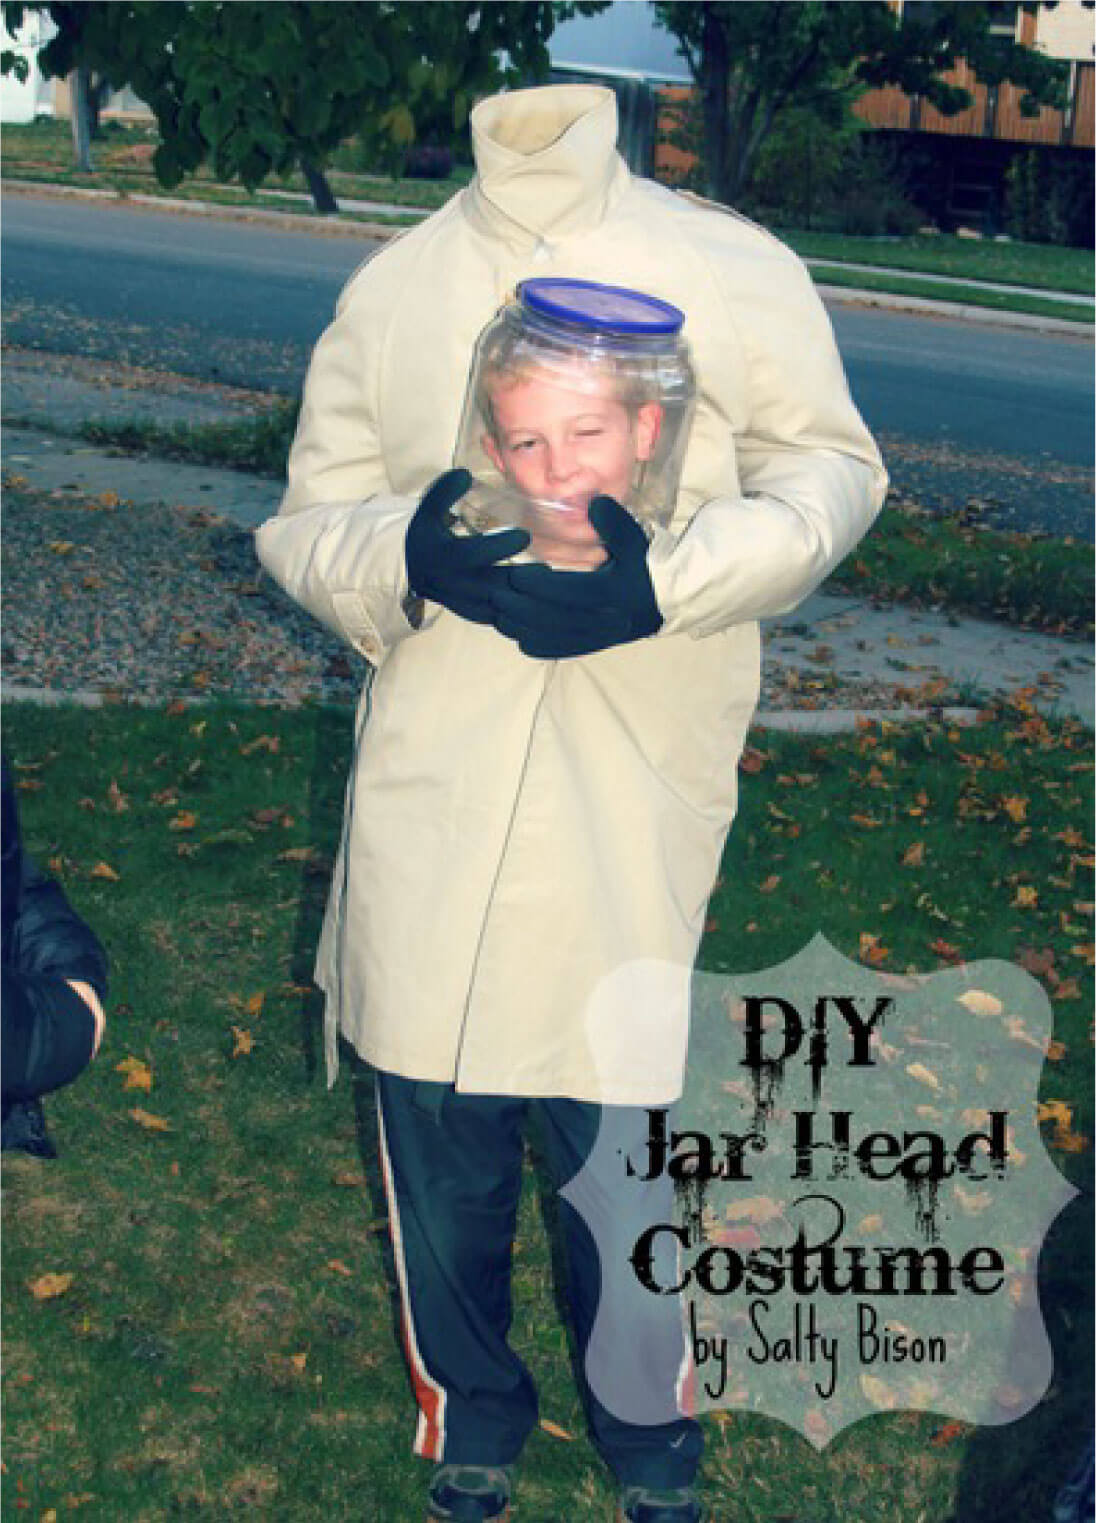
We’re taking a caloric filled jar of cheese balls and turning it into the most legit Halloween costume you’ve ever seen. So lick off those cheesy fingers and don’t throw away the jar because we’re going to up-cycle that baby. Here is the coolest DIY costume idea out there.
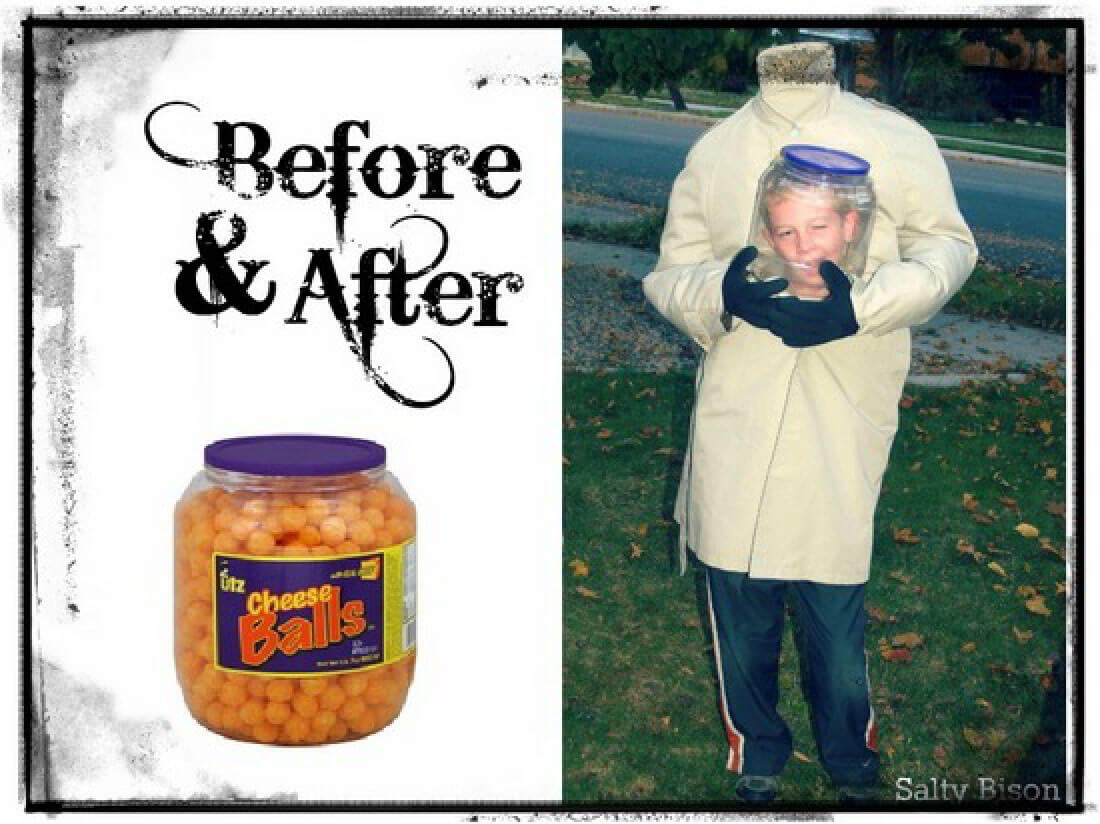
Last year while my kids and I were scouring the Internet for fun Halloween costume ideas we came across this picture. It didn’t have any instructions on how to make the costume so we started brainstorming and here’s what we came up with. Below are the items you’ll need…
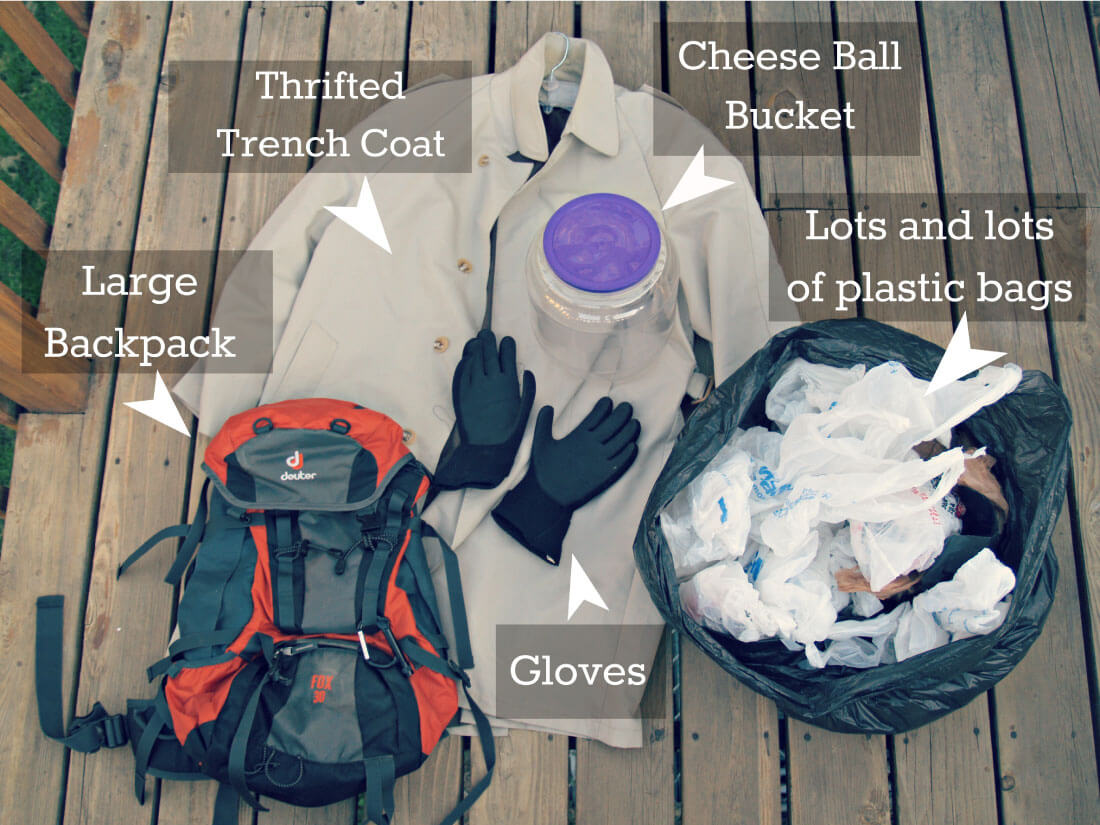
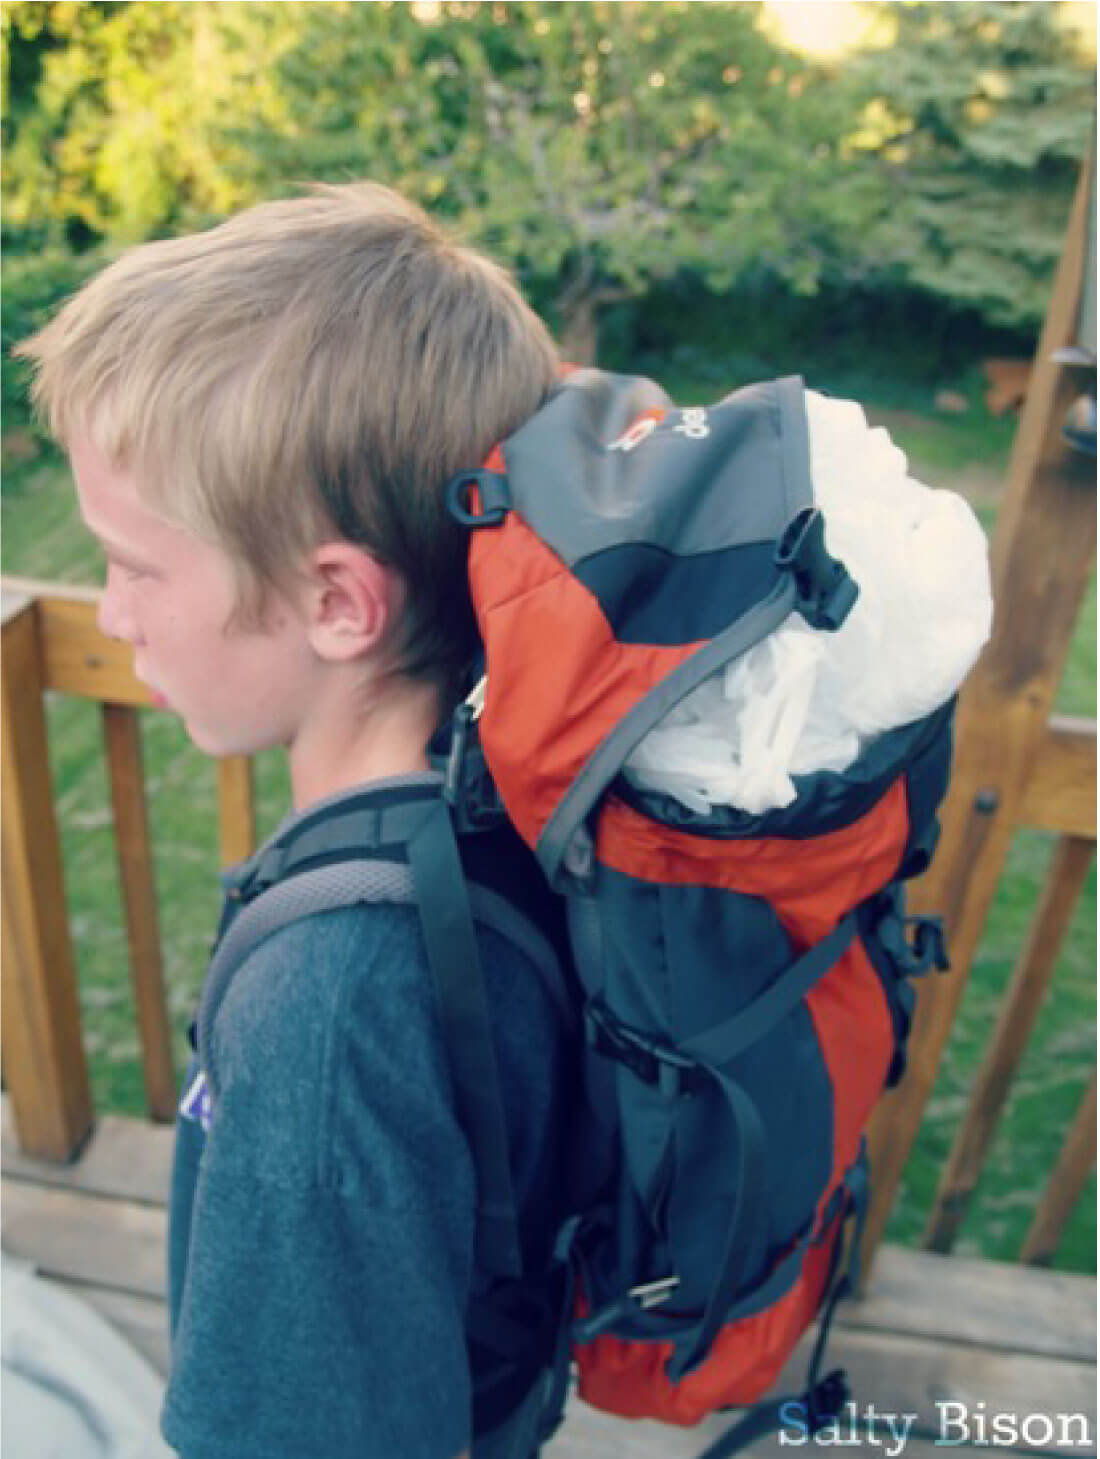
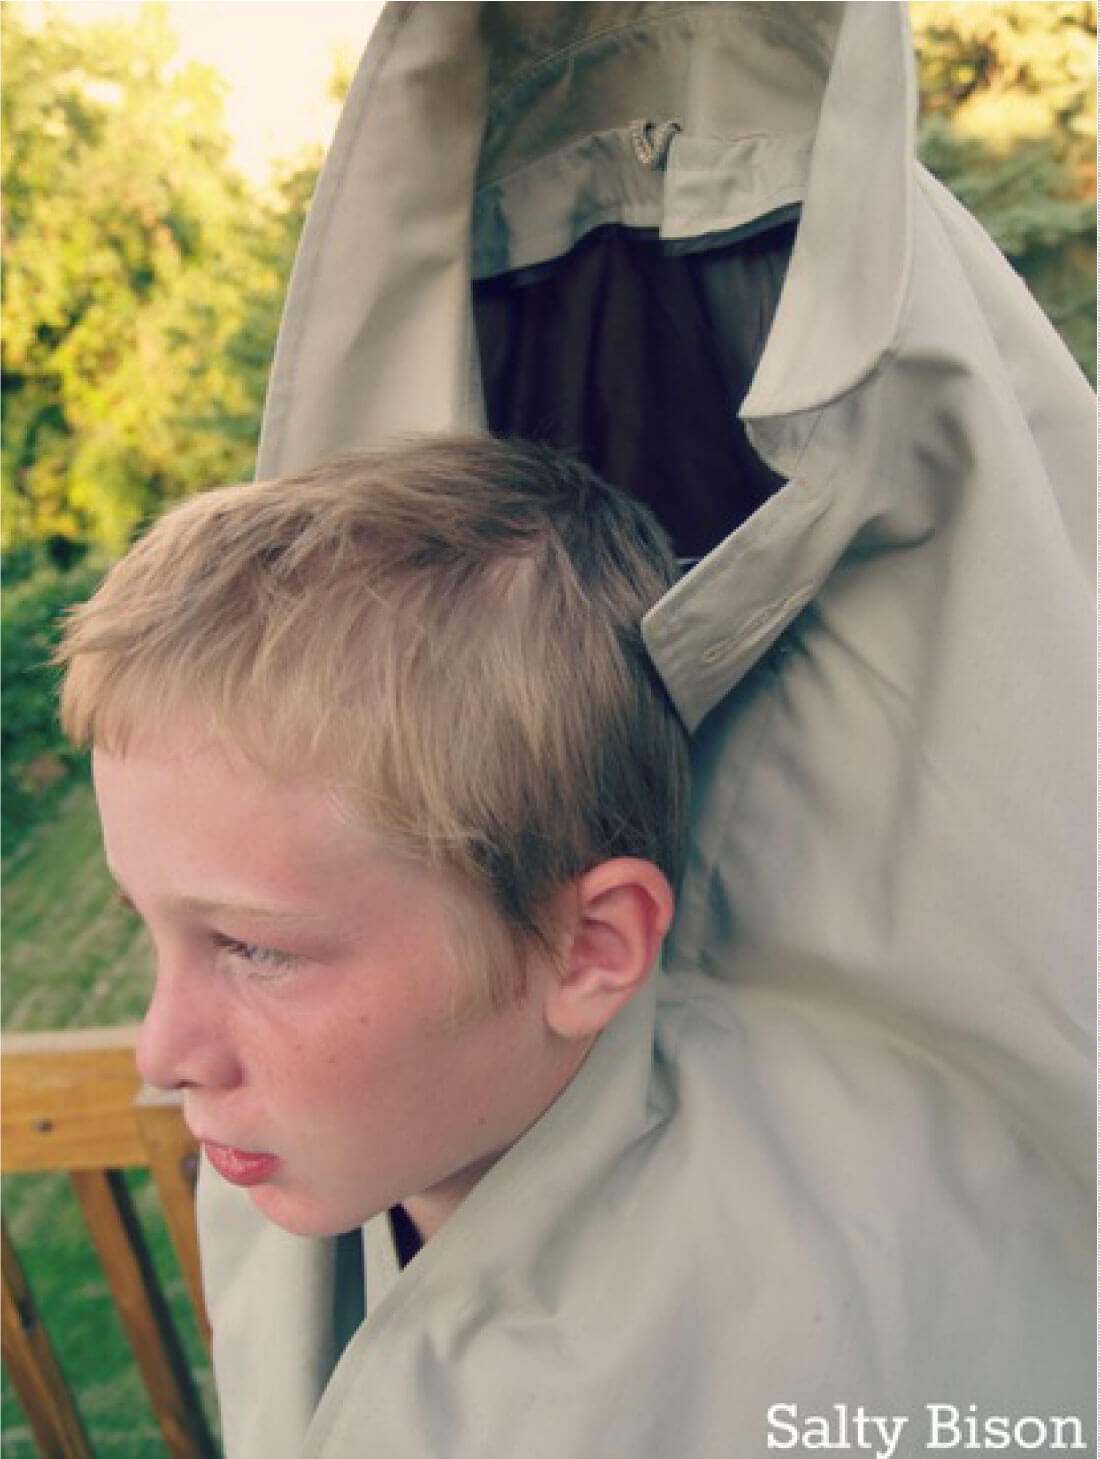
First fill the big backpack with plastic bags to give it some bulk.
Second put the trench coat on over the pack and button it up around your kids head so it’s at stomach level.
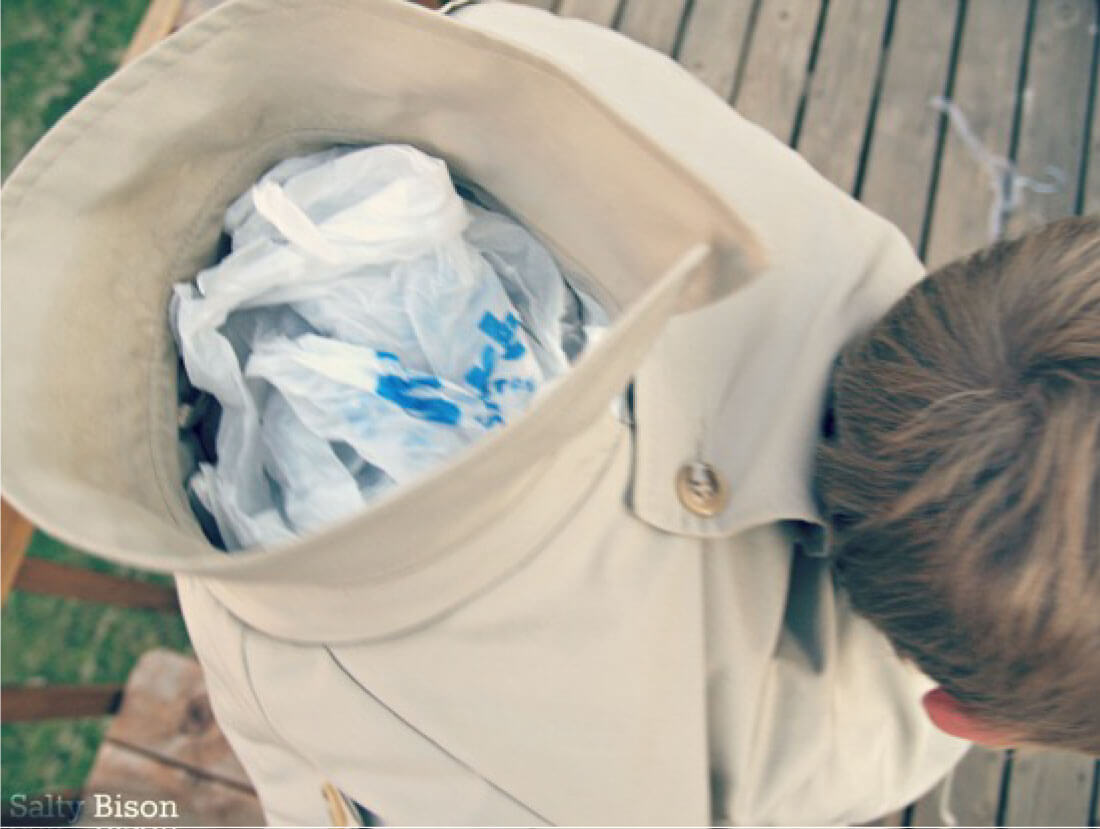
Third fill the coat’s arms and torso with more plastic bags until it’s nice and firm. Plastic bags make it look bulky without all the weight. Remember you’re kiddo has to lug this thing around while trick or treating all night.
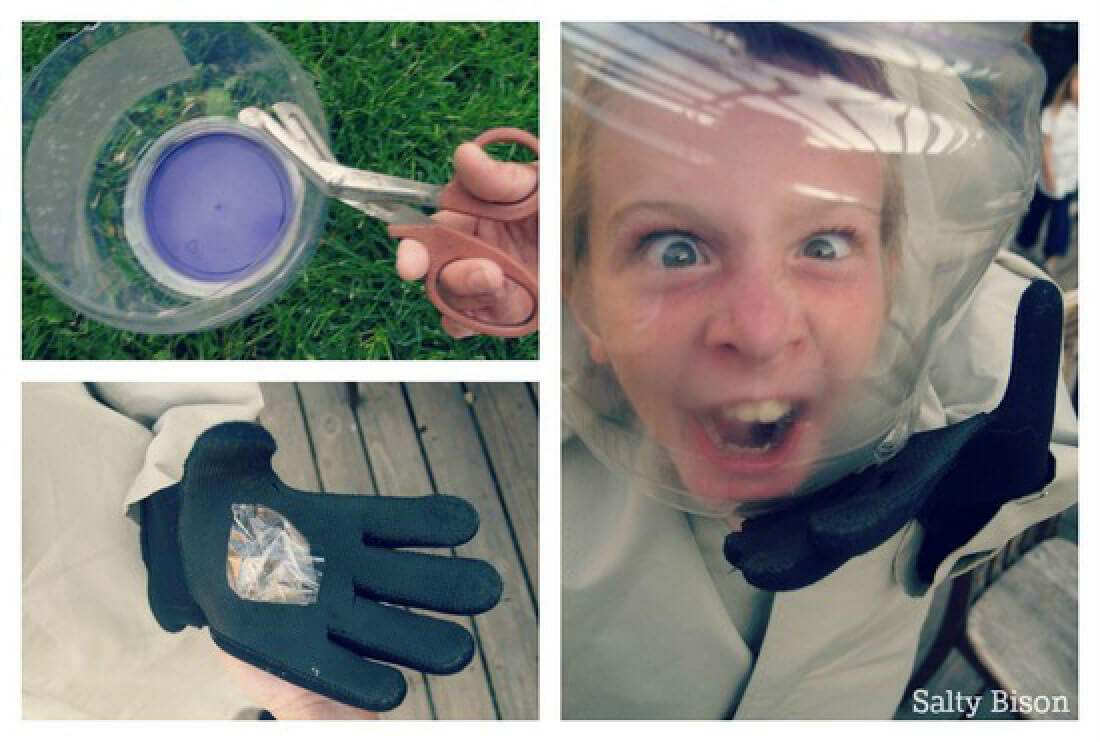
Fourth attach gloves to the coat sleeves with safety pins and stuff the gloves with plastic bags.

And lastly cut the bottom of the cheese ball jar out using heavy utility scissors or tin snips. Make sure the hole is big enough for your kiddos head to pass through. then attach the gloves to the base of the jar using strong tape. (please excuse the disturbing face of my 10-year-old)
Last Halloween I sent my son off to school like this and as he walked down the road I saw several heads turning and an older couple on their morning walk were laughing their heads off. It was definitely worth eating all those cheese balls!
If you like making Halloween costumes, you’ll love these Halloween costume ideas:


Awesome costume! Our 10 year old wanted to do this and this is just BRILLIANT!! So inexpensive but super cool. Thank you!
I dressed my 8 year old up as “Jarhead” for a Halloween costume contest where we camp and he got 2nd place!! Everyone loved his costume. Thank you so much for the idea. I saw this last year and said then that we were going to do it in 2014. It was so much fun to see people’s expressions when they saw him.
This is amazing. I think this is awesome and I’m going to do it for myself. Excellent idea.
Such a great creative idea!
Im going to try this costume as a adult. Issue I see (which Im going to have to figure out how to fix) is
1: Holding a drink in hand
2: Putting on and remove the costume easy (I think the backpack is going to ease that a lot)
Thanks for the great idea though
We made this costume for both my sons (5 & 8) this year for Halloween and a photo of them in their costumes made the front page of our local paper! It was a big hit. Thanks for the great idea!
Thats So cool , Easy Instructions! Made it last year but this year is going to be better!!!!! with these instructions
Awesome costume!! My younger son saw this picture and decided he HAD to be a “head in a jar” for Halloween this year! I ended up needing to use blown up balloons to fill the backpack and to stuff the top of the coat because the plastic bags were too heavy for him (he’s 7) Still looks pretty cool! We got some face make up to make his face pale and are going to put dark circles around his eyes. He will need airholes though. He only had it on for maybe 5 minutes so I could take pictures and he started to say he needed air. I’ll probably stick some through the lid or maybe the back of the jar (although my husband about cut off his fingers trying to cut through that annoyingly thick plastic to open up the bottom!!) The lid might be easier to cut through since it’s not quite so tough. Thanks for posting this!! It’s making one little boy’s Halloween a bit more exciting! I’m very surprised he would even want to wear it because he has autism and often things like this are too overwhelming for him, but apparently being a head in a jar is all good for him!
Hi! I did this for my 9 year old son and it was a hit! I tied a string around the lid of the jar and around the collar of the jacket, so if he needed to, he could just lift the jar up off his head. I also cut not only the bottom of the jar, but the back of the jar as well. This was actually pretty easy and we got so many compliments, and I think it might have scared the little kids! They just stared like they could not figure it out! Best costume ever! I don’t think we will ever have a better one! Thanks for sharing!!!!
oh my gosh this is perfect my son will be a hit and it’s totally doable thank you so so much!!!!!!
Women with “kiddos” tend to have “hubbies”. Nice costume though.
How did your child breath with his/her head in the jar?
I’m so excited to feature this fantastic costume on OneCreativeMommy.com Please feel free to stop by and grab a featured button.
thanks for this idea and for the great instructions! I hope to post pics of our take on it on my blog and I’ll link to your tutorial.
How funny! I love this costume! What a great idea:) Thanks for the tutorial! btw; I have a new sewing blog and I”m trying to get the word out there. Would love it if you passed by and checked it out. Thanks!
-Reyna
http://www.reynasews.blogspot.com
can you post or email me a picture of how the back of the jar is cut out? I can’t tell what of the bottom is left on. thanks a million.
[email protected]
This is the best costume ever! I have one important comment—I hope you cut air holes!!!
If you haven’t already, I hope you’ll visit “One Creative Weekend” on OneCreativeMommy.com (open every Fri-Wed) and link up this idea and anything else you’d like to share. There are two categories—one for Halloween and one for everything else.
This is going to be my last year trick-or-treating so I want to make my costume the best I’ve ever had. After about 2 hours of research I think this is the winner- thank you for sharing this!! The only problem is I always wear my costume to school on Halloween, and was wondering if I could somehow fill the arms of the coat with my own arms, so I could lift the jar off my head and do schoolwork. Is it possible to maybe cut holes in the torso of the coat and elbows of the arms to stick my arms through? Any ideas would be appreciated!
Also thank you for the excuse to eat a whole jar of cheese balls ;)
Could you cut the pockets open on the coat for your hands? If the opening needs bigger, open the side seam and add velcro to hold it closed when you don’t want to have arms out. That’s one way. I understand not wanting toke it off and on as it looks to be a pain in the tookus to do quickly and by yourself without calling too much attention to the fact that you are recostuming for the between class walk!
For those that have concerns with breathing for the little ones…I made a similar costume a couple of years ago for my son. I made a frame using pvc pipes & pvc elbows (found in the plumbing dept @ Lowes/Home Depot) & attached them to an old book bag w/duct tape. Next, I attached a large clorox wipe container to the top of the frame w/duct tape (love that stuff!) I cut it approximately in 1/2 to simulate his neck. Then I mixed some paint colors together to make a flesh color & painted the container. Next, I mixed red paint w/Elmer’s glue. I then held the glue above the “neck” & squeezed in random spots & let it drip down to make it look like blood. The frame extended above his head so he looked more adult size. I put an adult sized black costume robe on him so that it would cover the pvc & my son. Then I put a black cape over that & pinned it around him so that only his head was sticking out. I too filled the arms w/plastic bags & pinned them to the cape just under his neck so that it looked like he was holding his head.
I had a blast making it & it was surprisingly easy. He loved it & so did all of our neighbors!
Happy Haunting everyone!
That is amazing. Very clever. Thanks for figuring it out and sharing :)
I wonder how difficult it would be to use a tray of some sort, rather than the cheese ball bucket? Like a “head on a platter”, lol!
That’s a great idea too! Maybe a large styrofoam tray because it’s lightweight. You could cut a hole in the center for the head & paint it whatever color you are wearing so that you can’t see the hole. Black would probably work best to blend it. You could also glue a few decorations – eyeballs, fake drinks etc to distract from seeing the hole. Pin the arms up to look like you’re holding the tray. I might try that! Thanks for the idea!
I hadn’t thought about styrofoam! Great idea, I might try that too!
Brilliant! Thanks for sharing!
Such a great creative idea!
I love the creativity of this blog. I have 8 grandsons and they will love this. Your blog is so imformative. I will tell my daughters and sign up as well. I just started blogging and posted about a unique craft thats great to do with the kids: Making a Halloween banner out of color sample cards and cupcake liners. I would love for you to see it at http://www.infoformydaughters.com. You have made a friend out of me.
Hi Debbie! Fun seeing your name pop up. (remember me? Mique, Saugus 3rd?) Glad you like my blog. ;) Hope your grandsons enjoy the costume. Shawna and Devenie (DIY contributors) have the most amazing ideas. This one is awesome! Have a great day.
I know Walgreens has the cheese puff containers like this year round. I think this is such a cute idea, that I’m trying to figure out how to modify it for myself so that I can wear it to work!! Lol, I think the pharmacy patients would get a kick out of it!
Looks, great!! My 8 year old son and I are going to make it. Did you use a 23 oz or 35 oz cheese ball bucket? For some reason, I’m having a hard time finding them (they are EVERYWHERE when you don’t want them), and I have to order it.
hmmm Nancy i didn’t pay close enough attention to that. I would error on the larger one though. good luck!!
Costco would have them with pretzels and cheese balls…maybe Sam’s, too.
Thanks for your comments everyone! In response to the “trouble breathing” and “where to put the candy” issues my son would lift the jar off is head every once in a while just to get a break from having it on his head. But he could breathe just fine. If you are worried maybe you could drill some extra holes around the jar. He held a bag under the coat and reached out and under the coat to get his candy. It seemed pretty easy for him and didn’t compromise the costume.
I too am really wondering how he breathed. If not executed properly this could be a really dangerous costume for kids.
That is freakin’ HILARIOUS! And your son’s disturbing face is the best part of all :) I L<3VE it! Thanks for giving me time to eat a ton of cheeseballs before Halloween too so we can do it too-LOL
That is hysterical! I am still amazed at how you put it together. I never could have figured something like this out.
That is the best!!! Guaranteed giggles!
My teenaged sons would totally LOVE this, but I’m wondering if it would be better to put a manikin (I know I’m totally spelling that wrong) head in the jar instead? I’m just thinking that they have to breathe and talk and that would probably fog up the jar. Maybe do the backpack and the trench and just put the head in the jar and have them peeking out of the neck of the trench so they can see? Amazing costume though!
Our easiest and most original costume was a “Cereal Killer”. I sewed a bunch of those mini cereal boxes to an old spooky black Halloween costume and then stuck plastic knives through them and dribbled blood.
Last year I went as a “Nudist on Strike”. I layered myself into all the clothes I could fit on and made a front and back placard out of cardboard and string. It was a great 5 minute costume and got a lot of laughs.
Great ideas Adrian! hehehe love the nudist on strike
Awesome! Great idea!
I really love this idea – my 4 year old really wants to do some sort of ‘headless’ costume. My only question is: Since the arms of the trench are being used and stuffed to hold the jar, how will your son use his arms to trick-or-treat? I’m not sure how to work around that one.
I wonder if you could put another empty container under the collar of the jacket? Inside, so the candy would go down through the neck opening of the jacket, and then stuff bags around it. It wouldn’t get too heavy, and the costume wouldn’t be affected by little hands reaching out the bottom to hold a candy bag haha.
Rebecca I think that’s genius! I didn’t think about that.. thanks for sharing!
i ave made it using a wire hanger , cutting off hook and putting around forhead/head, using it as shoulders. not needing any stuffing,
Oh my word!!! This is BRILLIANT! I found you on Pinterest, and you’ve given me the best giggle this morning! Now to see if we can pull this off at Halloween… Thanks :-)
Wow, this halloween costume is amazing. It definitely would make a lot of heads turn for a second look. Nice Work!
oh my gosh that is hysterical. Maybe the most creative costume i’ve ever seen. I absolutely love it, totally impressed!