

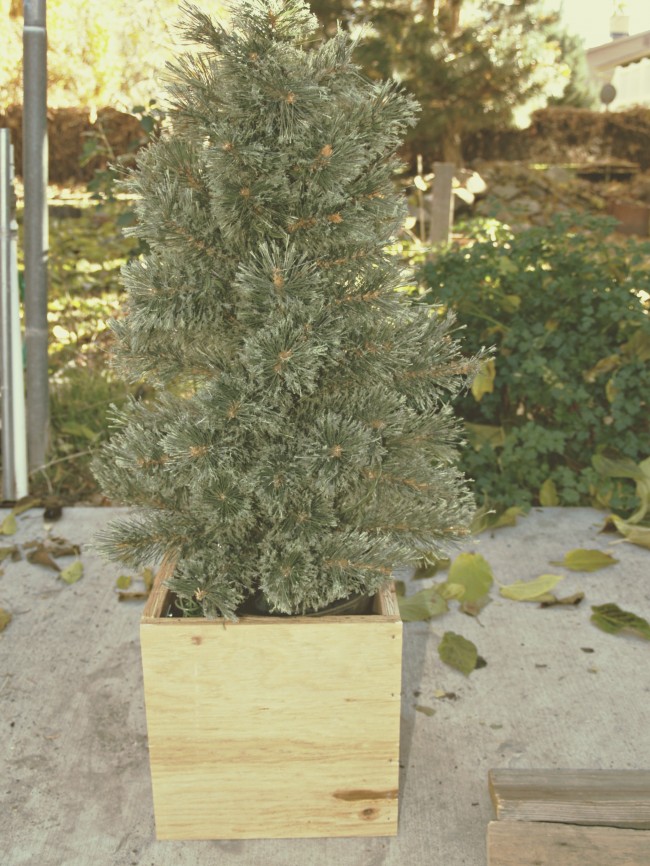
Is your Christmas tree in need of a new wardrobe? Has it been wearing the same skirt since Clinton was in office? Let’s ditch it for some nice new diggs shall we. Learn how to make this DIY Christmas Tree Stand Slipcover.
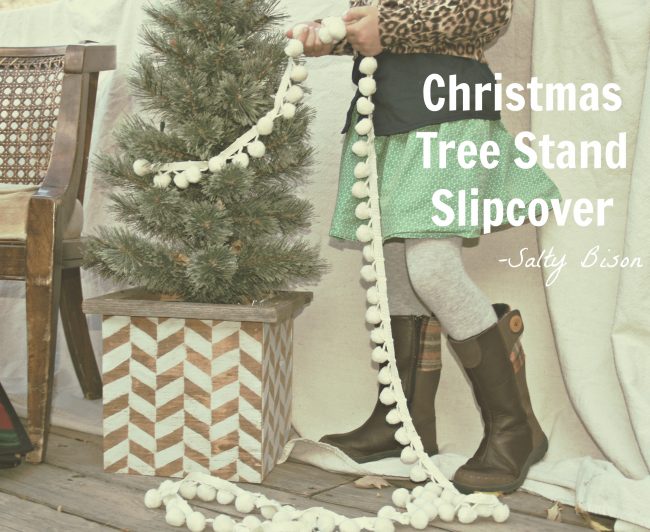
Today we’re going to show you how to build a slipcover for your tree stand. The best part about this project is that it doesn’t have to be built to be indestructible, it’s not actually holding the tree it’s only there to look good. So don’t get nervous if your woodworking skills are lacking.
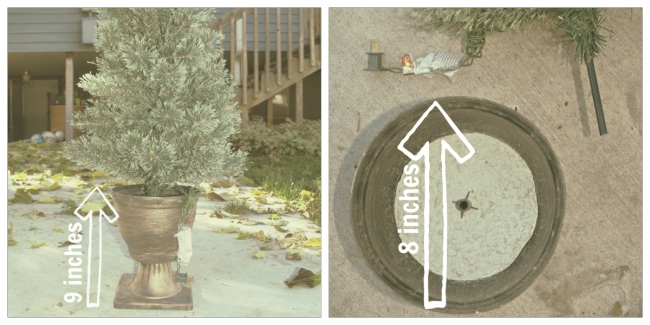
1.) Grab your tree stand. You’re going to need the dimensions of it.
2.) Measure the height and width of it.
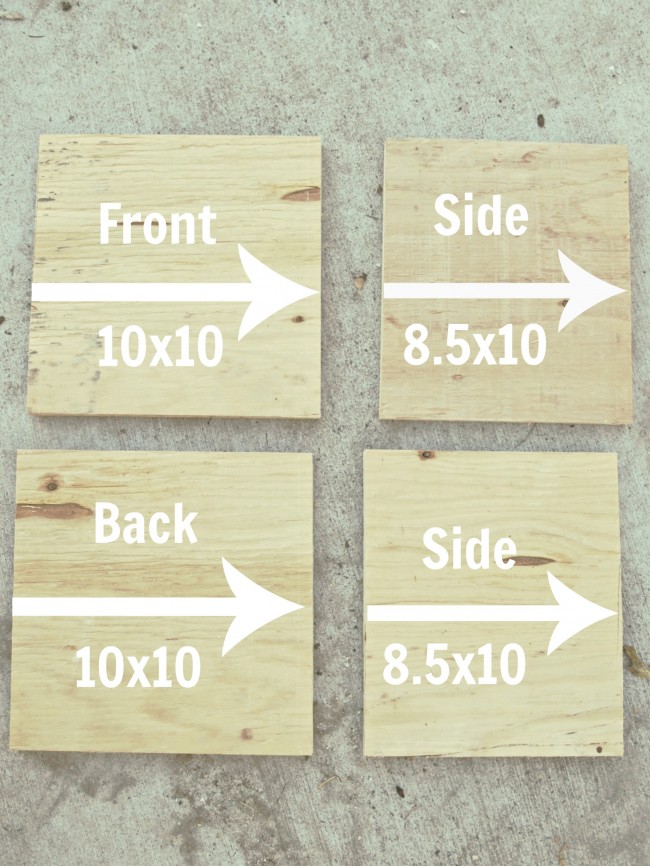
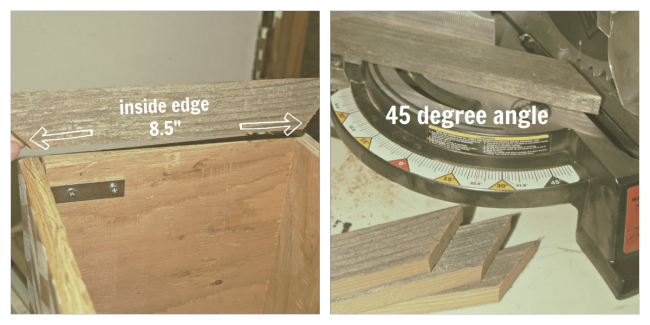
3.) Cut out four pieces of plywood (or have the nice guys at the home improvement store do it for ya!) You’ll want your slipcover to end up being an inch taller and an inch wider on each side than your tree stand. In my case, to make my box 10×10 I cut two boards (my front and back) at exactly 10×10 and then cut two more boards (my sides) at 8.5×10 to accommodate for the width of the boards which were 3/4 ” thick.
4.) Now, line your boards up and put metal brackets in the corners to secure the boards together.
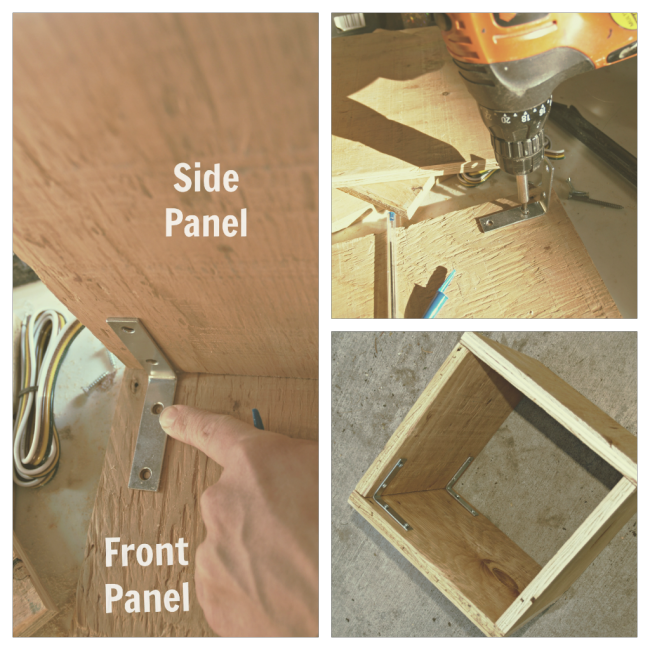
5.) You should be able to slide the tree stand right down inside the newly built cover.
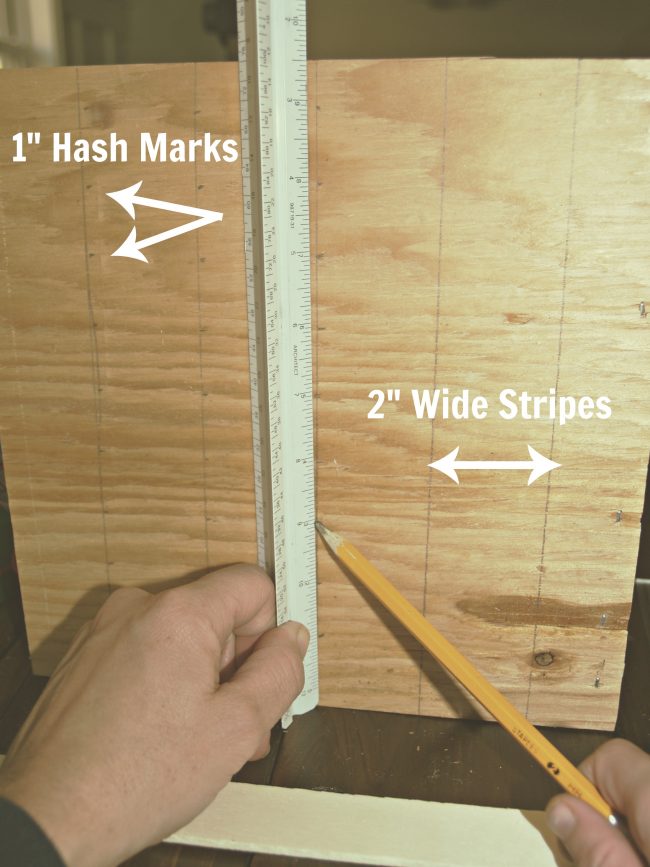
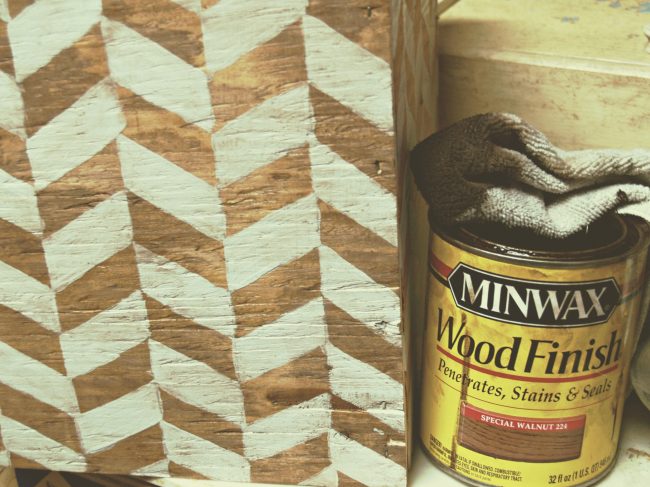
6.) Now comes the fun part…decorating it! I chose to paint a herringbone pattern on mine. Here’s a quick tutorial. First mark 2-inch wide stripes going across the wood. Then put dash marks every 1-inch along the lines going vertical.
Then connect the dots using a straight edge, making a zig-zag shape.
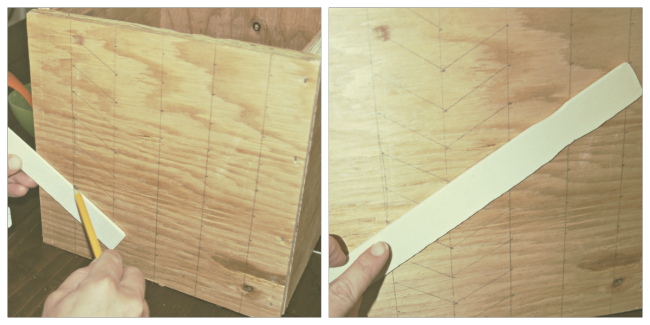
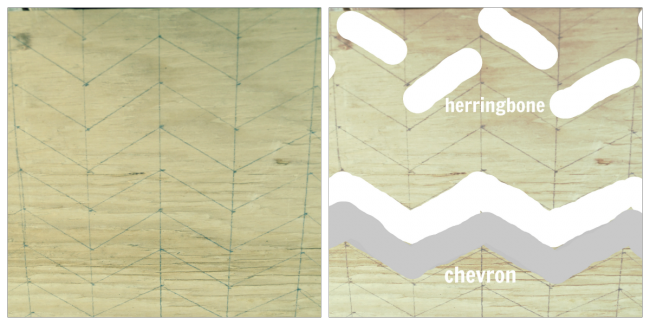
From this point you can either paint it in a herringbone pattern or a chevron, you choose.
After I painted my pattern on I covered the entire thing with a coat of wood stain. It makes the wood pop and gives a weathered look to the painted areas.
7.) You can stop here or add a lip to the top of the slip cover. I had some reclaimed wood laying around so I cut four lengths of wood for the lip. The wood was 2 inches wide. I cut the length to match the inside edge of the slip cover with 45 degree angle ends.
Then I lined them all up onto the top edge of the slip cover and shot a couple of staples into them using a staple gun.

It’s far from being perfect. My edges don’t match up exactly and the paint job was fast but it does the job.
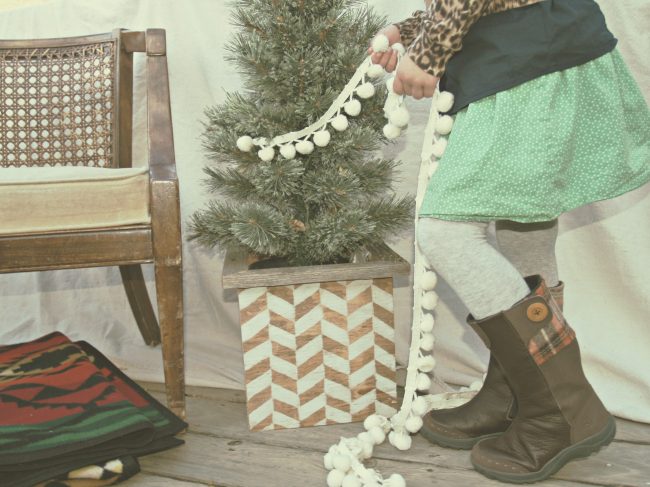
This tree is going outside on my front porch, I’m making two to flank my front door, but imagine what a tree stand slipcover could do for a full size Christmas tree in your home or for your sun-faded flower pots! You could paint any design or color you wanted. The possibilities are endless!
Here’s hoping we got your wheels turning today. I hope you have a fantabulous holiday season!
If you like this post, you’ll like these too:


My spouse and I absolutely love your blog and find nearly all of your post’s to be exactly what I’m looking for.
can you offer guest writers to write content available for you?
I wouldn’t mind publishing a post or elaborating on a number of the subjects you write in relation to here.
Again, awesome web log!
This is so cute! Do you think something like this would work for a full size tree? I have a nine ft tree and I hate the stand. I have it covered with a tree skirt but I really like this. Or would it look funny with a tall tree?
Kim! I totally was thinking of doing the same thing so no I don’t think it would look weird. Good luck to you and have a Merry Christmas!
Ooo, I so love this too!! Such a fun change :)
I love how this turned out! I’m loving herringbone lately!!
-Fotini
I love this! I’m also loving the pom poms going on the tree!