Learn the 1-2-3 for Cricut Design Space with this step by step tutorial.
The organizing bug bit me about six months ago and out came my Cricut machine. I’ve been using it to make labels over and over for months and today I’m going to share how to use Design Space to make something simple.
Cricut Design Space
Design Space is the program that Cricut uses to create all kinds of projects. It’s really user friendly and after playing around with it for a bit, you’ll get more confident in designing all kinds of things.
Not sure which Cricut machine is right for you? Make sure to check out my comparison post – Maker vs. Explore Air.
Cricut Design Space download
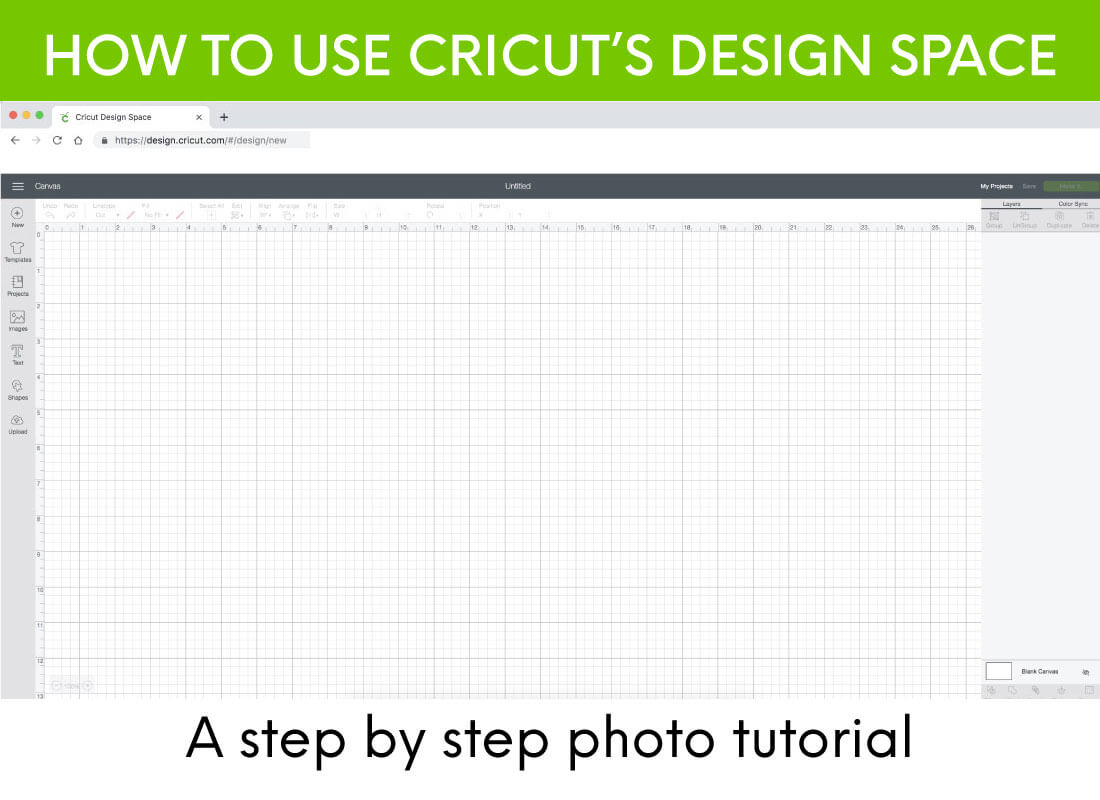
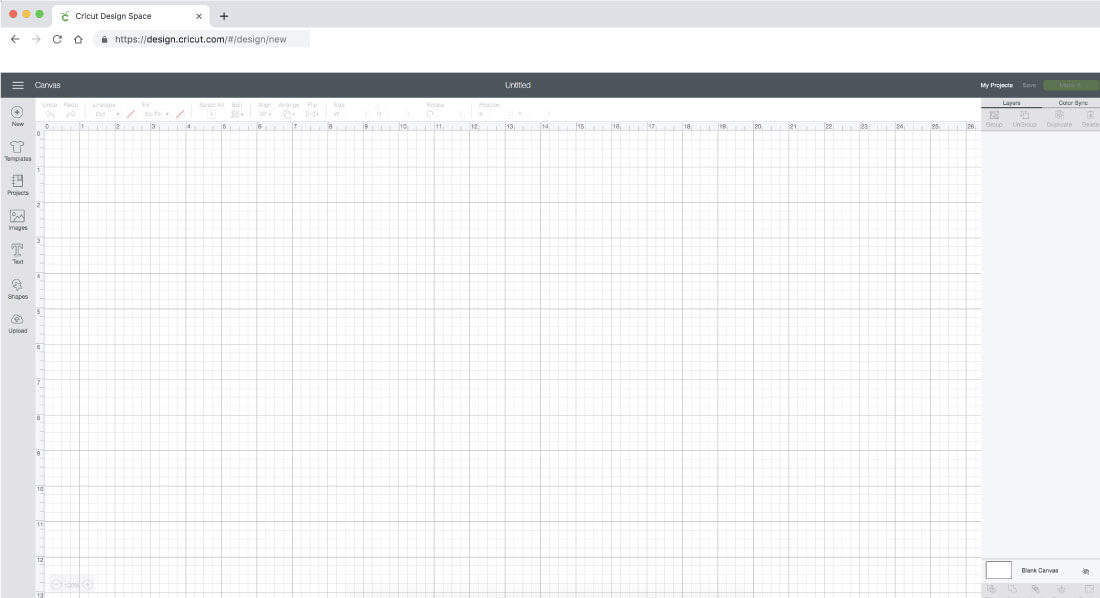
Before you get started, you’ll need to set up an account and download Design Space. It’s simple and straight forward, just follow the directions. At this point, you can look through all of the designs or choose to make your own. Once you’re all set, you’ll click on “new project” in the upper right hand corner of the screen and you’ll see this:
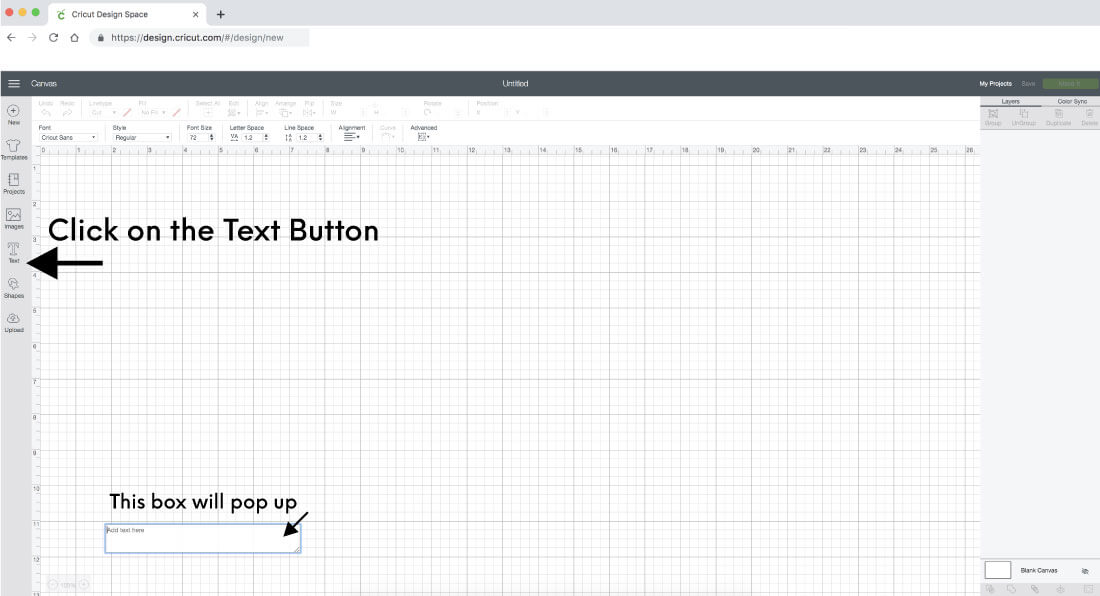
This is the basic overview of what you’ll be designing from when you want to create something new. For this project, we’re going to simply great some text for labels to add to a container. Click on the “text” button on the left hand sidebar:
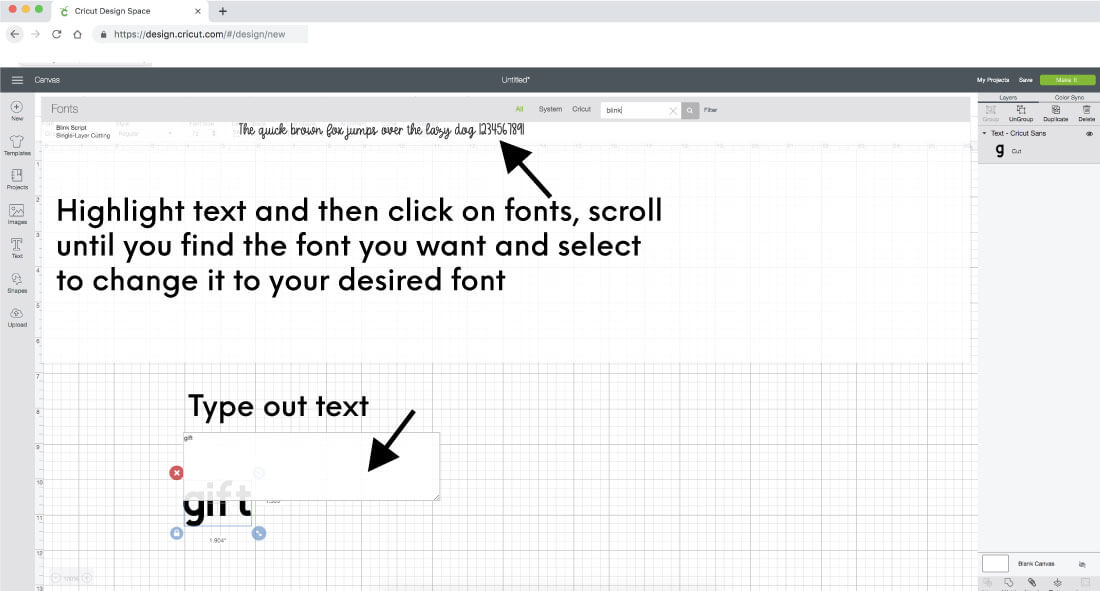
A box will pop up that you will then fill in with whatever text you want to cut out on your cutting machine. To change the font (there are tons to choose from), highlight the text and click on fonts in the upper middle of the screen.
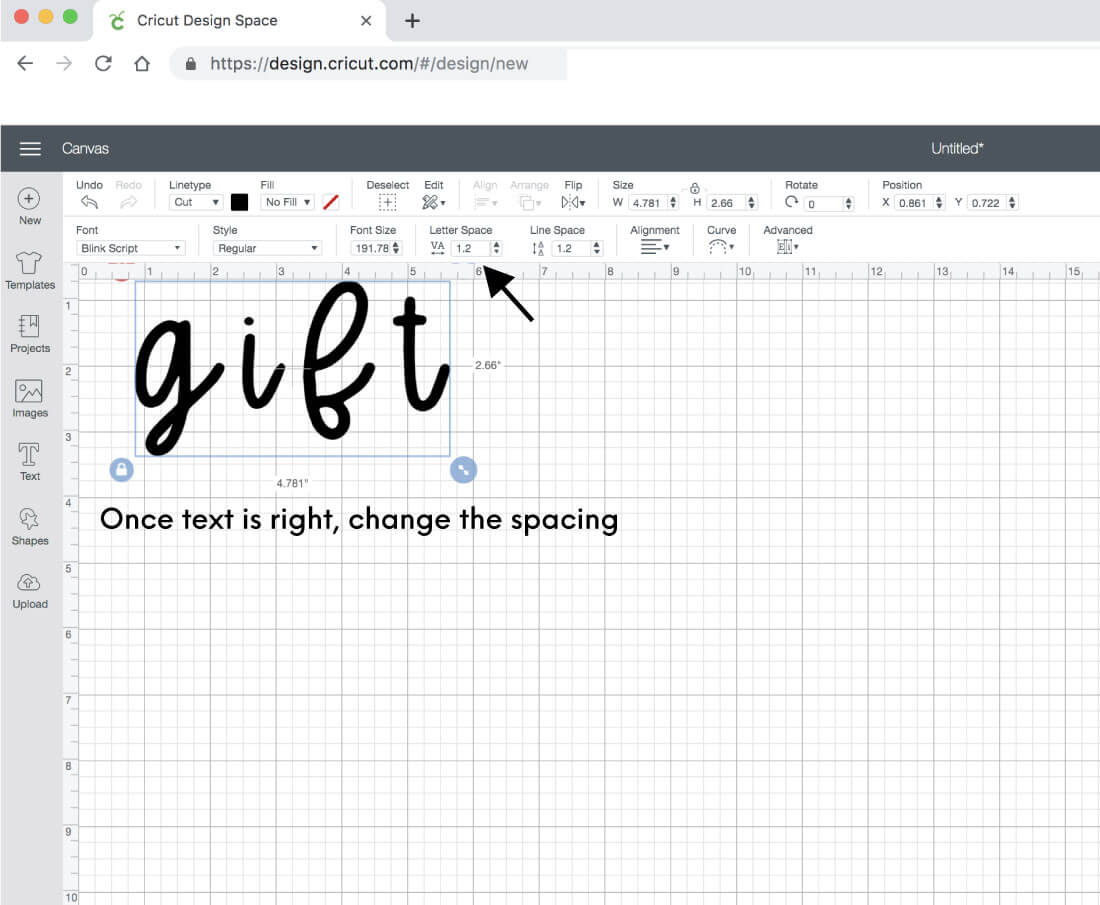
In another post I’ll share what fonts I like to use and how to install new ones. For now, play around with the ones that are offered in Design Space already. Once you find the font you like, you can then play around with the alignment. Cricut automatically has text spread kind of far apart.
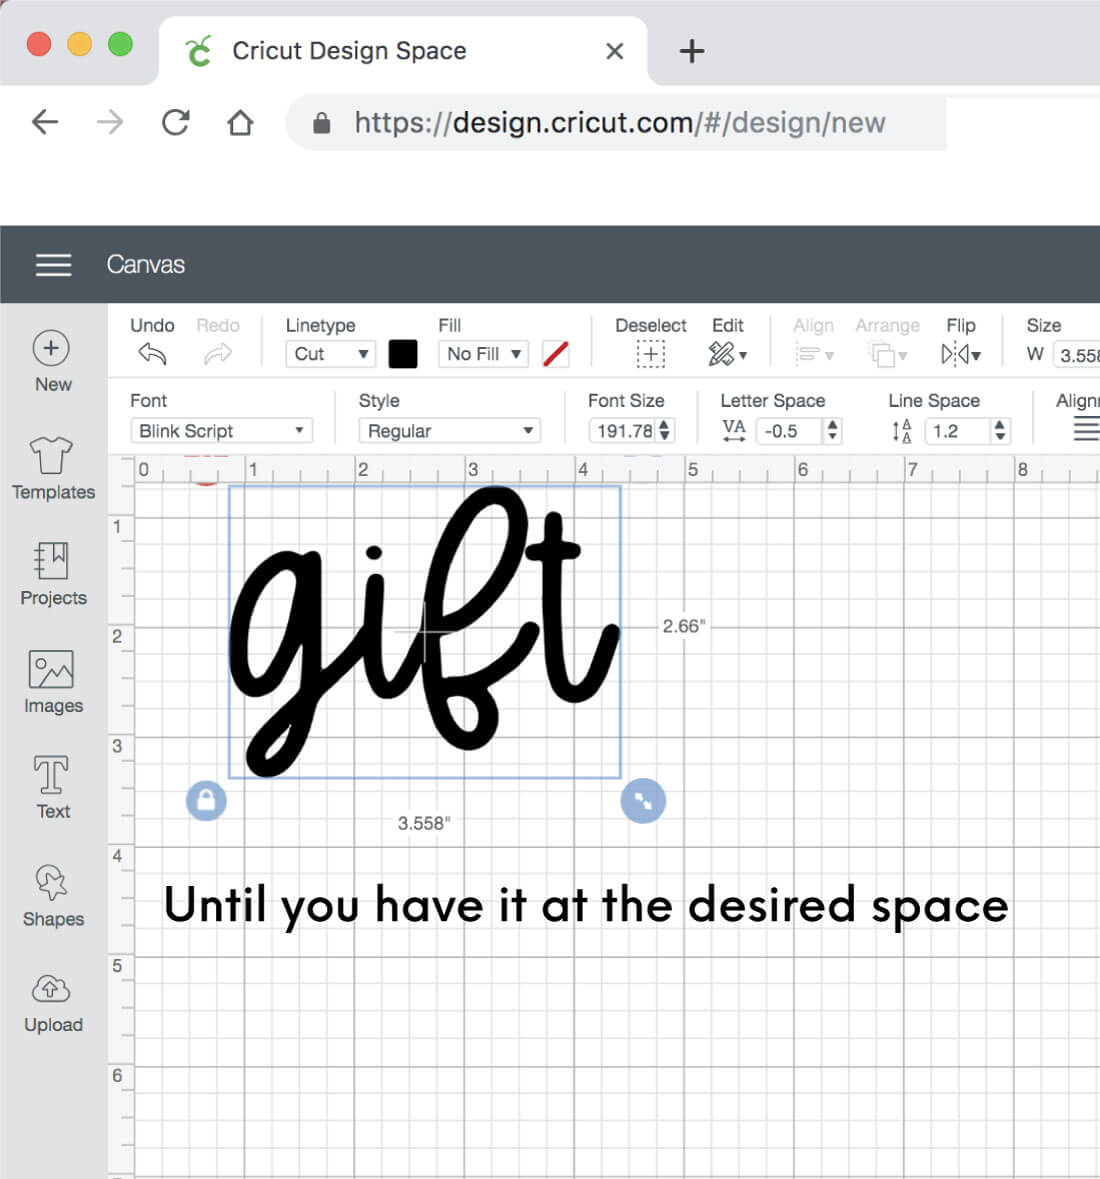
There is letter spacing, which will make your letters further apart or closer together. There is also line spacing. That is when there are more than one line of text and you want the lines to be closer or further apart. Use the arrow keys to adjust the spacing to your liking.
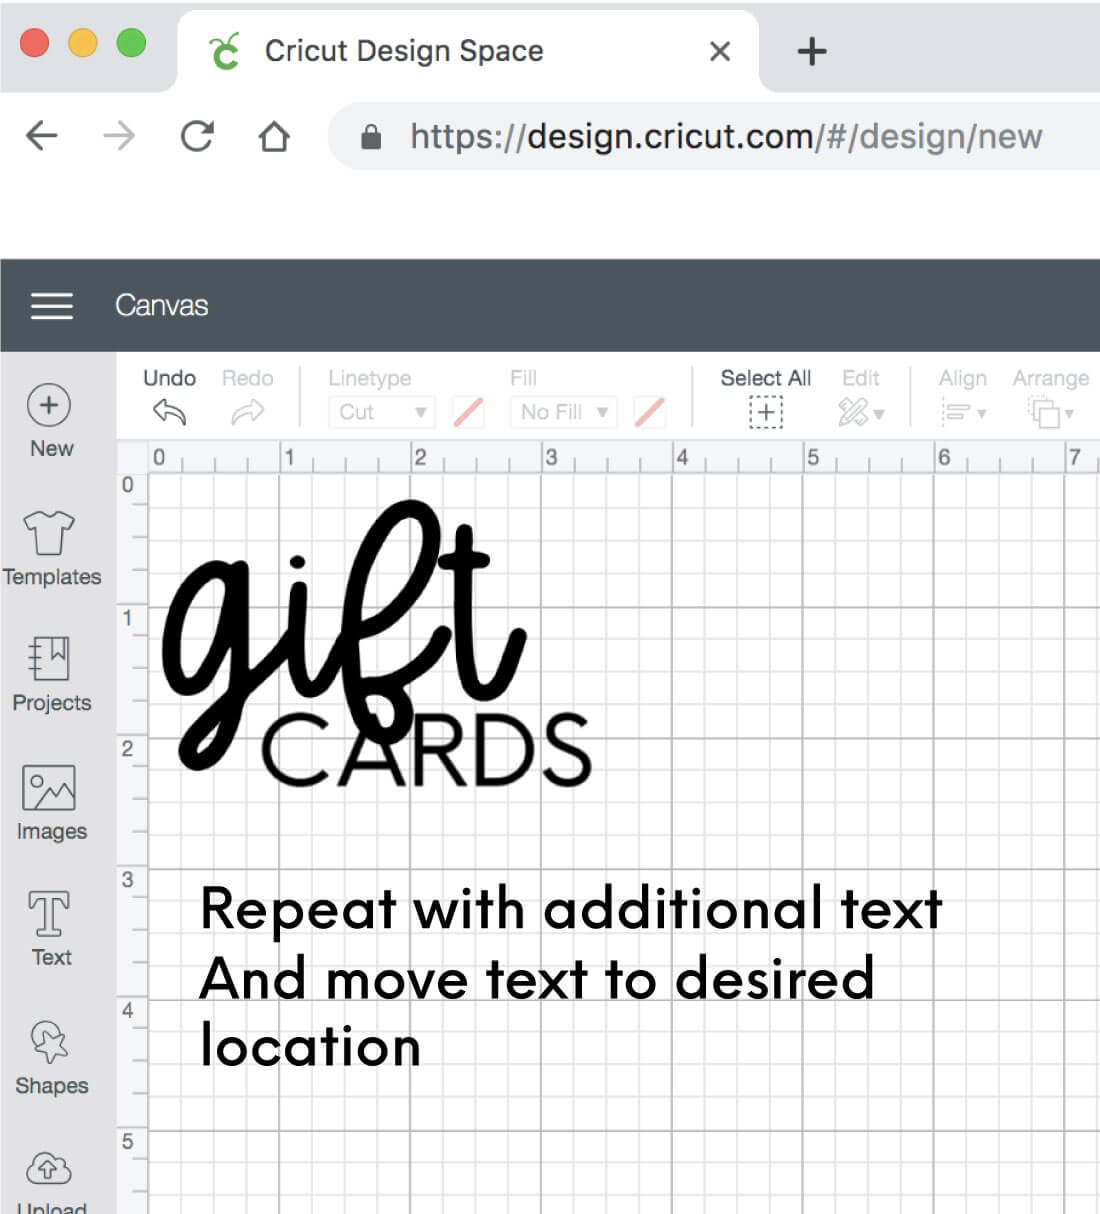
At this point, the spacing looks good to me so I will add another line of text and adjust the spacing again:
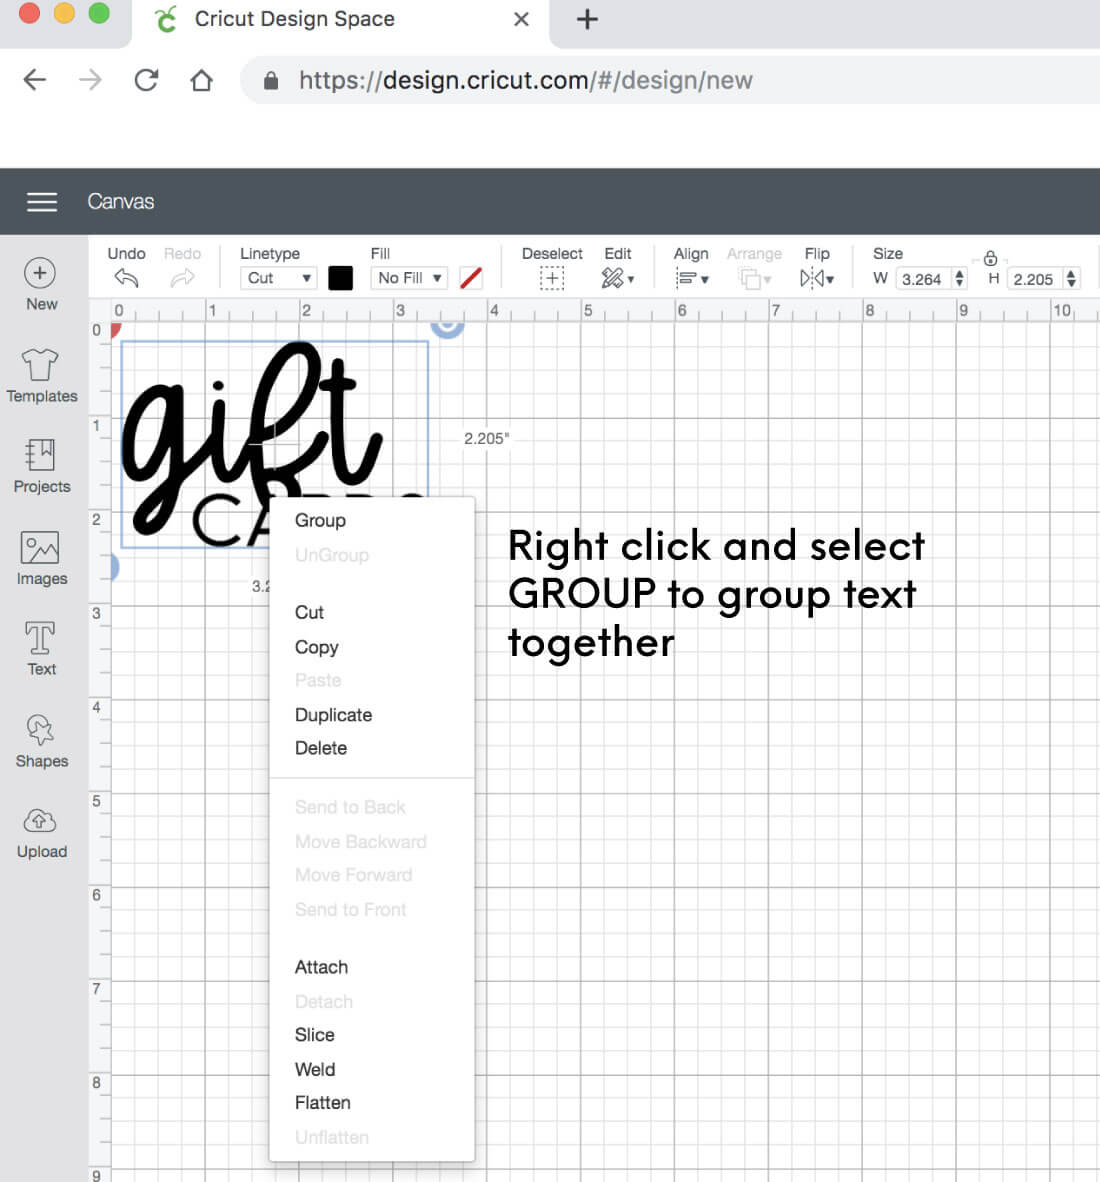
To move the fonts around and change the sizing, at this point you will want to group your text together. This can easily be done by right clicking and an window will pop up. Click on “group.”
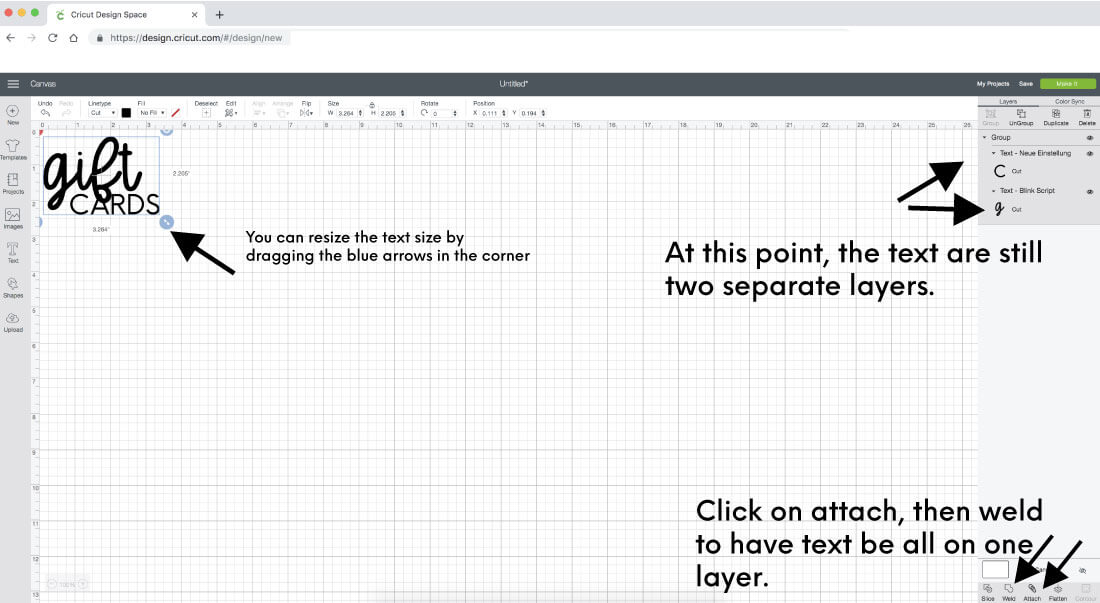
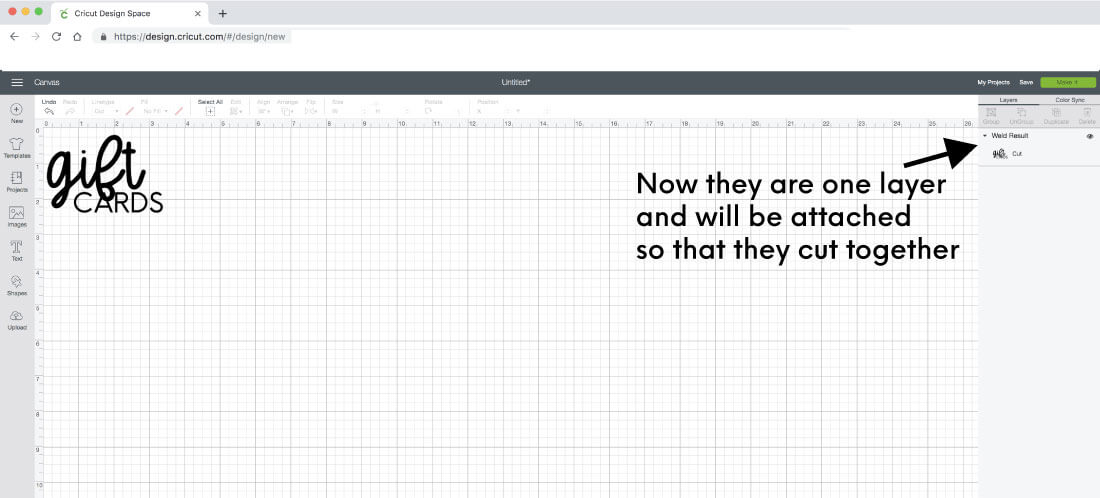
Even though they are “grouped” together, if you go to cut at this point, they will show up separately on the mat screen. At this point, they are two separate layers. You want to change that so you can right click again and choose attach.
The weld tool comes in handy when you are wanting two different layers to be cut together, they are welded. This is awesome for script fonts or two different fonts on top of each other because they make one cut instead of several.
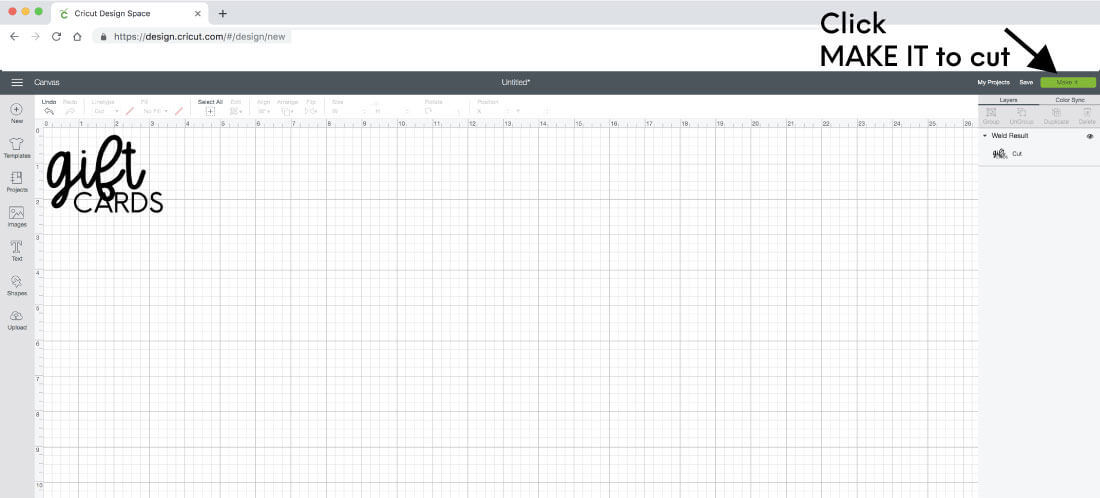
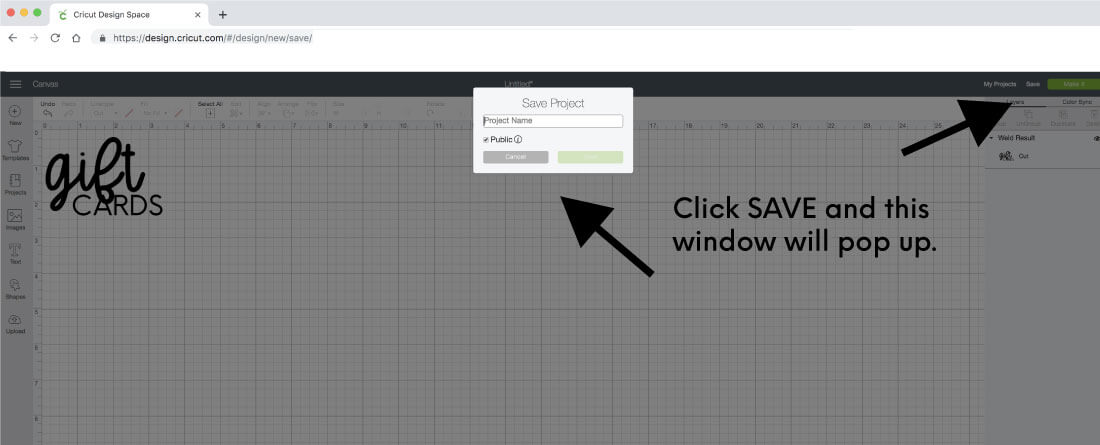
Once you like your design, it’s time to cut. Simply click on “Make it” to cut the design out.
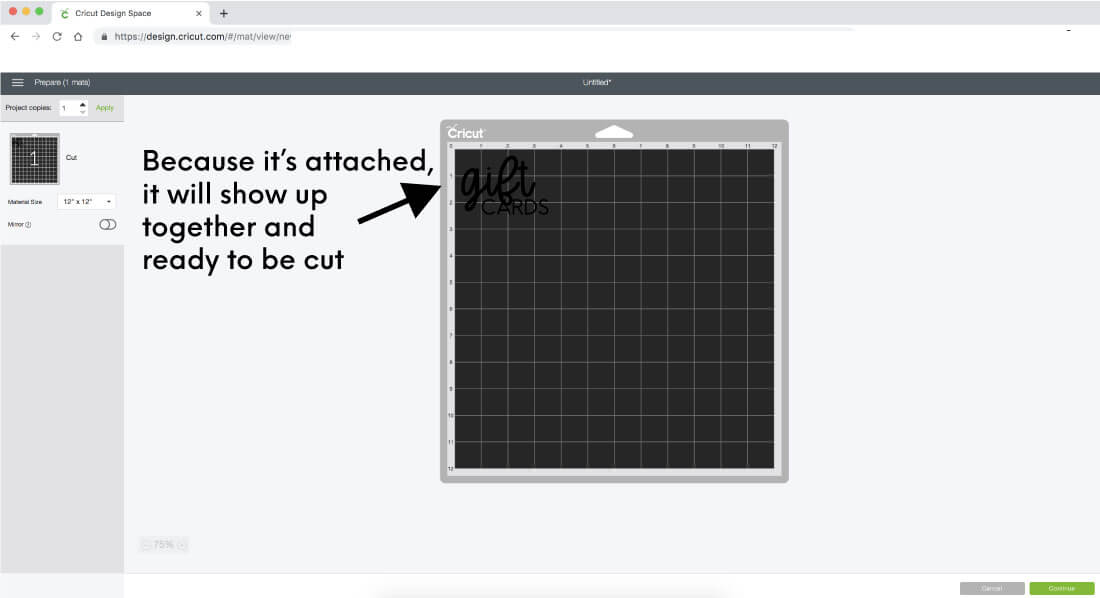
Because you attached the layers together in previous screens, it shows up together on the mat screen. Had you not done that, the letters would appear all spread out throughout the mat.
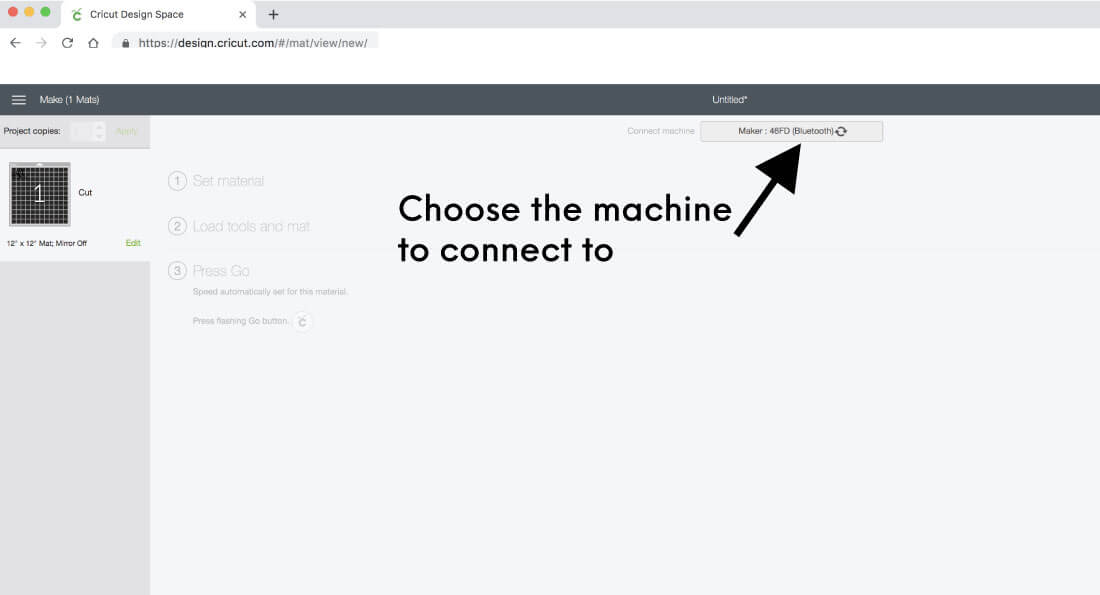
Select continue and then choose your machine (if you have more than one, it’ll give you the option to choose between the two).
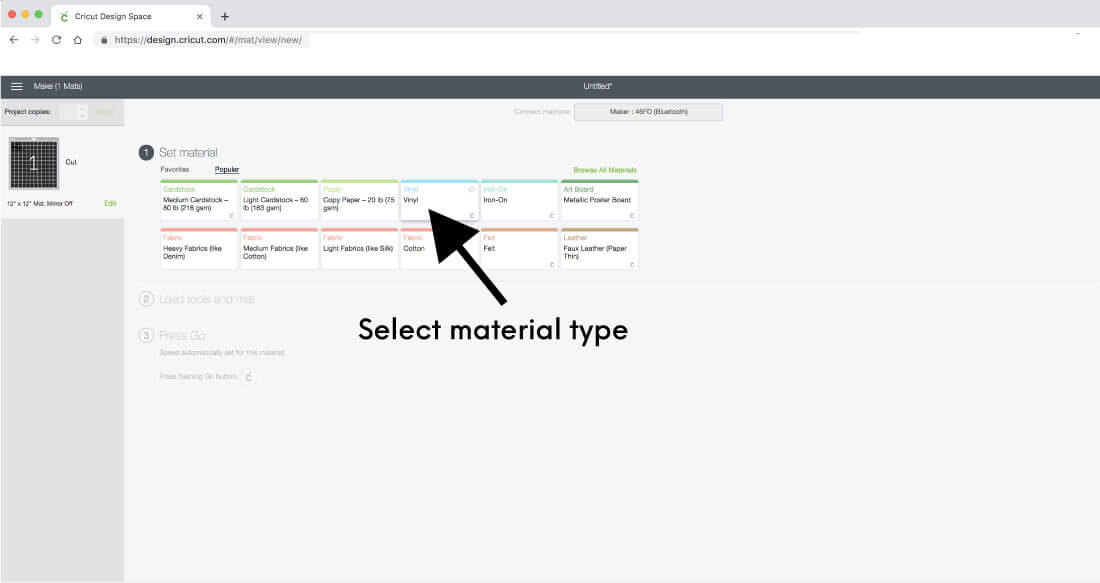
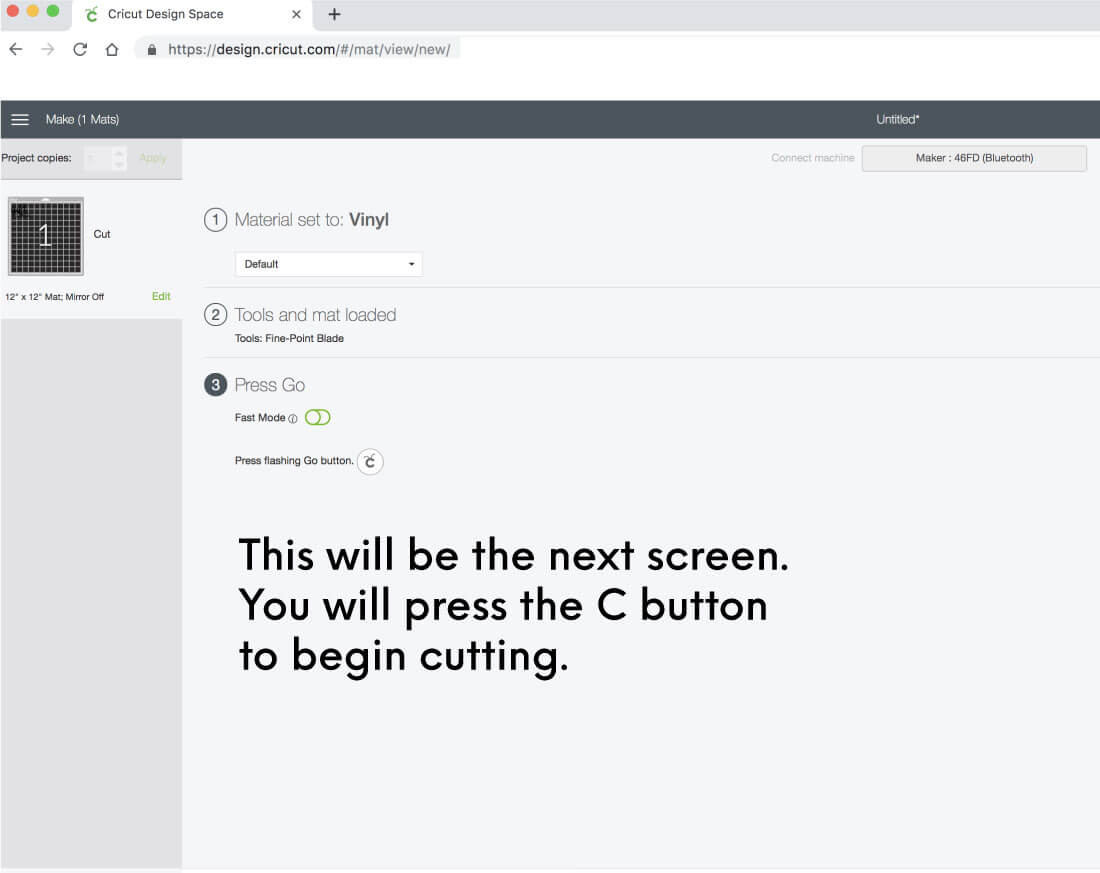
Next, select the type of material that you’re using. Most often I am using vinyl, so I chose vinyl for this project:
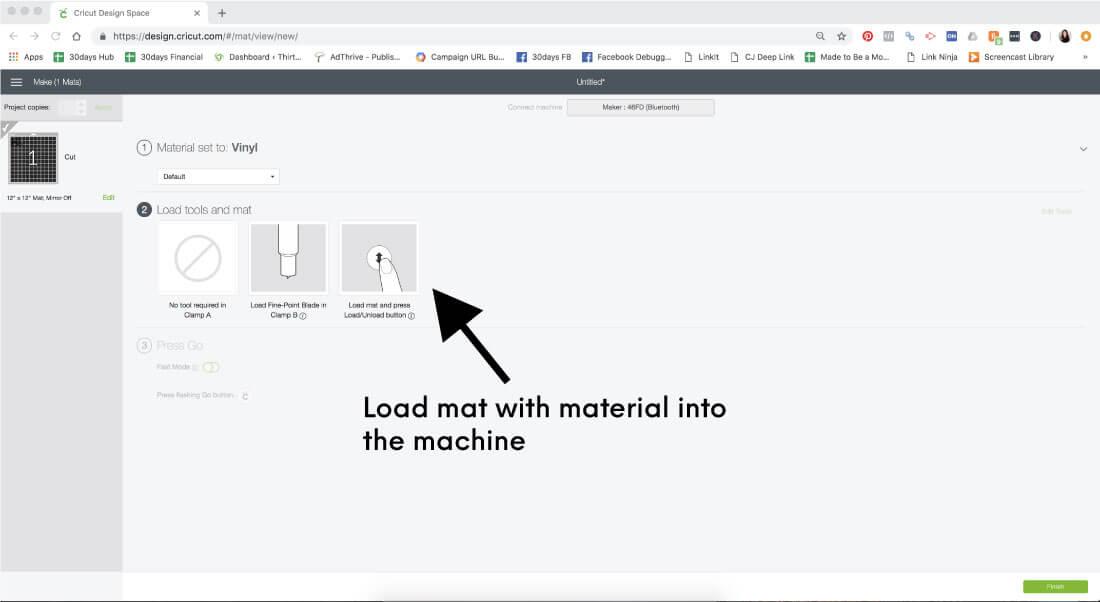
Load mat into your machine and you are ready to go!
The “C” on the machine will blink and you click it to get started.
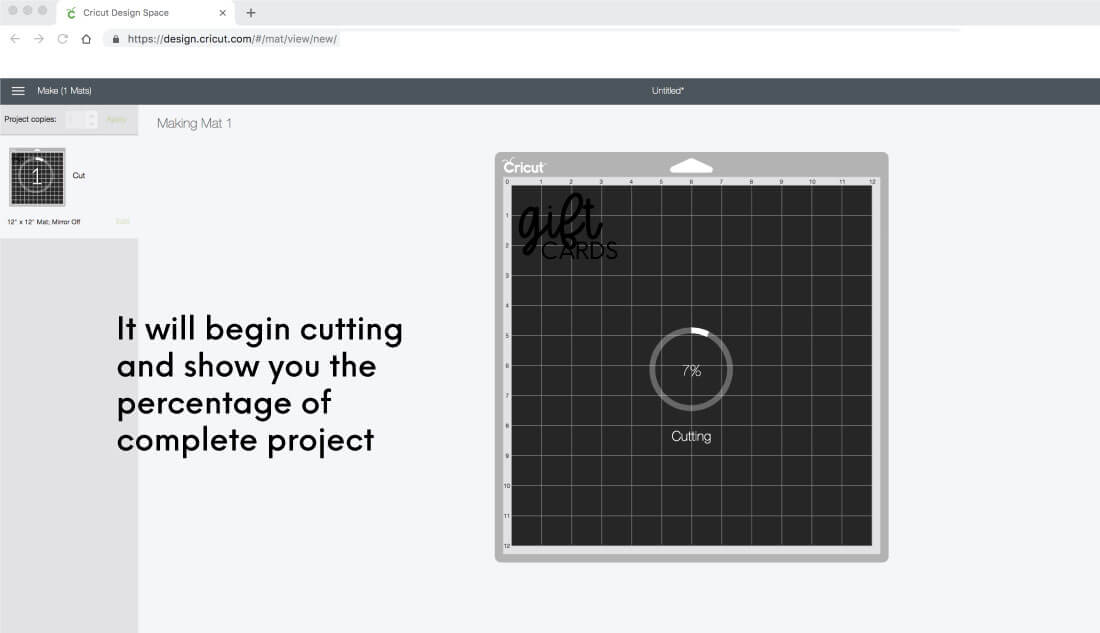
As your cutting machine works on the project, it will show you the percentage of how complete the project is.
Next up: I will show you the step by step on how to make labels for all of your organizing projects!


Hello! You’ve mentioned using something other than design space for your designs- What was it? I like design space, but it can be a bit slow sometimes. Also, I use a website called wordmark.it to look at all my downloaded fonts together. If you’re having trouble choosing a font it’s a great way to quickly narrow them down. I does not work with Cricut fonts, only those that are downloaded to your computer. :-)
Hi Michelle – I use Adobe Illustrator and group everything together on there. Thanks for the tip about wordmark – I haven’t heard of it.
That was it! Any chance of a tutorial on using Adobe Illustrator and what the benefits are? or an Inst story perhaps! ;)
Hi Mique
Could you also use Photoshop?